
Adding a "Pin-It" Button to Your Posts
This post may contain links to affiliate websites, such as Amazon and we receive an affiliate commission for any purchases made by you using these links.
Do you spend hours on Pinterest searching for inspiration? Do you want people to be able to “pin” your images directly from your blog? This is important because as a blogger, you want any images of yours that are “pinned” to be linked directly back to your blog. By adding a “pin it” button to your posts, you are allowing people to easily “pin” directly from your blog.
I am going to show you how to automatically add one to the bottom of EVERY post. Once and done, people!
READY? Here we go… Super Easy!
1.
First, you need to choose an image that you want. You can do a Google search for Pinterest icons or you can use the one that I used, below. Right click on it and save it to your computer. Upload it to Photobucket so your image has its own URL.

2.
This is the CODE you will need to add the button to your blog
Replace INSERT IMAGE URL HERE with your image URL from Photobucket.
Not sure which URL code to use? Use the code that says “Direct Link”.
3.
You will now need to paste this code into your blog. These directions are for Blogger templates.
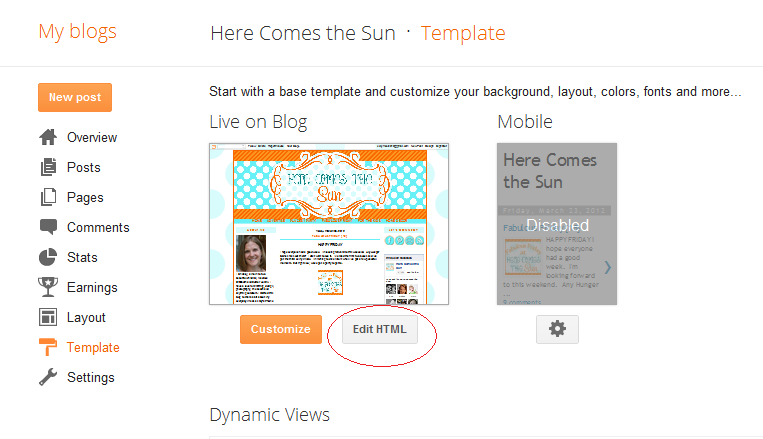
On the upper right corner of your blog, click on “Design”
Click on “Edit html”
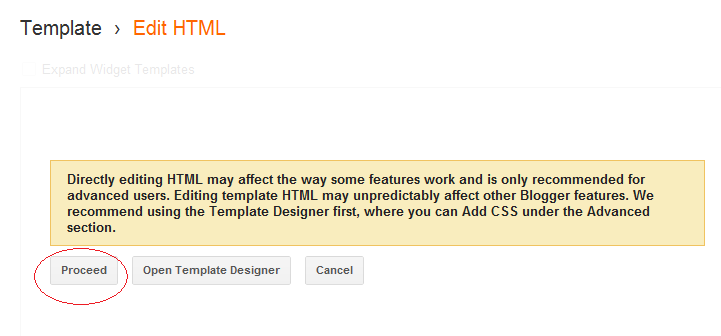
Click on “Proceed”
 Check “Expand Widget Templates”
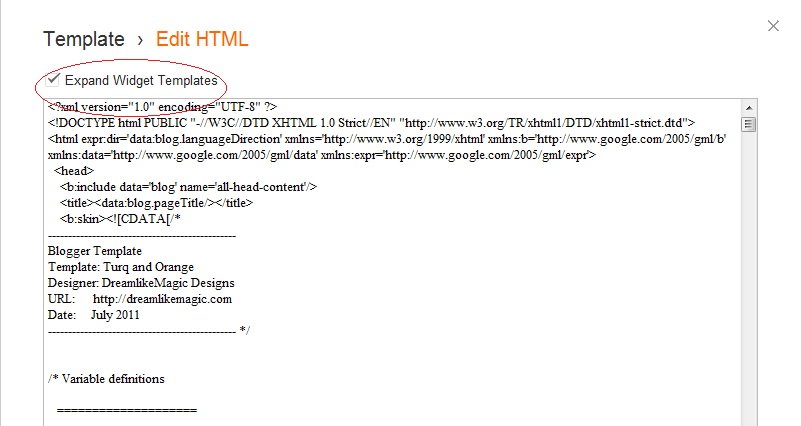
Use CTRL-F to search for: <div class=’post-footer’>. Paste the code right above that.
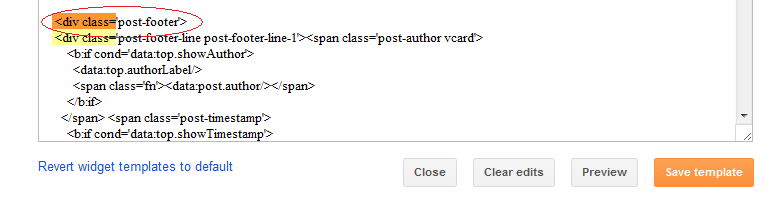
Hit save and you’re done!
Happy pinning!
Happy pinning!
I just joined your linky party!! Thanks for the great tips for adding the pin it button!! New follower here! Please come and check us out at shabbygals.blogspot.com.
Great post! Thanks for the tutorial!
Thanks for the tip. Easy to do.
KCoake
http://www.realcoake.blogspot.com