
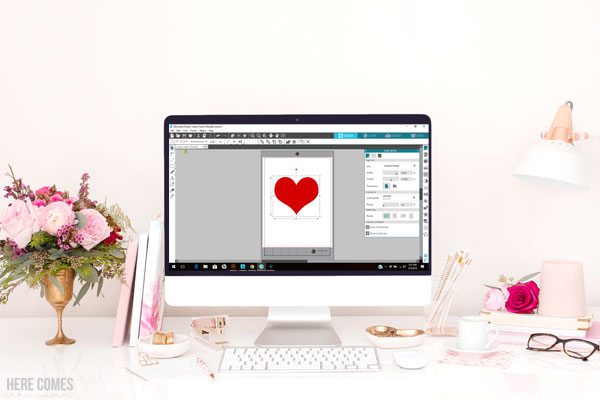
How to Convert a JPEG or PNG into a Cut File using a Silhouette
Learn how to easily convert a JPEG or PNG into a cut file using a Silhouette.
If you haven’t noticed, I’ve been doing a lot of projects with cut files lately. Last week I shared my Love Wins cut file and today I’m going to teach you how to convert a JPEG or PNG into a cut file using a Silhouette machine.
This post contains affiliate links. You can read my disclosure policy here.
Cut files can seem intimidating at first. When I first saw them, I had no idea how to make them. Many people use Illustrator to design their cut files but if you are not experienced in Illustrator, this can be a daunting task. Did you know that you can convert a jpeg or png into a cut file? Yep! You can use an image that someone else has already created to make gorgeous cut files. Let me teach you how! I’ve even got a video tutorial at the end of this post as well if you learn better that way.
HOW TO CONVERT A JPEG OR PNG INTO A CUT FILE USING A SILHOUETTE
First things first… when you are using items that are already created, you MUST be certain about the license of that item. An item that is licensed as personal use only cannot be used to make things to sell. So now that we have that out of the way… the first step to convert a png or jpeg into a cut file is to download an image that you want to use to your computer.
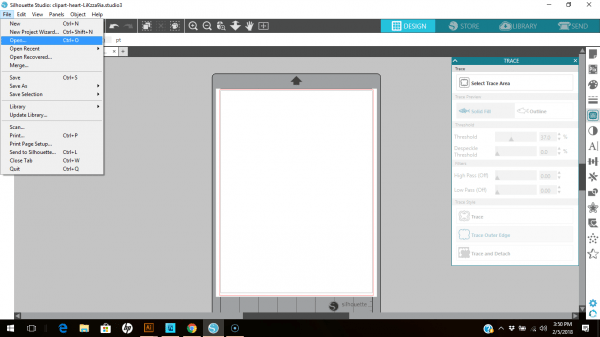
Next, open up your Silhouette software. Note this tutorial is using the Basic Edition version 4. This process also works on version 3.
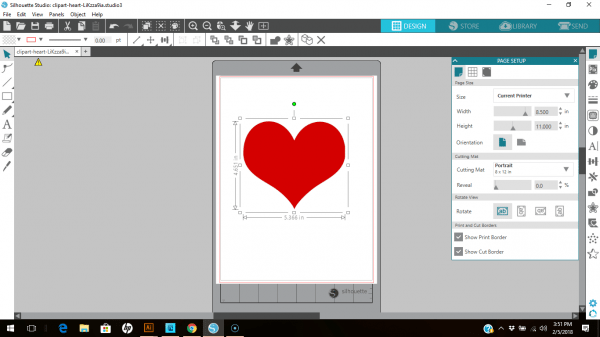
Click File>Open and navigate to where you saved your image. The image will open onto the cutting mat. Click on the image and resize it to fit onto your mat.
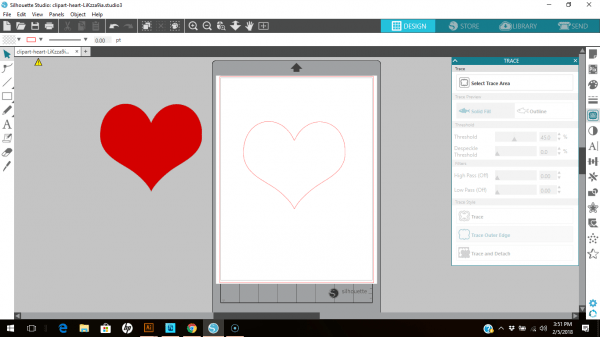
This is the image that I chose.
On the right side of the screen, click on the Trace button (it looks like a butterfly). Open up the Trace Image window and click “Select Trace Area”. Drag a box around your image. The image will turn yellow. Adjust the Threshhold slider until everything that you want to cut is highlighted in yellow.
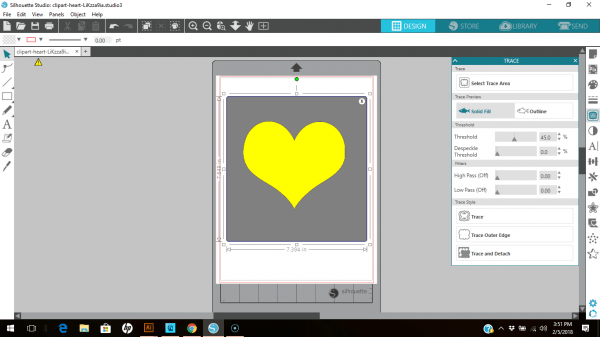
At the bottom of the Trace menu, click on “Trace Image” and your image will be traced. If you have lines inside the image that you also want cut, choose the “Trace Image” option. If you just want the outline cut, choose the “Trace Outline” option. Once your image is traced, you can move your original image off of the cutting mat and delete it.
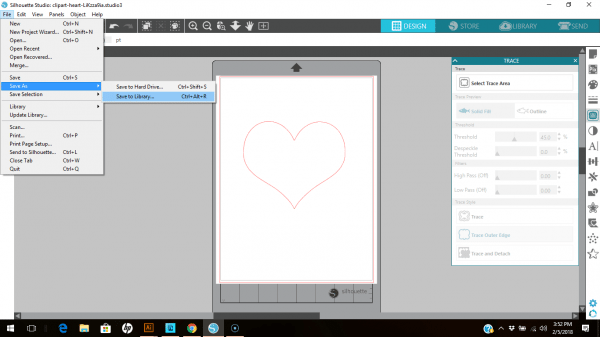
Next, save your image to your library and/or to your hard drive. I currently don’t have the Silhouette Designer edition so I can only save my files as STUDIO files. I believe that if you have the Designer edition you can save your design as an SVG file. You can also save it as an SVG using the Business Edition.
NOT SURE HOW TO USE CUT FILES? HERE ARE SOME SUGGESTIONS
- Use heat transfer vinyl and iron onto fabric using Cricut Easy Press. You can find a heat transfer vinyl tutorial here.
- Use vinyl and place onto mugs, clipboards, or use the vinyl to make signs.
- Cut out using cardstock and adhere to another piece of cardstock to make a card.


[clickToTweet tweet=”Learn how to easily convert a JPEG or PNG into a cut file using a Silhouette.” quote=”Learn how to easily convert a JPEG into a cut file using a Silhouette.”]
Now that you know how to convert a JPEG or PNG into a cut file, what designs will you make?
DID YOU LOVE THIS POST? IF SO, PLEASE PIN IT!
YOU MAY ALSO LIKE:


![]()
So excited to learn new things!
Very glad to have found your blog and tutorials! There seems to be so much more info out there for the Cricut!
I find that there is a lot of Cricut info out there and less on Silhouette. I’m glad you find my Silhouette info useful.