
How to Create Printables with Photoshop Elements
I love creating printables! I love it so much that I’ve turned it into a business. But it wasn’t always easy for me. I would ooh and ahhh over printables on Etsy and wonder how to make them. It took a lot of trial and error but I finally found a program that works for me and I today I’m going to teach YOU how to create printables with Photoshop Elements.
Since I create so many different types of printables for my shop, I’m going to focus on one of the more easier ones today. We’re going to learn how to make circle tags in Photoshop Elements. I use version 11 but there are newer versions as well.
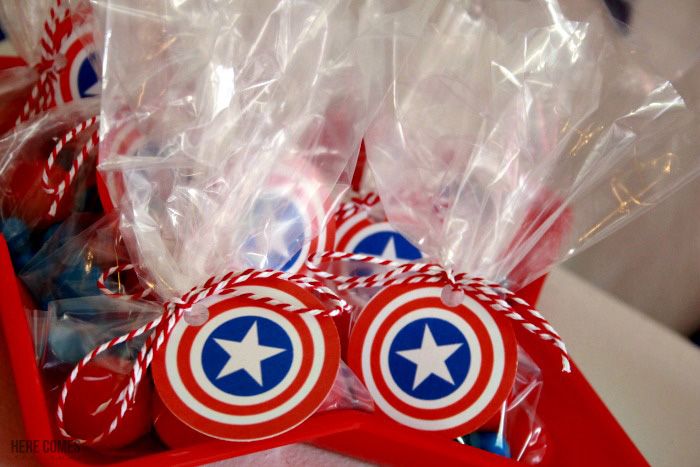
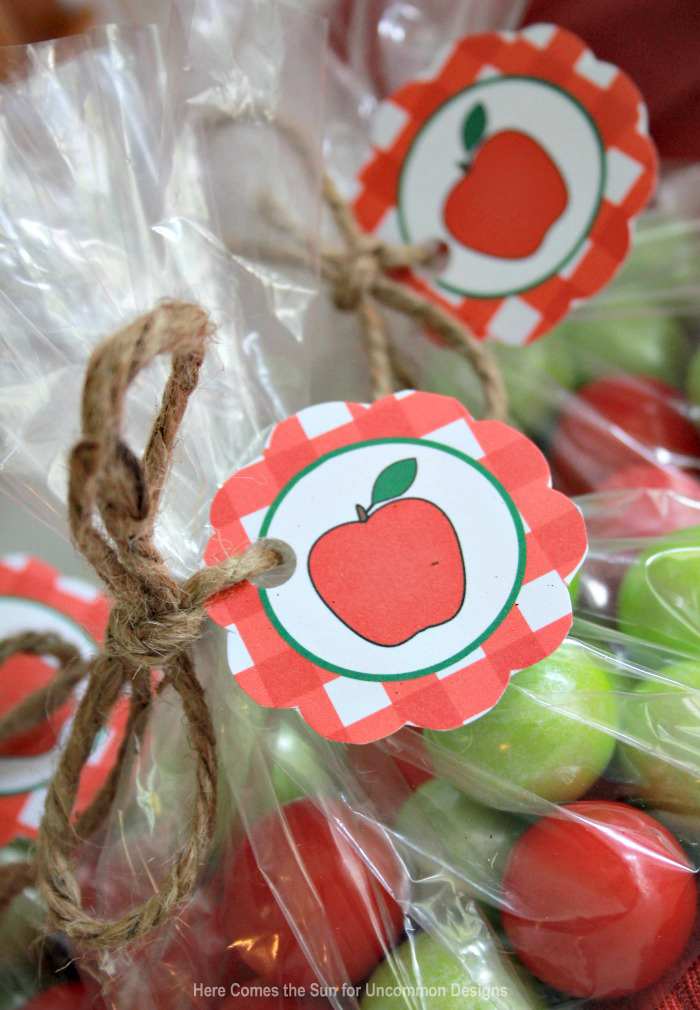
You can use circle tags for cupcake toppers, stickers or you can even string them together to make a banner. Here are some examples of different circle tags that I have created.


HOW TO CREATE PRINTABLES WITH PHOTOSHOP ELEMENTS
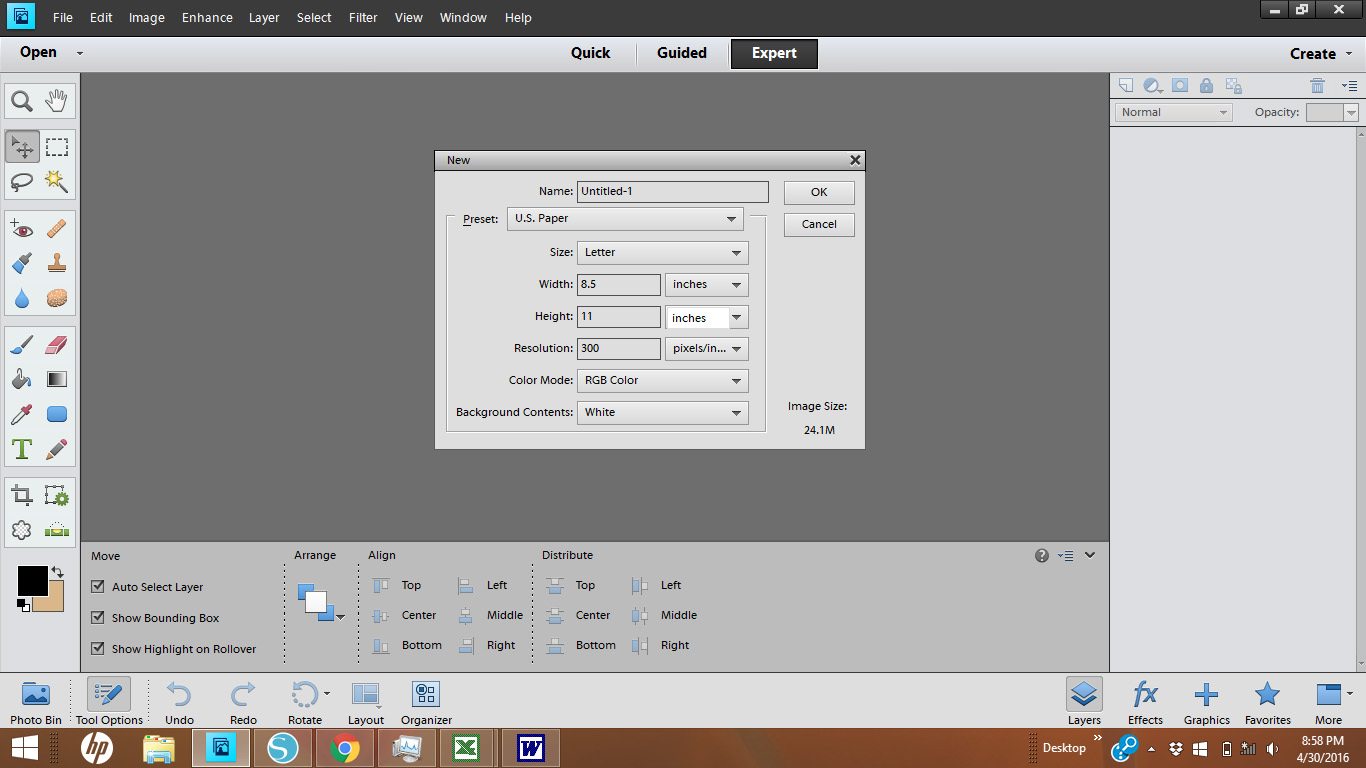
Step 1.
Open Photoshop Elements and click File > New > Blank File
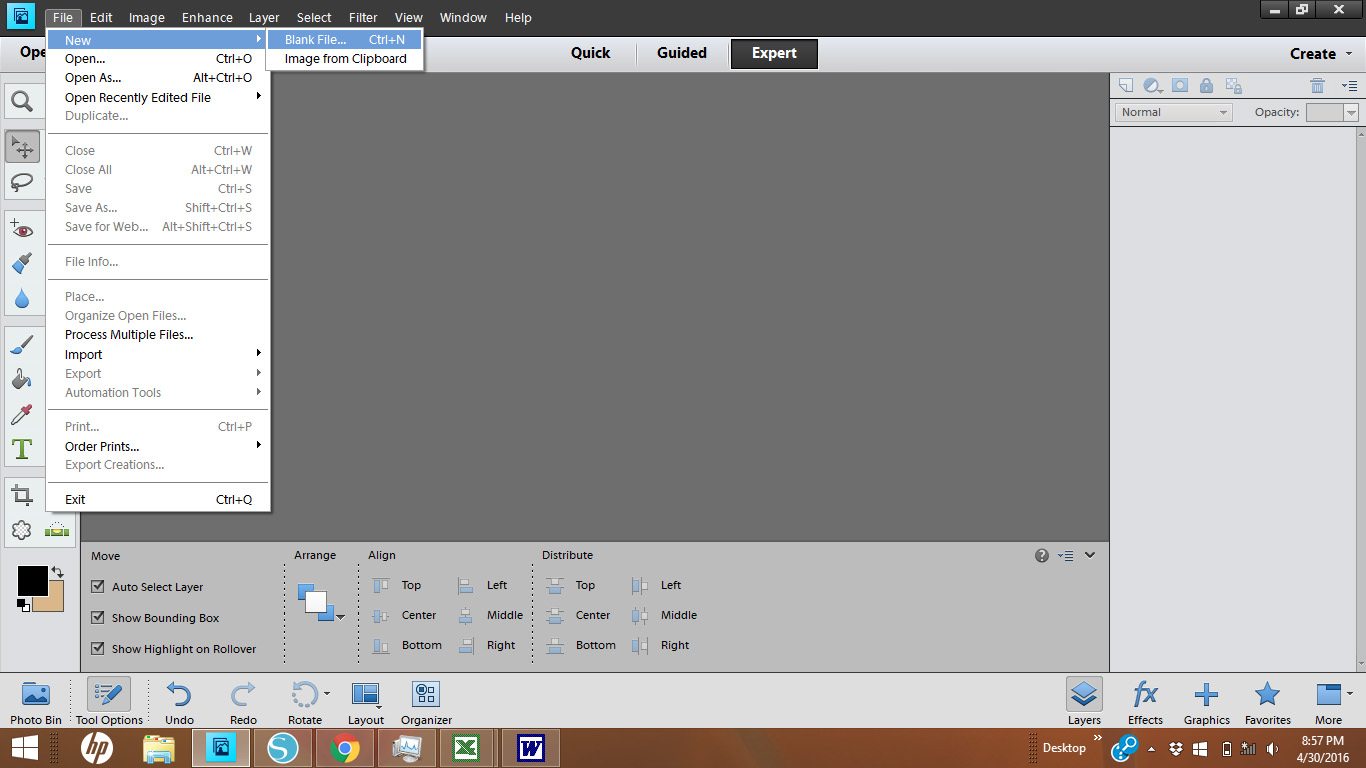
From the dropdown menus, choose U.S Paper, 8.5″x11″, white background and 300 dpi.
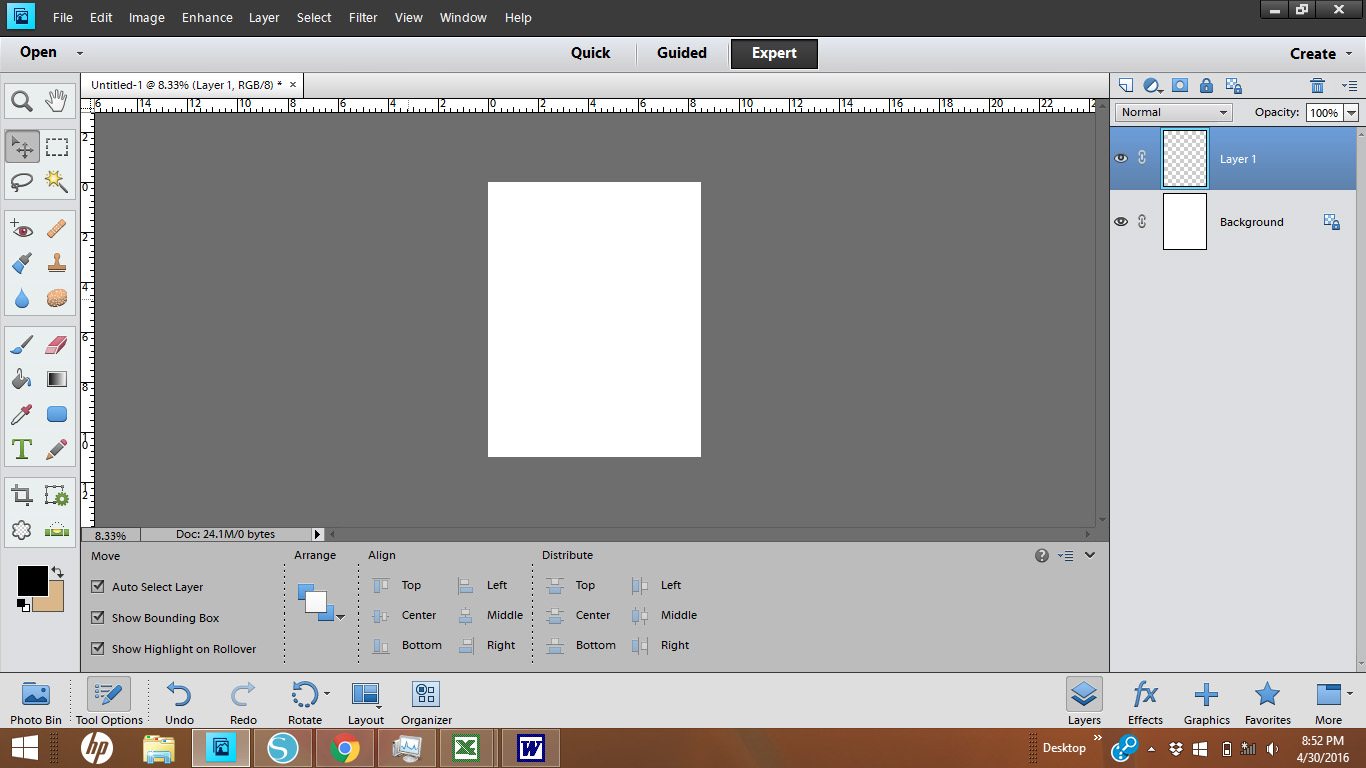
This is what your screen will look like when you are done with Step 1 (minus the 2 layers in the layer palette):

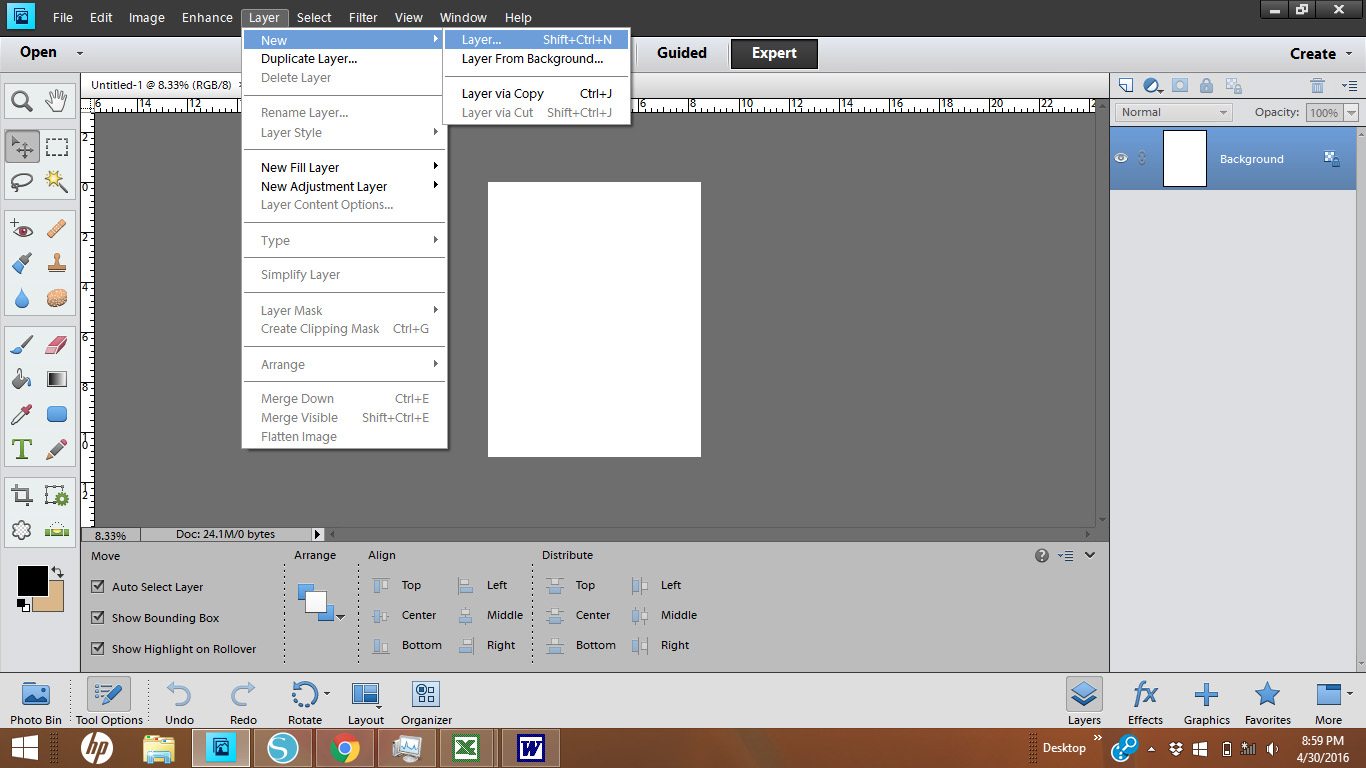
Step 2.
Create a new layer . Layer > New > Layer
Now you can see the transparent layer in the layer palette on the right hand side of the screen. This is where we will place the shapes and text.
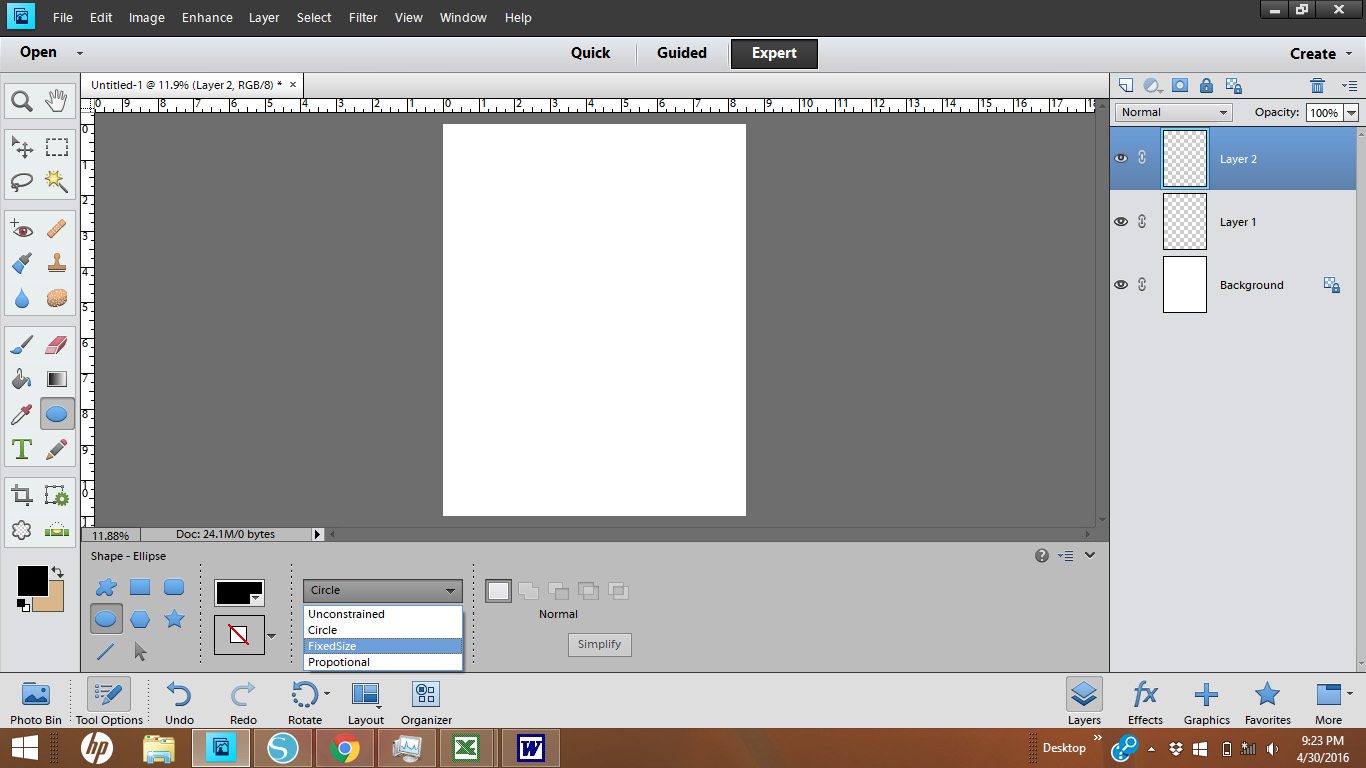
Step 3.
On the tools menu on the left hand side, choose the shape tool. It’s the ninth tool down in the right column. Choose Ellipse. In the dropdown, click on the circle > fixed size. Enter 2.5 inches.
Now, click anywhere on your canvas and a circle will appear with the dimensions that you chose.

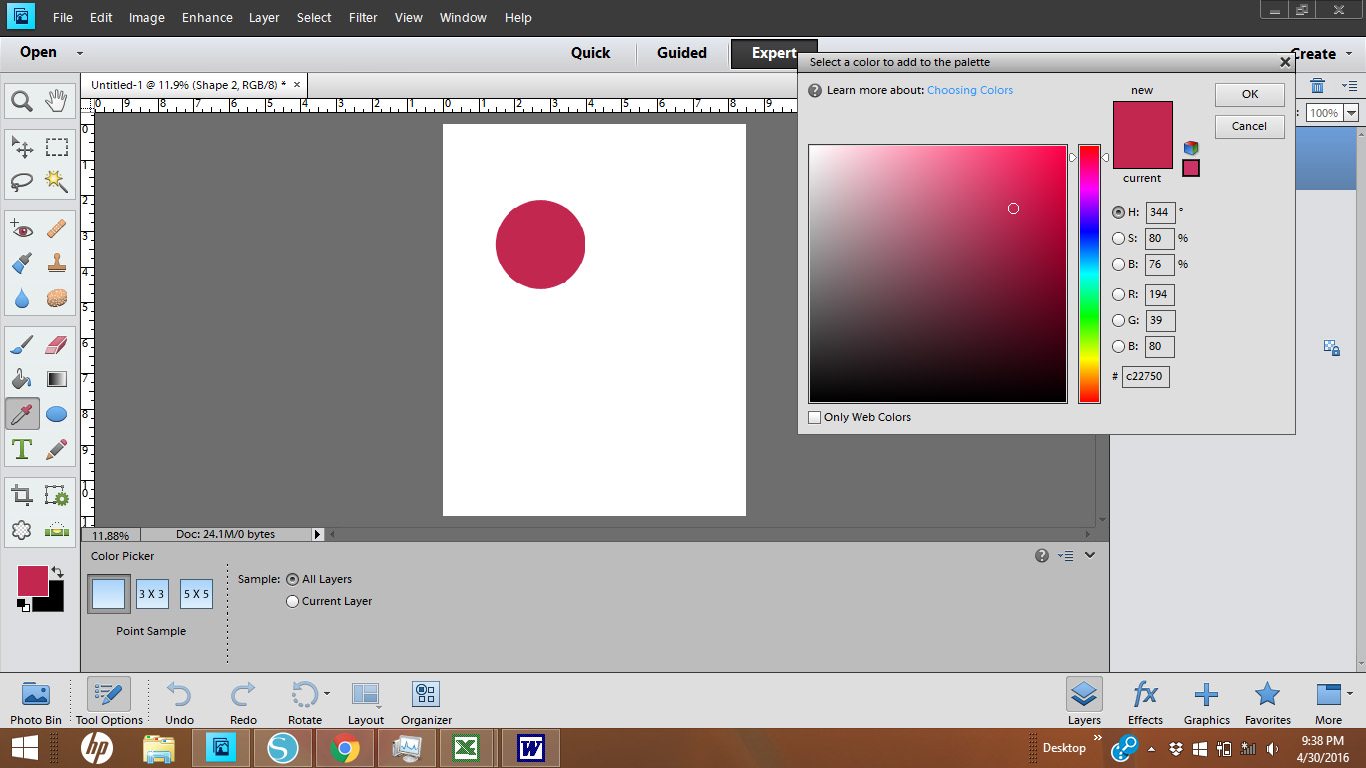
To change the color of your circle, click on the color dropdown menu and then click on the multicolored circle in the lower right.
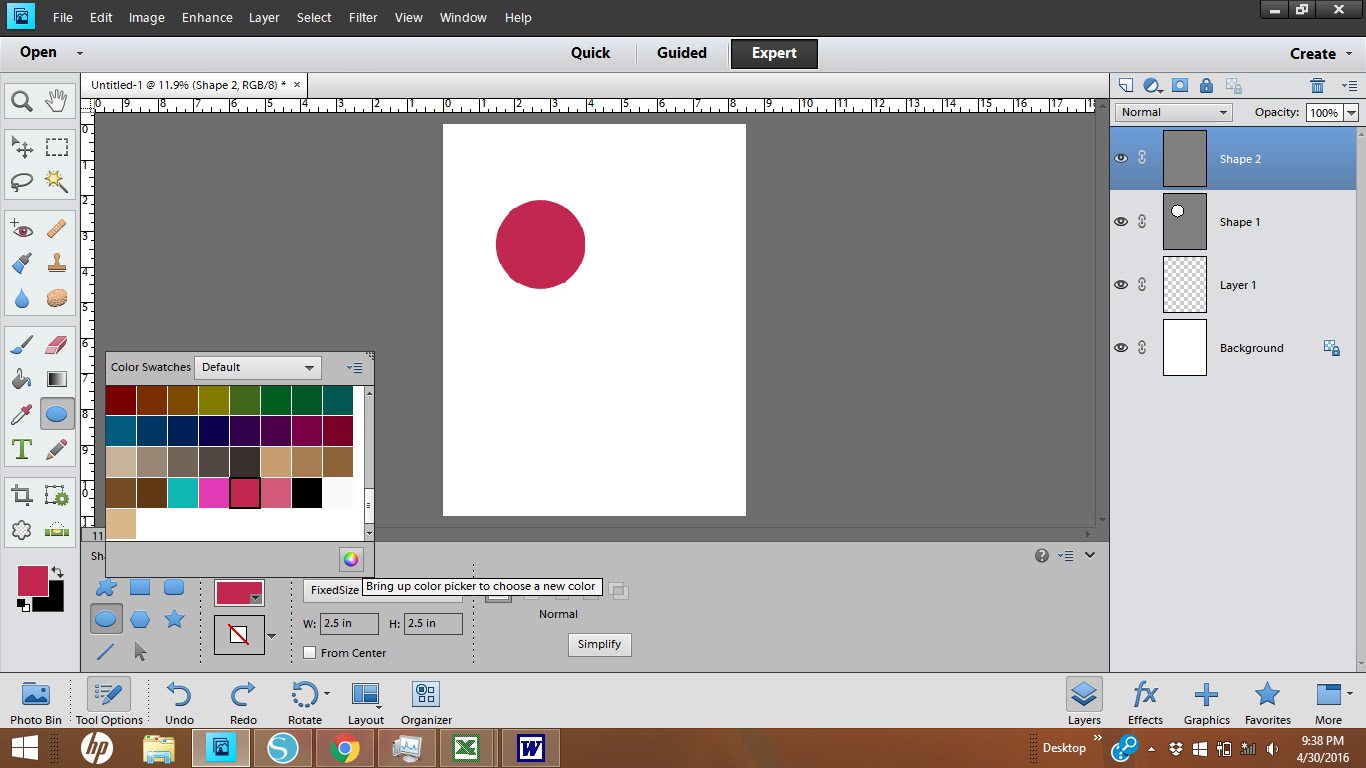
This will bring up the color palette. Choose the color you want and click “ok”
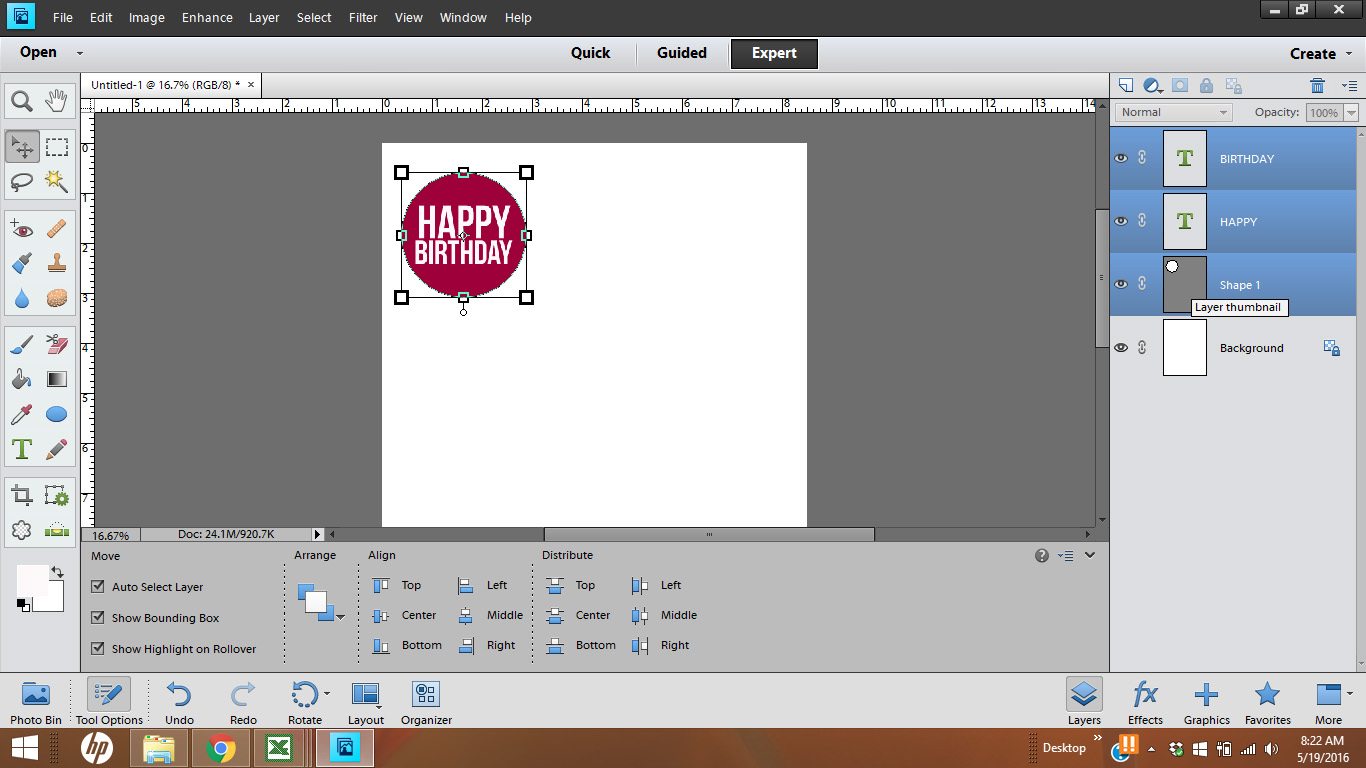
Step 4.
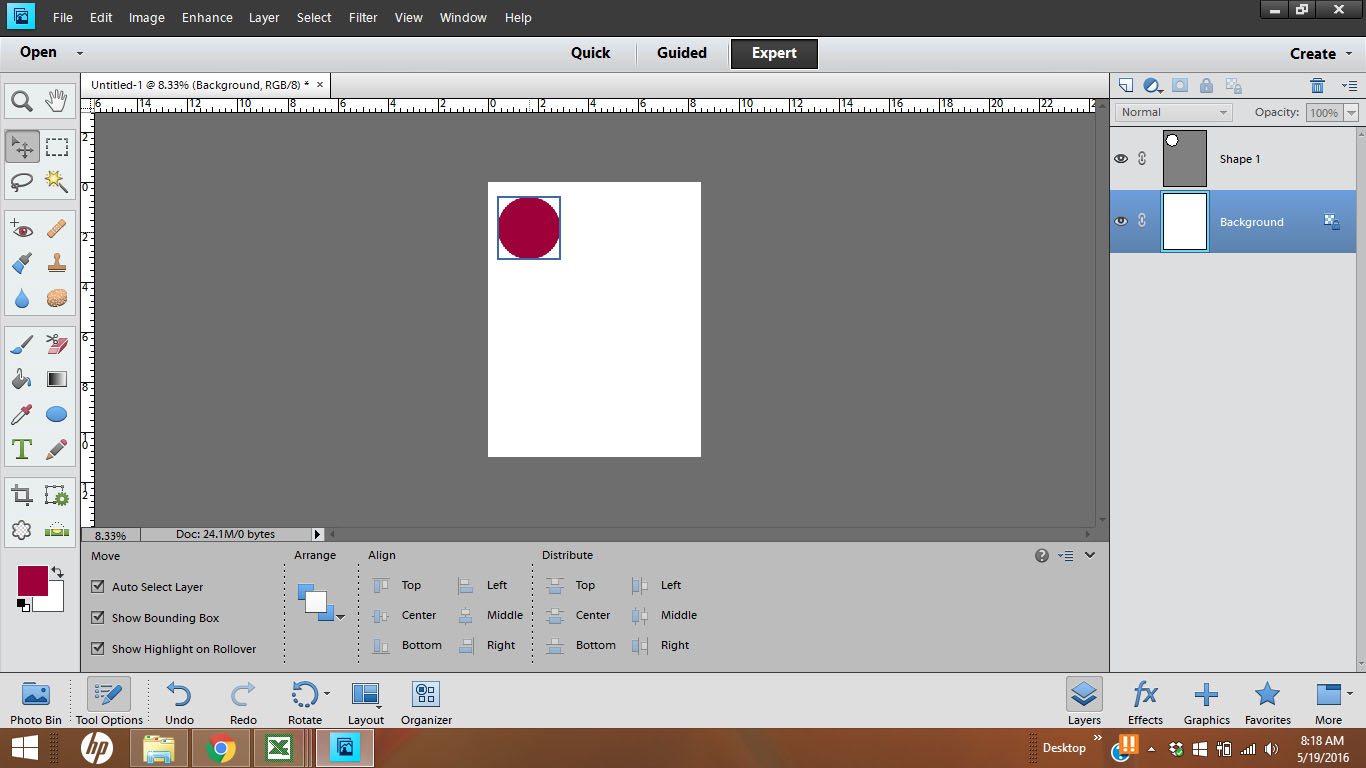
Now we’re going to move the circle to the upper left of the page. Click the “Move” tool (the second tool down on the left), click on your circle and drag it to the upper left corner of the page.
Step 5.
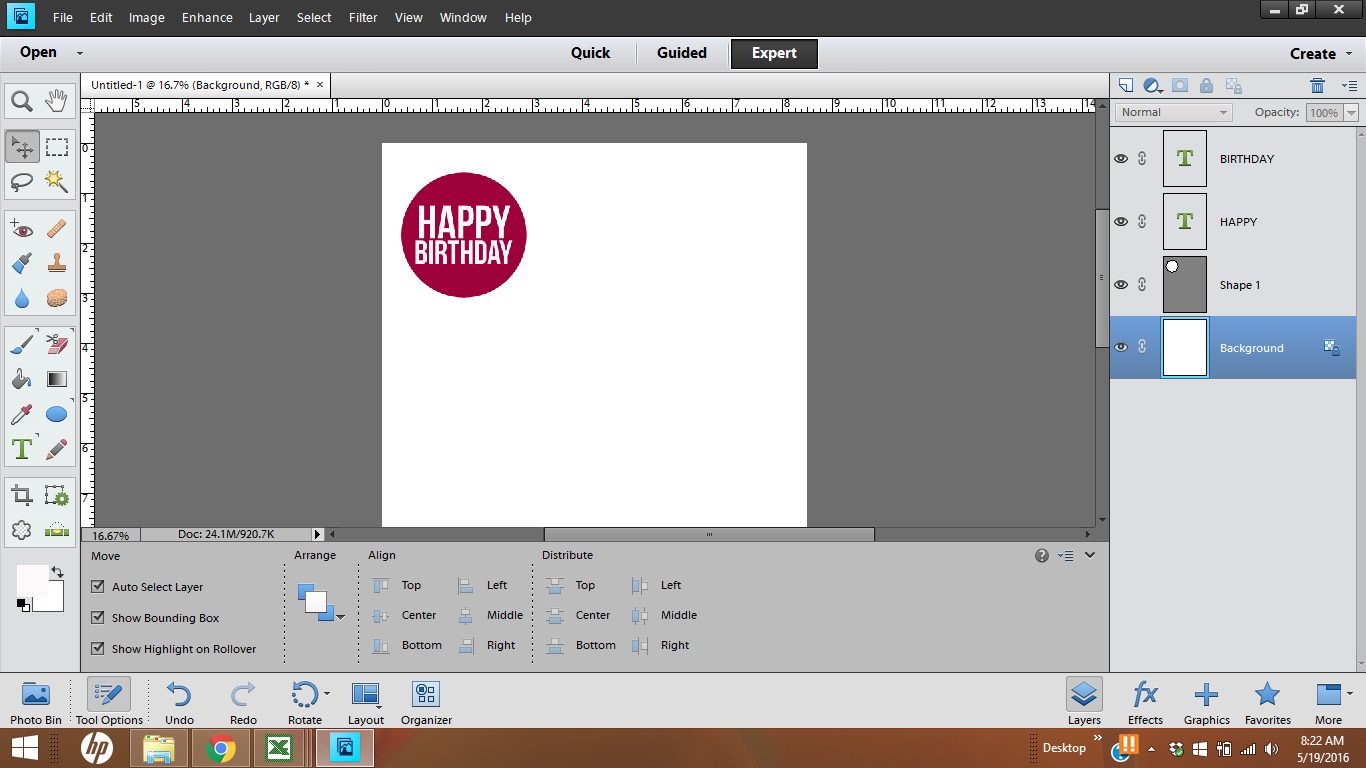
Next, we’re going to add text. Click on the text tool (the “T”) and pick a font from the dropdown menu. You can change the color of the font the same way that you changed the color of the circle. You can change the size of the text from the dropdown menu or by clicking on the text and dragging the corners. Place each line of text on a separate layer (CTRL-SHIFT-N is the shortcut to create a new layer). Make sure the text layers are above the shape layer. To do this, just click and drag the text layers in the layers palette. Move the text to the middle of the circle.
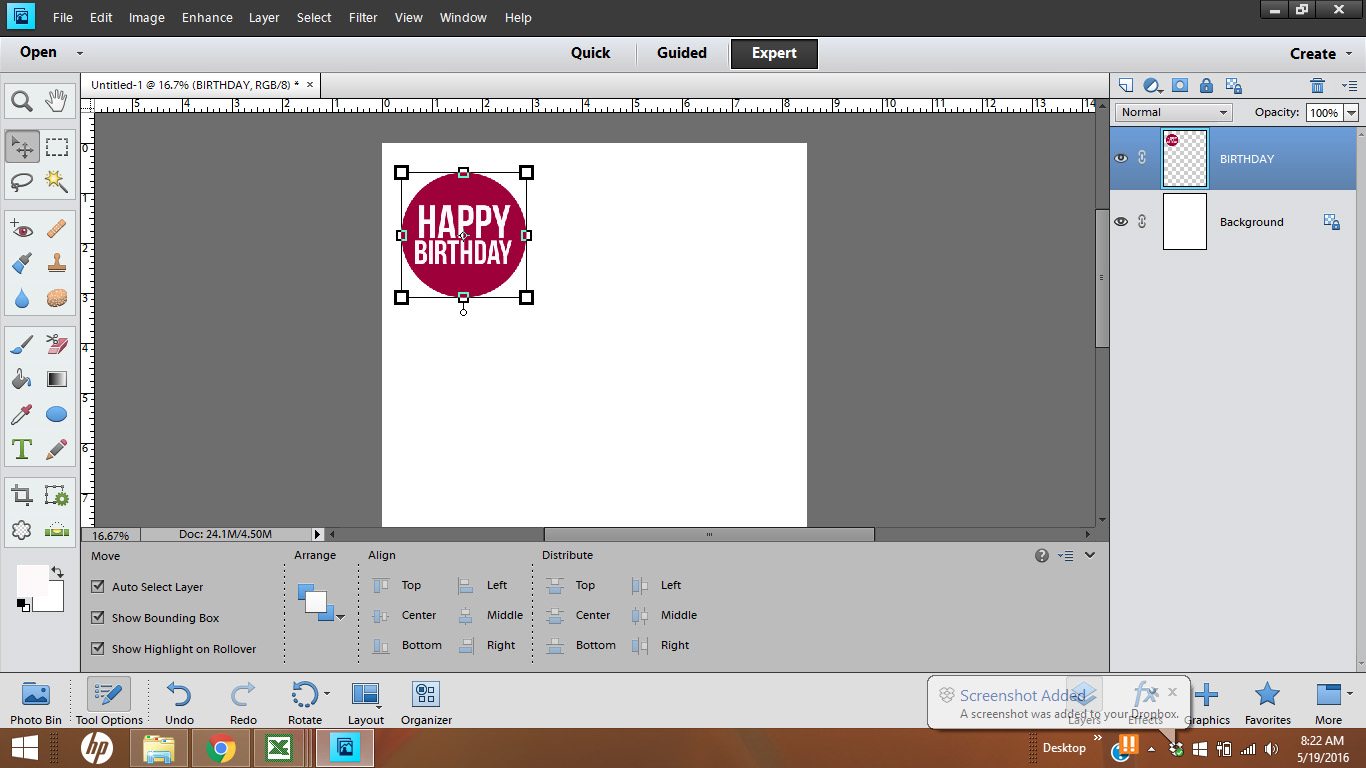
Step 6.
Now we are going to merge all layers together. Select all layers (except background) in the layers palette. Click CTRL-E to merge the layers.
After merging the layers, your screen will look like this, with the text and the circle combined into one layer.
Step 7.
Now we are going to copy the image to fill the page. Make 2 copies of the image by clicking on the image and then clicking CTRL-J twice. Click and drag each image to the right to make a row.
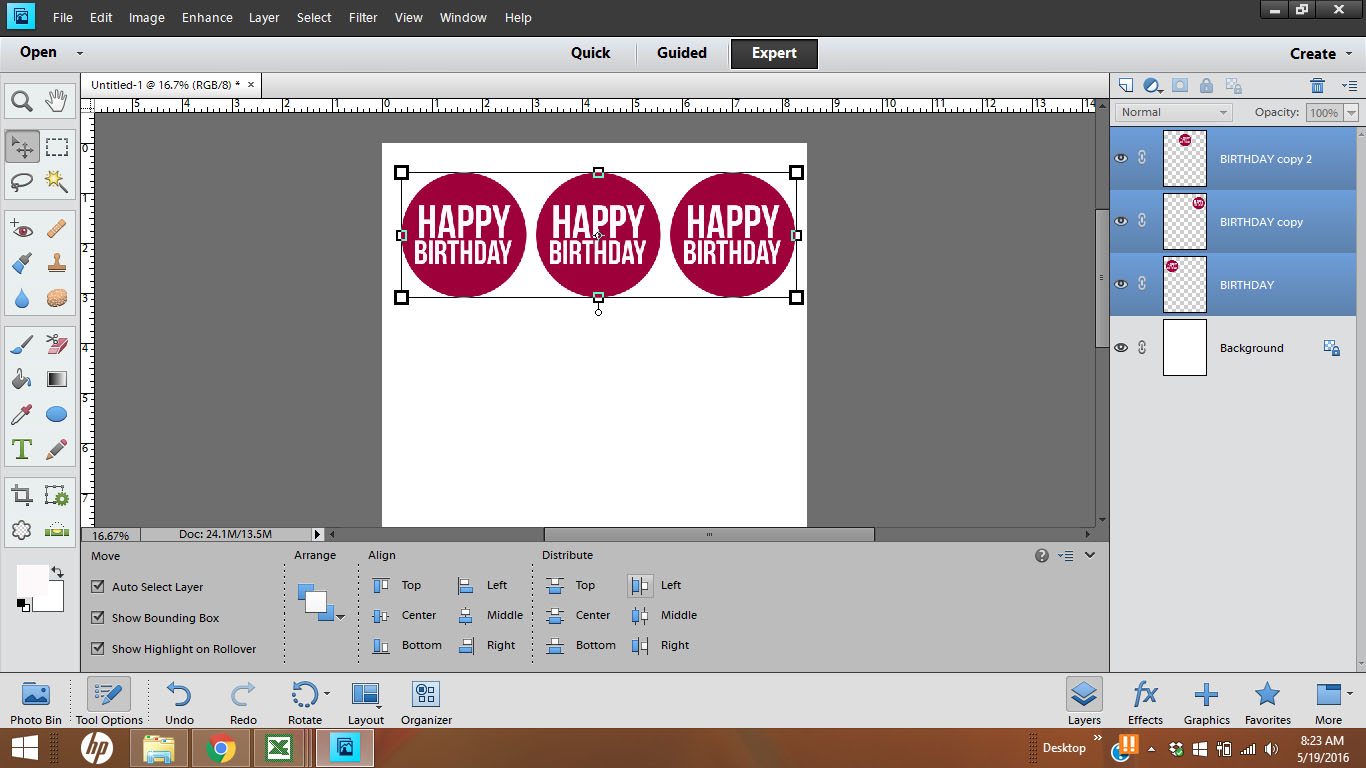
Distribute the images evenly by selecting all images and clicking “left” under the Distribute menu at the bottom.
Step. 8
Once the images are distributed evenly, click CTRL-E to merge the images (make sure the background is not selected)
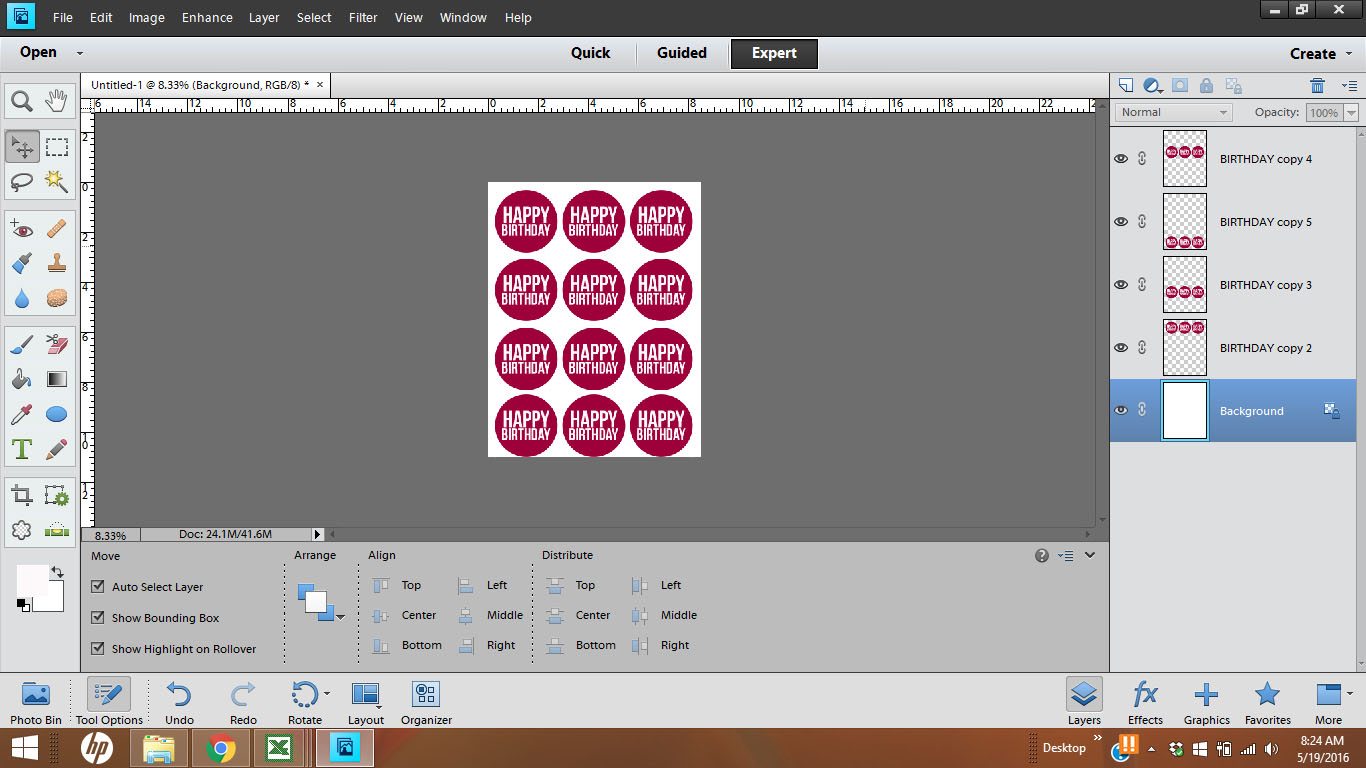
Step 9.
Select your image and Click CTRL-J to make 3 copies of the line of circle tags. Use the move tool to move each line to fill the page.
Highlight each layer (not the background) and distribute the lines evenly by clicking Distribute > Top.
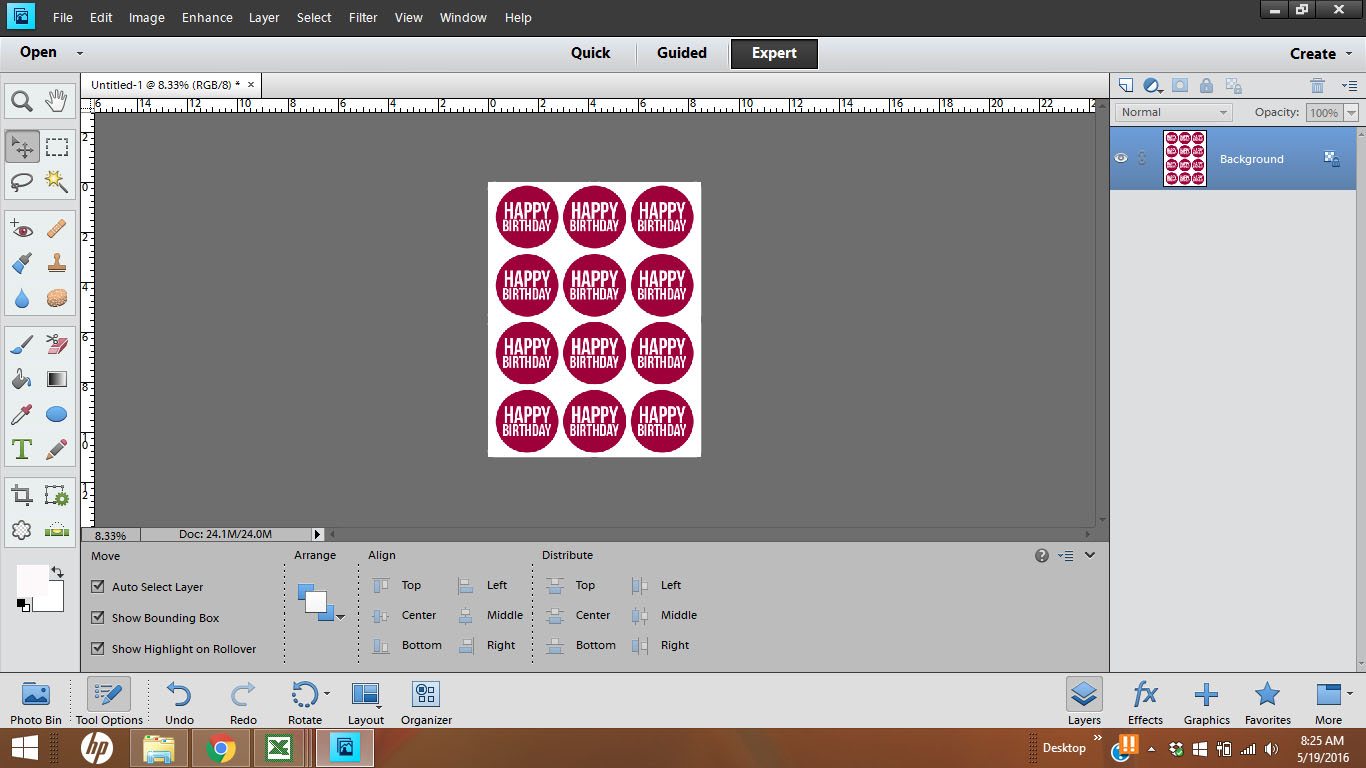
Step 10.
The final step is to center the images on the page. To do this, first merge the layers (not the background) using CTRL-E.
Next, click on both the background layer and the circle tag layer. At the bottom of the screen under the “Align”, click “Center” and “Middle”.
When you are finished, this is what your screen should look like.
Step 11. Save!
Save your work as a PDF!
I hope that wasn’t too confusing for you all. Once you get the hang of it, it goes pretty fast. As I was writing it all down, I was thinking that maybe it would be easier to show you how to create printables in a video format. Would that be something that you would want? Do you think that would be easier to follow? Leave me a comment if so.
The images that I showed at the top of the post included graphics instead of text. The process to create these is pretty much the same but you import an image instead of creating text. Would you be interested in a tutorial for that too? If you have any questions, please feel free to email me. I love to create printables and would love to help you too!
LOVE IT? PIN IT!
YOU MAY ALSO LIKE:
This is GREAT!!!!!!!!!!!! I use Elements as my only processing tool- I love it for it’s mega abilities without all the bulk of full CS. Love your tutorial
Thanks so much, Gina! I’m so glad you found it helpful. I’m hoping to do more tutorials on it in the future.
It’s really nice to find tutorials on using Photoshop. I have had the software for a while but never the patience to play with it very much until recently. Is it possible to insert the printable into a blog post?
Thank you for sharing these instructions!
Hi Vanessa! I’m so glad that you found the tutorial useful. If you want to insert the printable into a blog post, save the final sheet as a JPEG and then upload the JPEG as a photo to your post.
Loved your tutorial & really appreciate your time & hard work! (Your work is beautiful!!). Only problem is…I dont have photoshop!! 🙁 (All my work has to be created from my lpad or iphone 6plus (my laptop is down at this time)
Hi Kelly!
Did you use digital paper in any of those designs? I have a ton of them but can’t figure out how to use them! I want to make simple gift tags using a digital paper as a background, white square layer and text, then print a few to a page. Sort of like those super cute apple tags. It has to be so obvious, but Im missing how to use a digital paper instead of filling with a solid color.
Hi Tara! In order to use digital papers in your designs, I would suggest using a clipping mask. You can find the tutorial on how to doit here: https://www.herecomesthesunblog.net/how-to-create-clipping-masks-in-photoshop-elements-and-why-bloggers-should-use-them/
Thank you for this tutorial! I use PSE mainly for photo editing, but I love unlocking the magic of it for printables! You helped me create a nifty little tab for a crochet gift.
You’re welcome, Kara. I’m glad you found it helpful.
YEAHHHHH! I’m so glad I found this. Quick search in Pinterest “Printables using Photoshop Elements” and your pin was first and so easy to understand. I am getting ready to finally create digital products for my blog but didn’t want to pay for the licensing from Canva because I felt like the red tape was so thick on what was allowed and not allowed.
Thank you so much for writing this, I signed up for your free course and grabbed a sample of your E-book while I am at it. I will definitely be back and be checking out your etsy! You Rock!
Hi Lacy! I’m so glad that you found this post useful. I love creating printables and teaching others how to do it.
I have tried to use photoshop and even ilustrator to make some designs and such, but it was pretty overwhelming. Fortunately I wasn’t selling them! I like the simplicity of elements, but I know with adobe that things never seem that easy! Is it really that much easier than the others? Do you ever have issues when you export to a pdf or jpg having the image come out not super crisp? Love the tips! I would love a video too is you ever make one 🙂
Hi Elle! Photoshop Elements is the easiest Adobe program to master (in my opinion). It is less overwhelming than the full version of Photoshop. If you are going to be printing your designs, make sure that you create them at 300 dpi for best print resolution. If you are creating designs to be used on the web, you can set the dpi at 72. I have plans to make videos of these tutorials in the future. Thanks for stopping by!
Wonderful! This great tutorial has given me a flying start using the PSE 2020 program I bought this week. Thank you and greetings from the UK. Marion s
Hi Marion! I’m so glad this post helped you.
I just found this and was so happy because I just bought Photoshop Elements 2020 and want to learn to make digital “stuff” :). so this was amazing and kind of easy. Thank you so much for this. Hugs Tora
Hi Tora! I’m so glad the post was helpful to you.
I have been searching everywhere to find out how to make these printable tags. I am a cookier and am always buying digital ones to print. I would like to add this feature to my business… where others can buy them from me. I am looking forward to finding all your posts, tutorials and learning from you.
Thank you
You’re welcome, Michelle. I have numerous graphic design posts for all different design software.
Thank you! I’ve been researching which kind of software to purchase for several months. Your article really pushed me to purchase it. I pinned this on two board to give it more exposure. Thanks so much!