
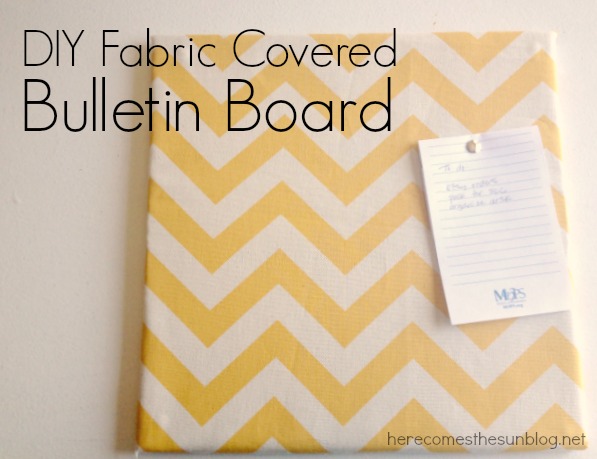
DIY Fabric Covered Bulletin Board
My office space really needs some sprucing up. Notice how I said office space and not office. I don’t exactly have a separate office, it’s more like a wall in my bedroom. And that wall needs some serious color. So I made a Fabric Covered Bulletin Board.
You will need:
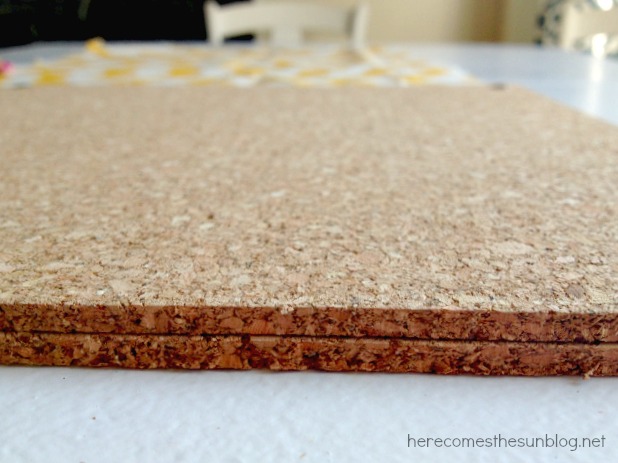
Cork board
Fabric
Rotary cutter or scissors
Push pins

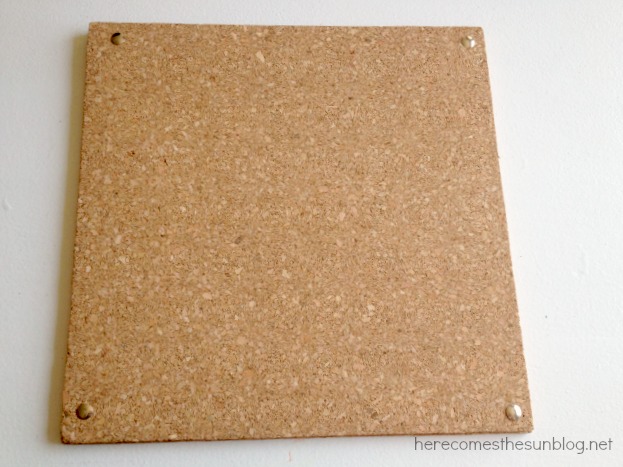
The cork board that I bought was thin so I used 2 pieces and held them together with push pins.
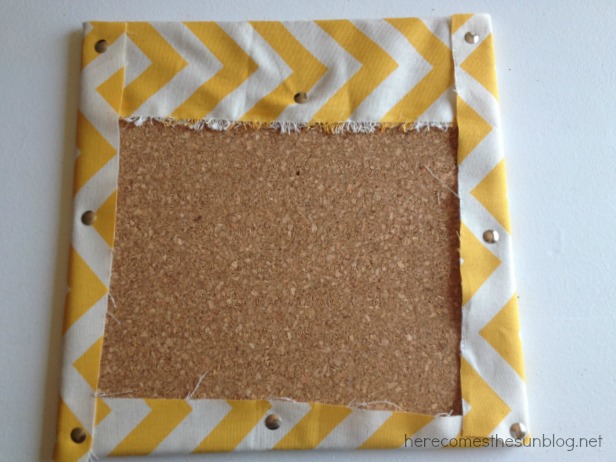
Cut your fabric with the rotary cutter to scissors to fit your cork board. If you have a fabric that has a pattern, make sure to cut it so the pattern is centered on the cork board. My pattern is a bright yellow chevron. I absolutely love yellow chevron. My favorite DIY project to date are my yellow chevron curtains. Everyone needs a bit more sunny yellow chevron in their life, don’t ya think? Turn the cork board and fabric over. Cut the corners as shown below so the is no bulk when you fold the corners over. I had to adjust my fabric to center the pattern that is why there is more fabric on the right side, below.

Fold the corners over and secure them to the back with push pins. You can also use a hot glue gun but I like to change things up a lot and will probably move the bulletin board and need to change the fabric, hence the push pins.
Super easy, right? This beauty is going up over my desk!
Kelly this is perfect! I just bought a bulletin board for my craft room and was just thinking I needed to cover it before I put it up, thanks for the tutorial! Can’t wait to meet you at SNAP next week.
Thanks, Britni! See you soon.
how did you hang? Can you not glue the cork together?
Yes, you can glue the cork together instead of using push pins. You can easily hang this with 3M strips.