
How to Make Invitations in Canva
Learn how to make invitations in Canva with this easy tutorial.
If you are anything like me, you hate spending money on expensive invitations when you know that you can create your own invitations. But did you know that you don’t need paid programs like Photoshop or Illustrator to make an invitation? You can make invitations in Canva for free!
Canva is an amazing program that can be used to make many different types of prints and graphics. Canva has a paid version and a free version. Everything I’m going to teach you today is included in the free version.
HOW TO MAKE INVITATIONS IN CANVA
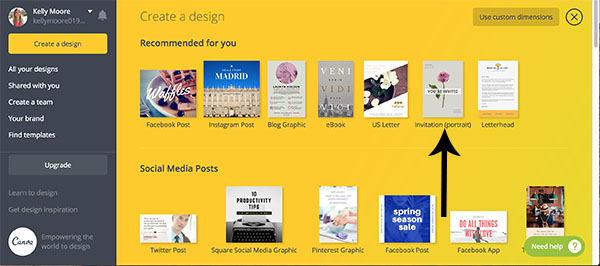
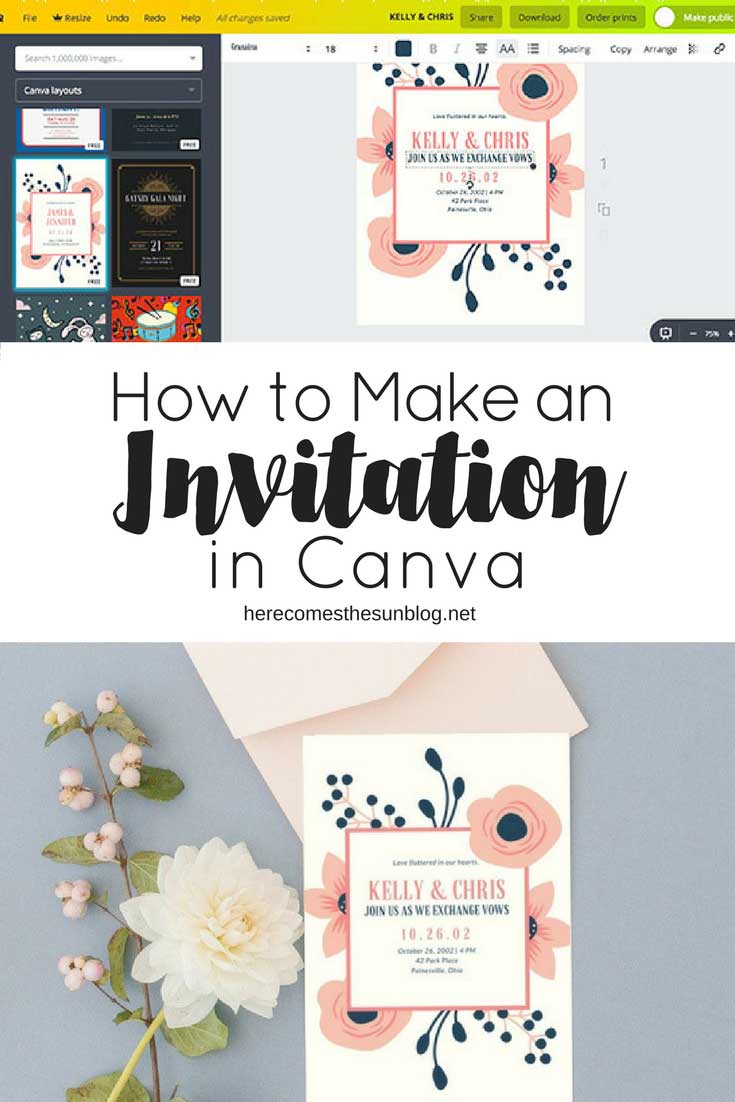
First, create an account with Canva. When you have your account set up, click on the “Create Design” button and then click on “Invitation”.
You now have a 5×7 invitation template all set and ready to go.
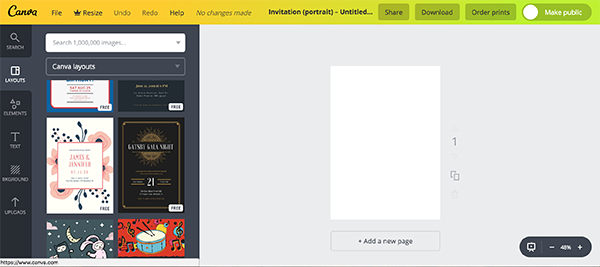
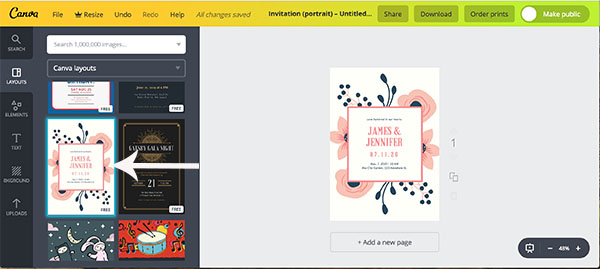
What I love about Canva is they have a bunch of free design templates that you can use to make free printable invitations. Scroll through the templates on the left hand side and choose one that you like. Don’t worry, you can change/delete anything that you don’t like about the template. For this example, I’m choosing a floral themed template since florals are pretty popular right now. Click on the design that you want to load it onto your canvas.
Now you can change pretty much anything that you want on the invitation. To change an element, just click on it. When you click on an element, options pop up at the top. This is what my screen looked like when I clicked on the text. At the top, you can see that you can see options to change the font, size and color. If your text is grouped together, as shown in the example below, click on the UNGROUP button and you will be able to edit the lines of text separately.
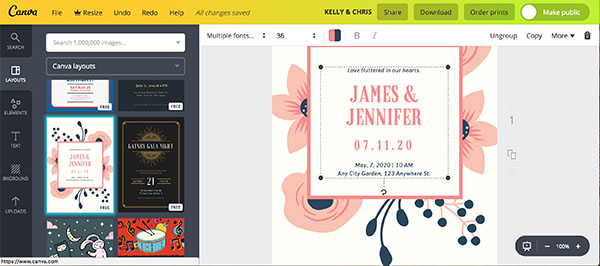
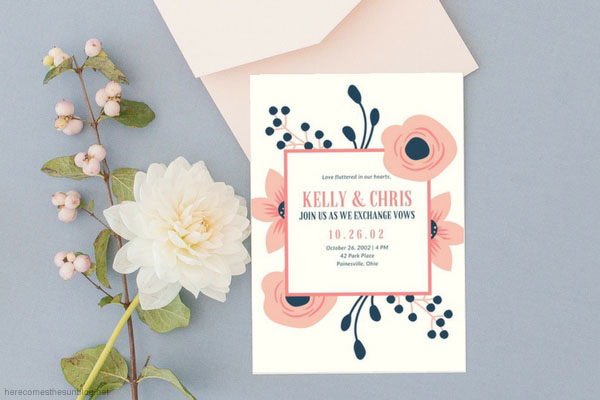
After I clicked UNGROUP, I changed the text to our names and wedding date/place.
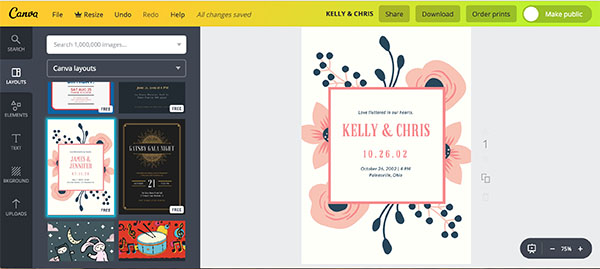
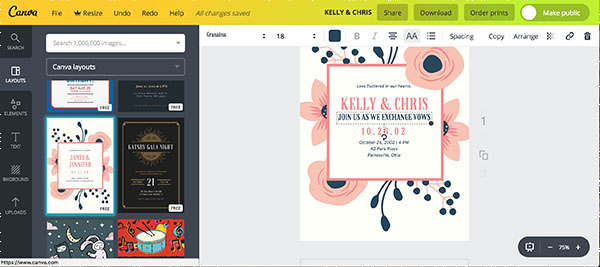
Since our names fit on one line, I thought that it looked a bit empty so I also added a line of text that says “Join us as we exchange vows”. To add the line of text, I simply selected the line “Kelly & Chris”, clicked COPY and entered my new text. I resized the text and changed the color using the buttons at the top.
I also wanted to change up the invitation a bit more by placing one flower in front. To do that, I clicked on the flower and ARRANGE>FORWARD to bring the flower to the front. If you make a mistake or don’t like something that you have done, simply hit the UNDO button.
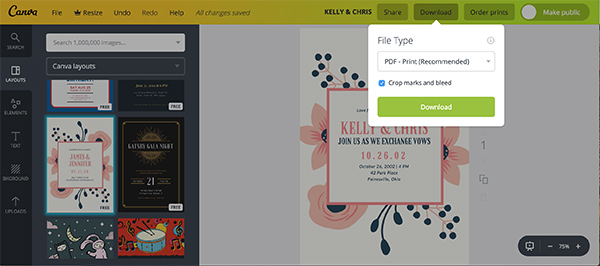
The final step is saving your invitation. To do this, click “DOWNLOAD” and save your file as a JPEG or PDF. If you choose the PDF option, you can add crop marks and bleed to your final document so you get a perfect cut every time.
HOW TO MAKE INVITATIONS IN CANVA VIDEO
I hope this tutorial helped you learn how to make invitations in Canva. Now that you know the steps? What type of invitations will you create?
LOVE IT? PIN IT!
YOU MAY ALSO LIKE: