
How to Create an Invitation in Illustrator
Learn how to create an invitation in Illustrator with this easy tutorial.

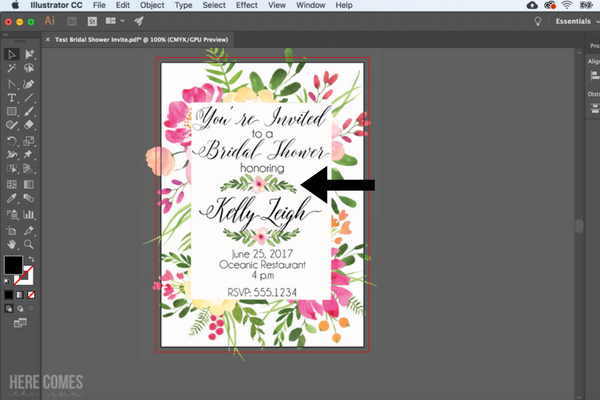
I’m in love with the watercolor floral trend. And since summer is upon us, it is the perfect time to use some watercolor florals to make and invitation. Today I’m showing you how to make the beautiful invitation above in a step by step tutorial. If you learn better through video, scroll down to the bottom of the post where I have a video of the entire process, start to finish.
HOW TO CREATE AN INVITATION IN ILLUSTRATOR
First, you need Adobe Illustrator. You can get a free trial version or you can pay for a Creative Cloud subscription.
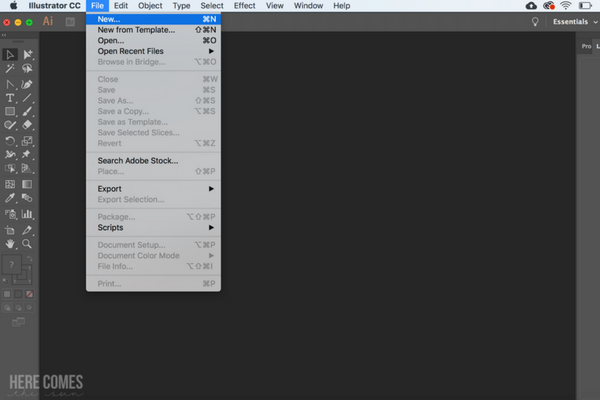
When you open up Illustrator, this is the screen you will see. To create a new file, hit FILE>NEW
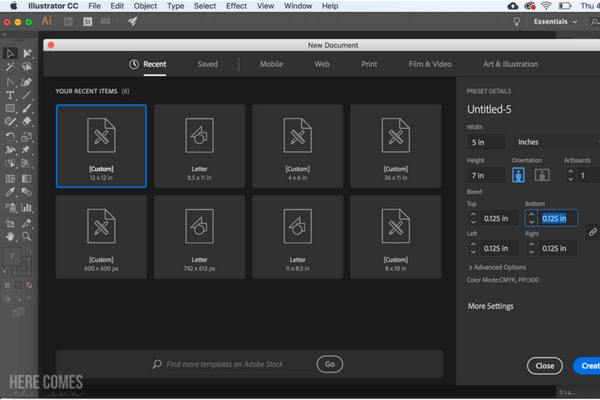
Choose a preset size or enter the dimensions that you want your file to be. In this case, I made my invitation 5″x7″ with a bleed of .125. The bleed is used in order to make sure that nothing is cut off of your invitations if you send them to a professional printer. The standard bleed is 1/8 inch (.125) on all sides.
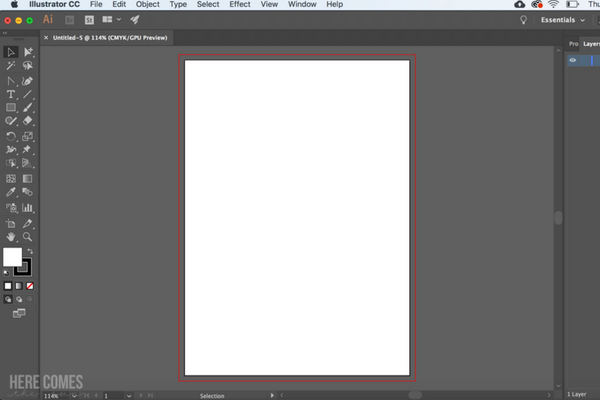
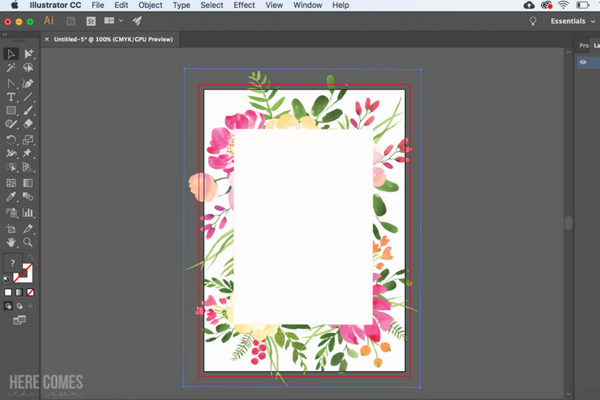
Once you enter your settings and click “CREATE”, this is how your document will now look. The red line around your document indicates the bleed. Anything between the red line and white document will get cut off in the trimming process. If you have a colored background or elements that you want to extend to the edge of the page, make sure to extend them to the bleed. Also, all text should be on the white portion of your document so it is not cut off.
ADDING FLORAL ELEMENTS TO YOUR INVITATION
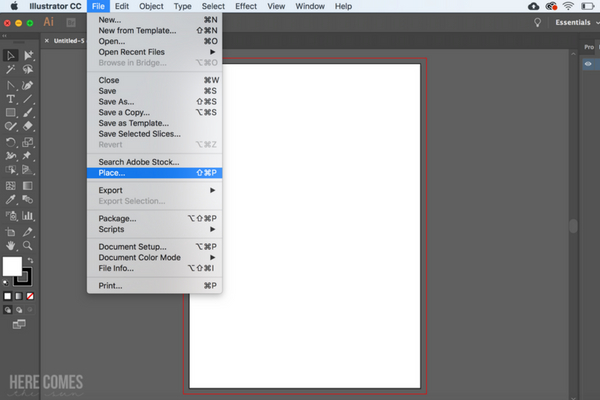
Once you have your document set up, the next step is to add the floral elements.The florals that I used are from this watercolor clip art set. To do this, go to FILE>PLACE and navigate to your watercolor florals on your computer.
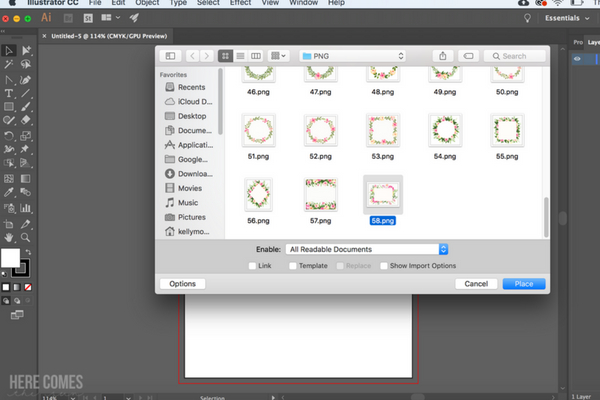
I chose to use the floral frame. It is perfect for an invitation. After you navigate to your file, click on it and then click and drag the corners to fill your document. Make sure to extend the florals to the bleed. This way, you know that the floral frame will extend to the edge of your invitation.
ADDING TEXT TO THE INVITATION
To add text to the invitation, click on the text tool and type out your text. You can change the size of the text by clicking and dragging the blue corners around the text box.
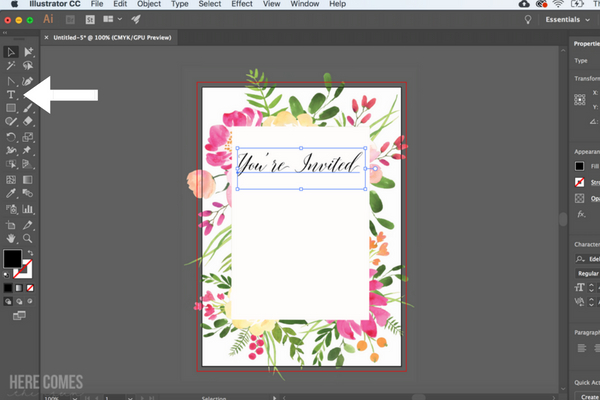
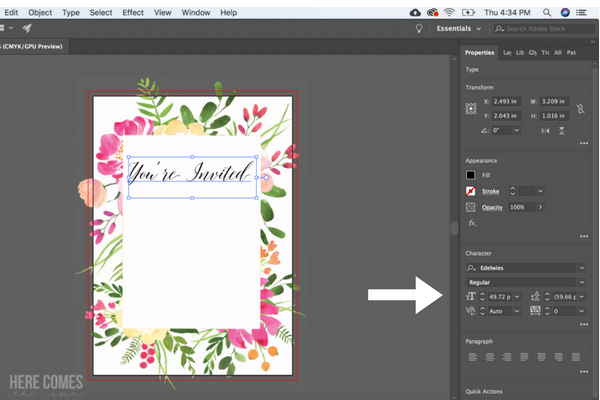
You can change the font, size and color in the properties tab.
USING ALTERNATE GLYPHS
Some fonts also have special alternative glyphs that you can use. To access the alternate glyphs, click on TYPE>GLYPHS and highlight the letter that you want to change. If the font has any alternate glyphs for that letter, it will show up. Then just click on the option you want to use.

After I added all my text, I added some more floral elements by using the FILE>>PLACE method as described above.
SAVING YOUR WORK
Once you have all your text and elements the way you want them, save it. I usually a=save my documents in several forms: an Illustrator file (ai) in case I want to make changes, a JPEG file for displaying online, and a PDF file for printing.
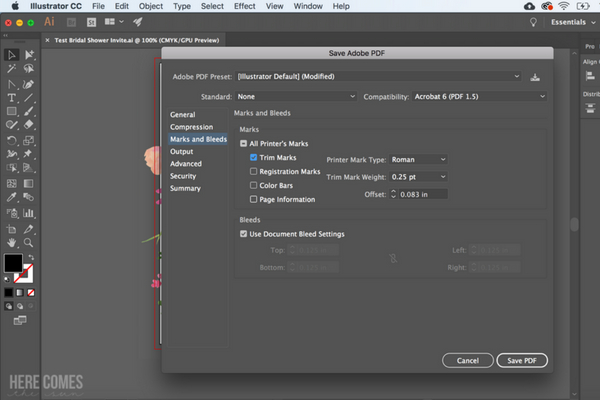
To save as a PDF, FILE>SAVE>PDF. Under “Marks and Bleeds” choose “TRIM MARKS” and “USE DOCUMENT BLEED SETTINGS”
To send this to a printer (and not waste paper), create a new 8.5×11 document with a white background. Click FILE>PLACE and navigate to the PDF that you just saved. When you place the PDF into the new document, the trim marks will show up so you can get a perfect cut. Copy and paste to place 2 5×7 onto your page for easy printing. Now it’s all ready to be sent to print!
CREATE AN INVITATION IN ILLUSTRATOR VIDEO
I hope you enjoyed this tutorial!
LOVE IT? PIN IT!
YOU MAY ALSO LIKE:
How to Make an Invitation in Canva
How to Create Printables Without Expensive Software
How to Create Printables in Photoshop Elements
Hello I have a question after I have downloaded the water color. When I go to file place and open up the downloads and find the rosaleen water color, my adobe illustrator says rosaleen watercolor clip art is in a format which can’t be placed.
Can you help? Thanks
Hi Amber! I have had this problem sometimes too. Make sure the downloaded file has a .png extension on it. If it doesn’t, rename the file to add that extension.