
DIY Tote Bag with Heat Transfer Vinyl
A DIY Tote Bag for back-to-school!

My little man started kindergarten a few weeks ago and has been so excited to learn how to read. He loves to pick out the sight words when we read books together and just loves to go to the library for new books. Last year I made his sister a library book bag and this year, I made him one too. For his, instead of stenciling on the letters I used heat transfer vinyl.
If you have never used heat transfer vinyl then you are on for a treat. It is so easy to use. Although I use vinyl a lot in my projects, this is the first time I have used heat transfer vinyl and I am totally sold on it.
Here is what you will need to make this Tote Bag:
Expressions Vinyl Heat Transfer Vinyl in Earthly Green and Captain Blue
Iron
DIRECTIONS
First, I created my design on my Silhouette. When using heat transfer vinyl, make sure you flip your design using the “mirror image” option on the Silhouette. Once I got my image sized and flipped, I place the heat transfer vinyl into the Silhouette machine with the shiny side (plastic) down.
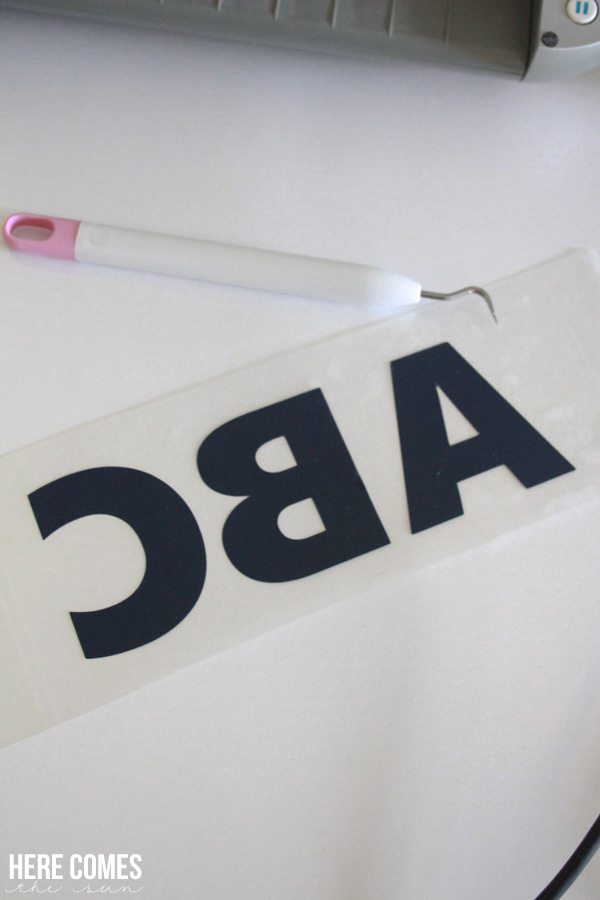
After my design was cut, I pulled off the excess vinyl and used a vinyl weeding tool to help pull out the little pieces between the letters.
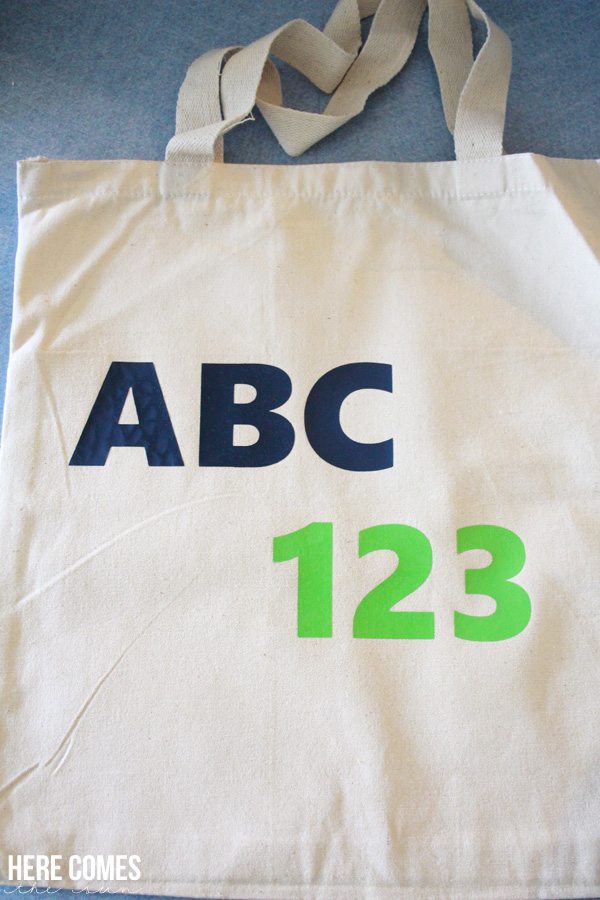
Next, place your design onto the canvas bag, making sure your design is straight.
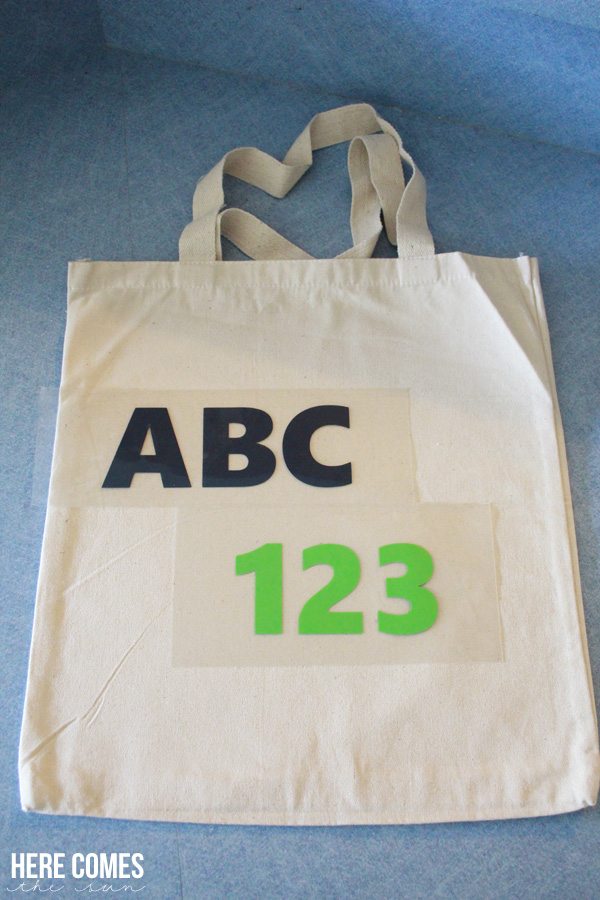
Turn your iron to the cotton setting (no steam) and press down on your vinyl design for 30-45 seconds. Do not move your iron, just apply pressure. Remove the iron and peel up a corner of the plastic. If the vinyl sticks to the canvas bag, continue pulling up the plastic. If the vinyl has not adhered to the canvas bag, place the iron back onto the vinyl until the vinyl adheres to the bag.
Heat transfer vinyl is my new favorite crafting material. I can’t wait to make more things with it. Shirts for the kids, pillow covers, holiday presents…
Be sure to stop by the Creativity Unleashed Link Party all this month because Expressions Vinyl is sponsoring it and we will be giving away a $50 Expressions Vinyl gift card each week in August!
Expressions Vinyl provided me with supplies for this project. However, the opinions are 100% my own.
This post contains affiliate links
This came out really cute! I love how easy it was to put together. Thanks for sharing!