
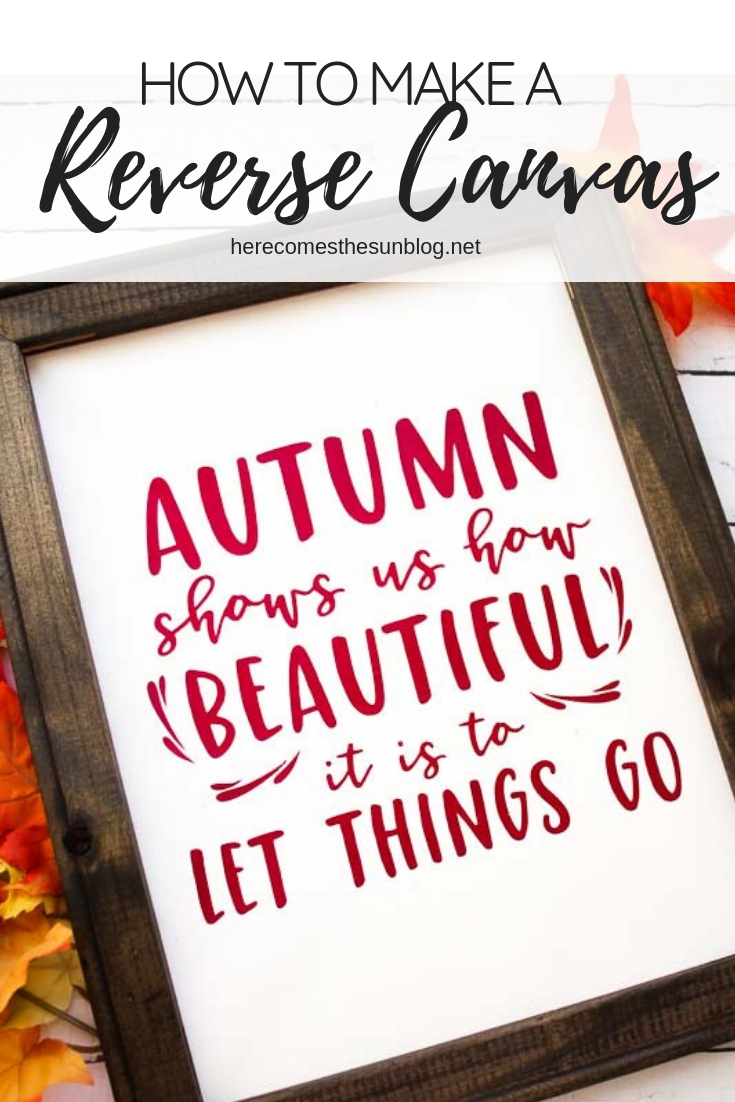
How to Make a Reverse Canvas
Learn how to make a reverse canvas and start creating beautiful art for your home!
I really love the look of canvas art but have you ever checked out the prices of premade canvas art? Oh my goodness gracious it is expensive. So if you like the look but not the price tag, making a reverse canvas is a great way to save money and get a custom sign for your home.
REVERSE CANVAS SUPPLIES
- Canvas
- Wood Stain (optional)
- Scissors
- HTV Vinyl
- Weeding Tools
- Iron or Heat Press
- Silhouette or Cricut
- Hot Glue Gun
- Cut File. You can access it in the resource library, available to my email subscribers.
HOW TO MAKE A REVERSE CANVAS
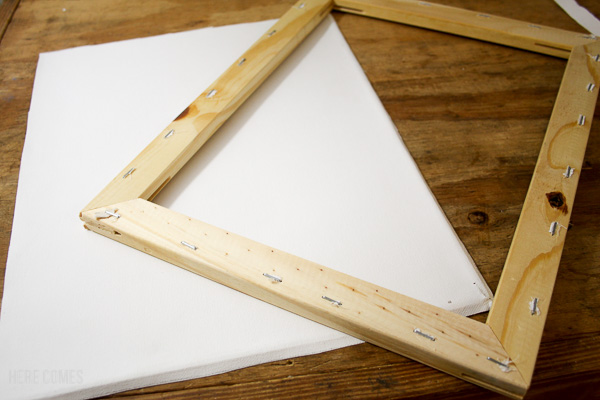
Turn your canvas over so the back side is up. Remove the canvas from the frame by cutting on the outside of the staples with an Exacto or scissors knife or just pulling the canvas away from the frame. Do this on all four sides until the entire canvas is removed from the frame. Don’t worry about removing the staples. Put the canvas aside.
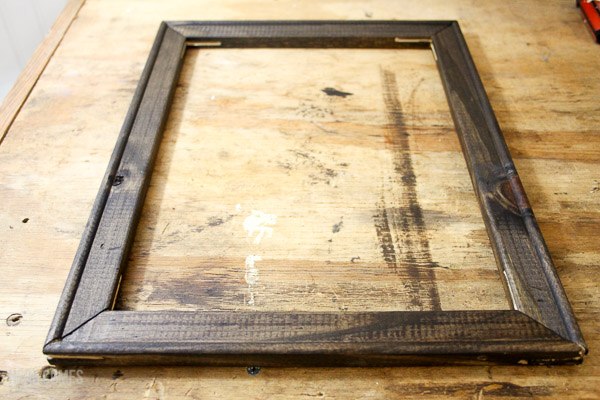
Turn your frame over so the side without the staples is facing up. Stain your frame (optional). I used Minwax stain in Espresso. I love this stain and have used it on numerous items in my home like my farmhouse table and my rustic Christmas sign. Let your frame dry completely.
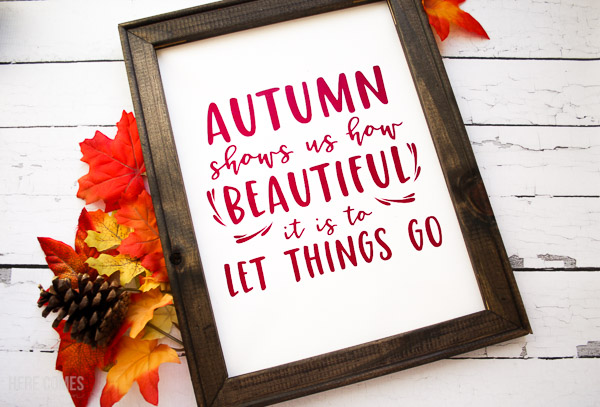
Using a cut file of your choice, cut it out onto heat transfer vinyl (HTV). My favorite HTV is Siser Easy Weed. I get mine from Expressions Vinyl. The color that I’m using for this reverse canvas is Burgundy. If you would like to use the design that I used, it is in the resource library. You can access the library at the bottom of this post. If you’d like a different fall quote, be sure to check out my Fall Quote Cut File Bundle.
Place the frame onto the canvas and center the vinyl design on the canvas.
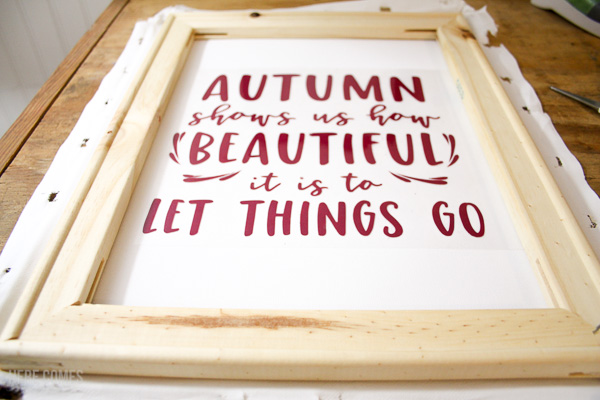
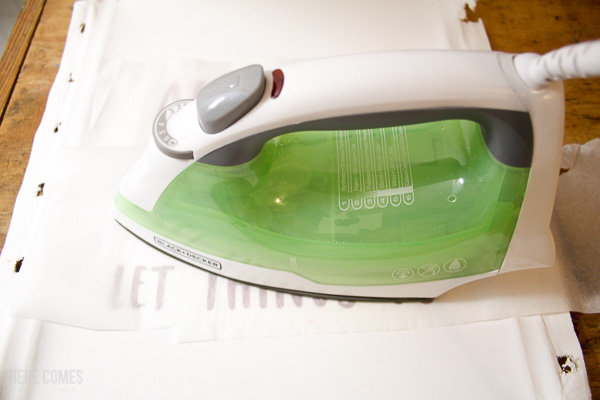
Place a piece of parchment paper over the carrier sheet and adhere the HTV to the canvas using an iron or heat press. If you are using an iron, a cotton setting with no steam and 20-30 seconds works well. Do not move the iron side to side. Place it in one spot for 20 seconds and press down. Then pick it straight up and place in another spot for 20 seconds until the entire design has been ironed.
Center your canvas under the frame and trace along the outside of the frame with a pencil. Cut off the excess canvas.
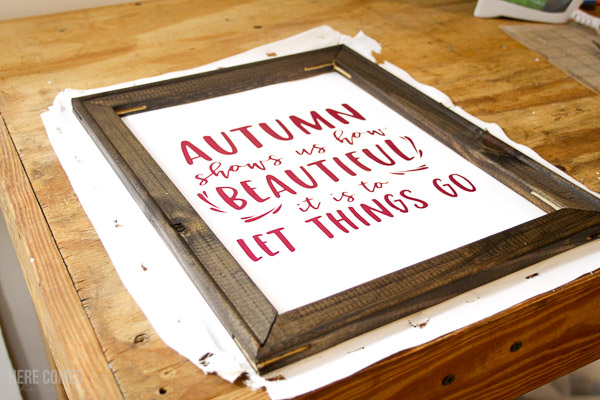

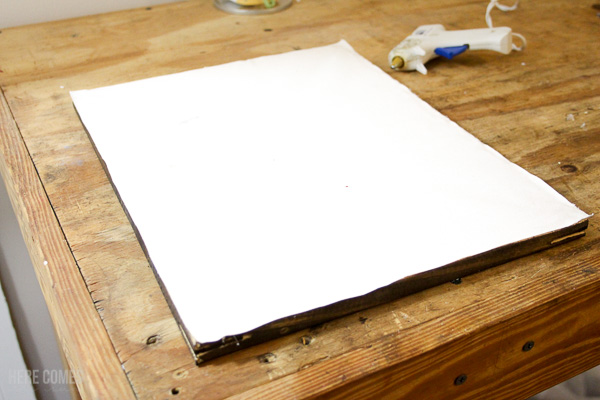
Flip the frame and canvas over and attach the canvas to the back of the frame using either hot glue or a staple gun. Start on the sides of the frame and pull the canvas tight before stapling/glueing. Staple/glue opposite sides of the frame and then move onto the other two sides. Trim the excess canvas to complete your reverse canvas.
I really love how this turned out and how easy it was. The step that took the most time was weeding the vinyl so make sure to go slow on that step if you have an intricate design. I like that the canvas is so affordable and you get such a nice frame from it.
I’m thinking about making one of these for each season. They would be perfect to give as gifts.
LOVE IT? PIN IT!
YOU MAY ALSO LIKE
Fall Quotes SVG File Bundle
Hand Lettered Fall Sign
10 Fabulous Fall Decor Ideas