
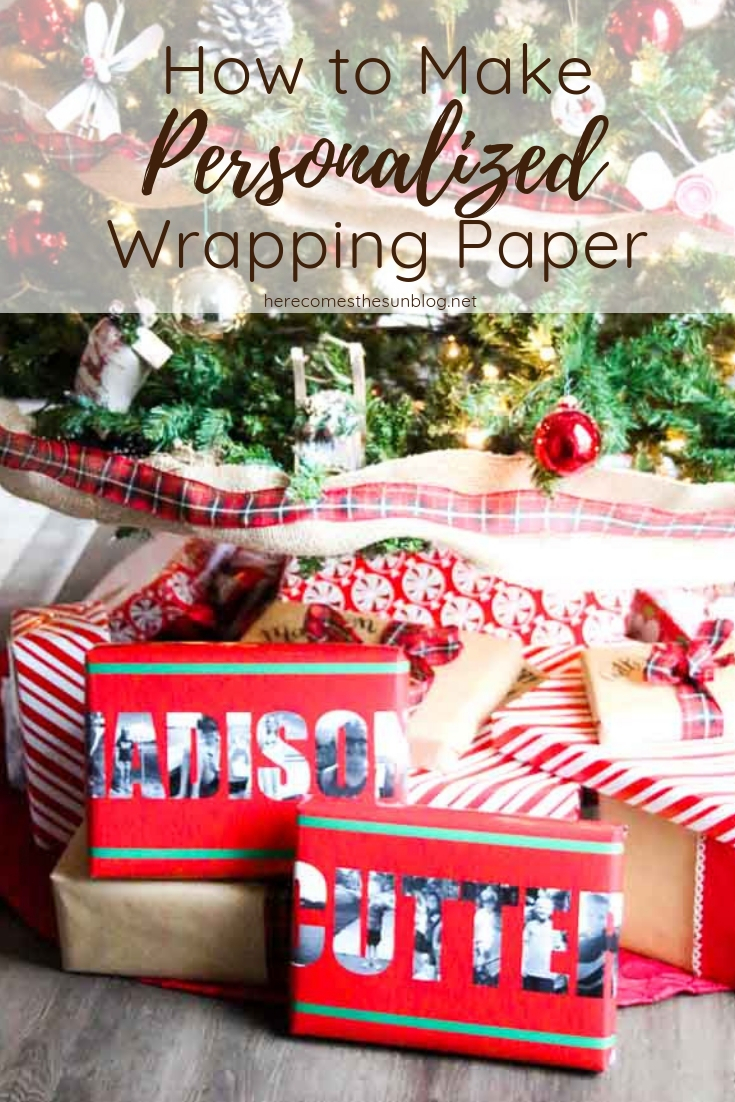
How to Make Personalized Wrapping Paper
Thank you to Adobe for sponsoring this post on DIY personalized wrapping paper. All opinions are my own.
Present wrapping is in high gear over here at our house. I love to pick out a wrapping “theme” every year. It drives my husband kid of nuts. He is always asking me what wrapping paper he is “allowed” to use. I can’t help it. I like the area under the tree to look cohesive and pretty. But this year I decided to add something just a bit different. I have always wanted to design my own wrapping paper and I’m just so pleased with how it turned out so I’m going to show you how to make your own personalized wrapping paper. And don’t worry… even you last minute wrappers can make this and have it in time for Christmas.
HOW TO MAKE PERSONALIZED WRAPPING PAPER
To make personalized wrapping paper, I used Photoshop Elements. I love this program and have used it to make so many of my digital designs. I really love the Guided Edits feature which lets you do amazing things with your photos in just a few clicks. Adobe provided me with a copy of the newest version of Photoshop Elements but if you don’t have it, you can download a free trial.
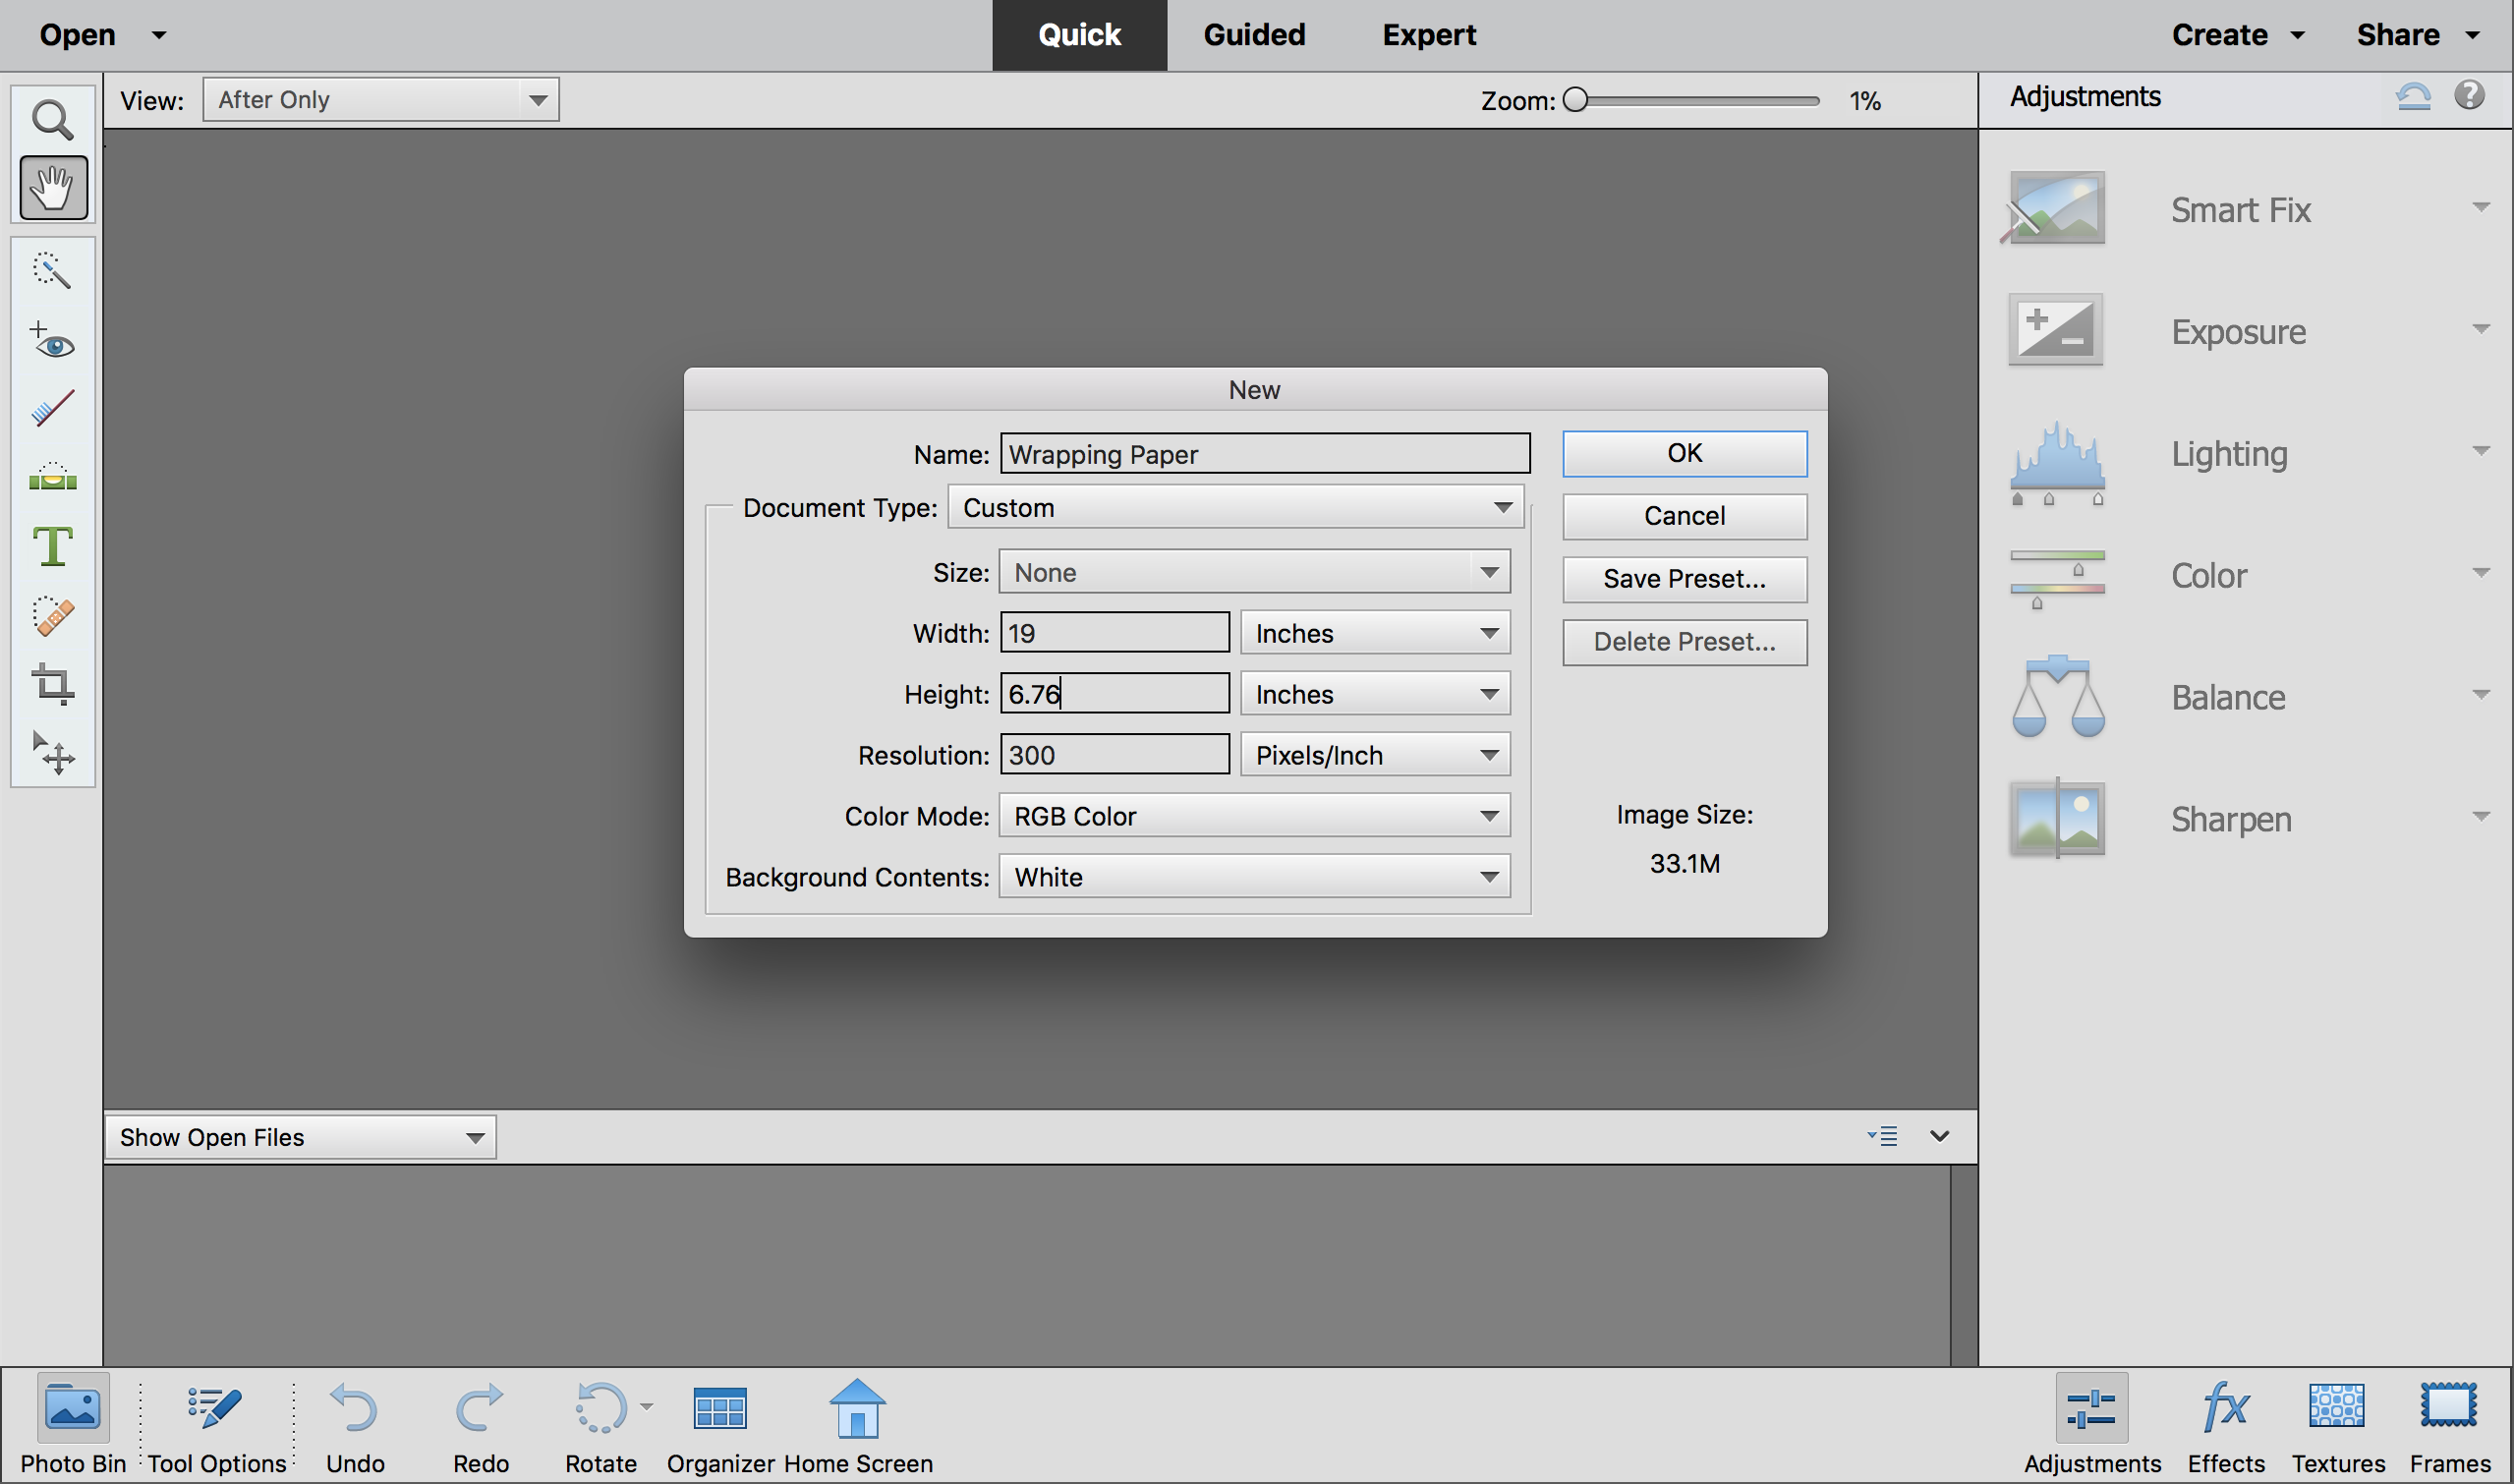
Open PSE and create a file at any size that you want by selecting FILE>NEW. I set my file to be long and skinny because I am going to print this file out in poster size. More on this later when I talk about printing. Make sure the resolution is set to 300 pixels per inch since you will be printing this file.
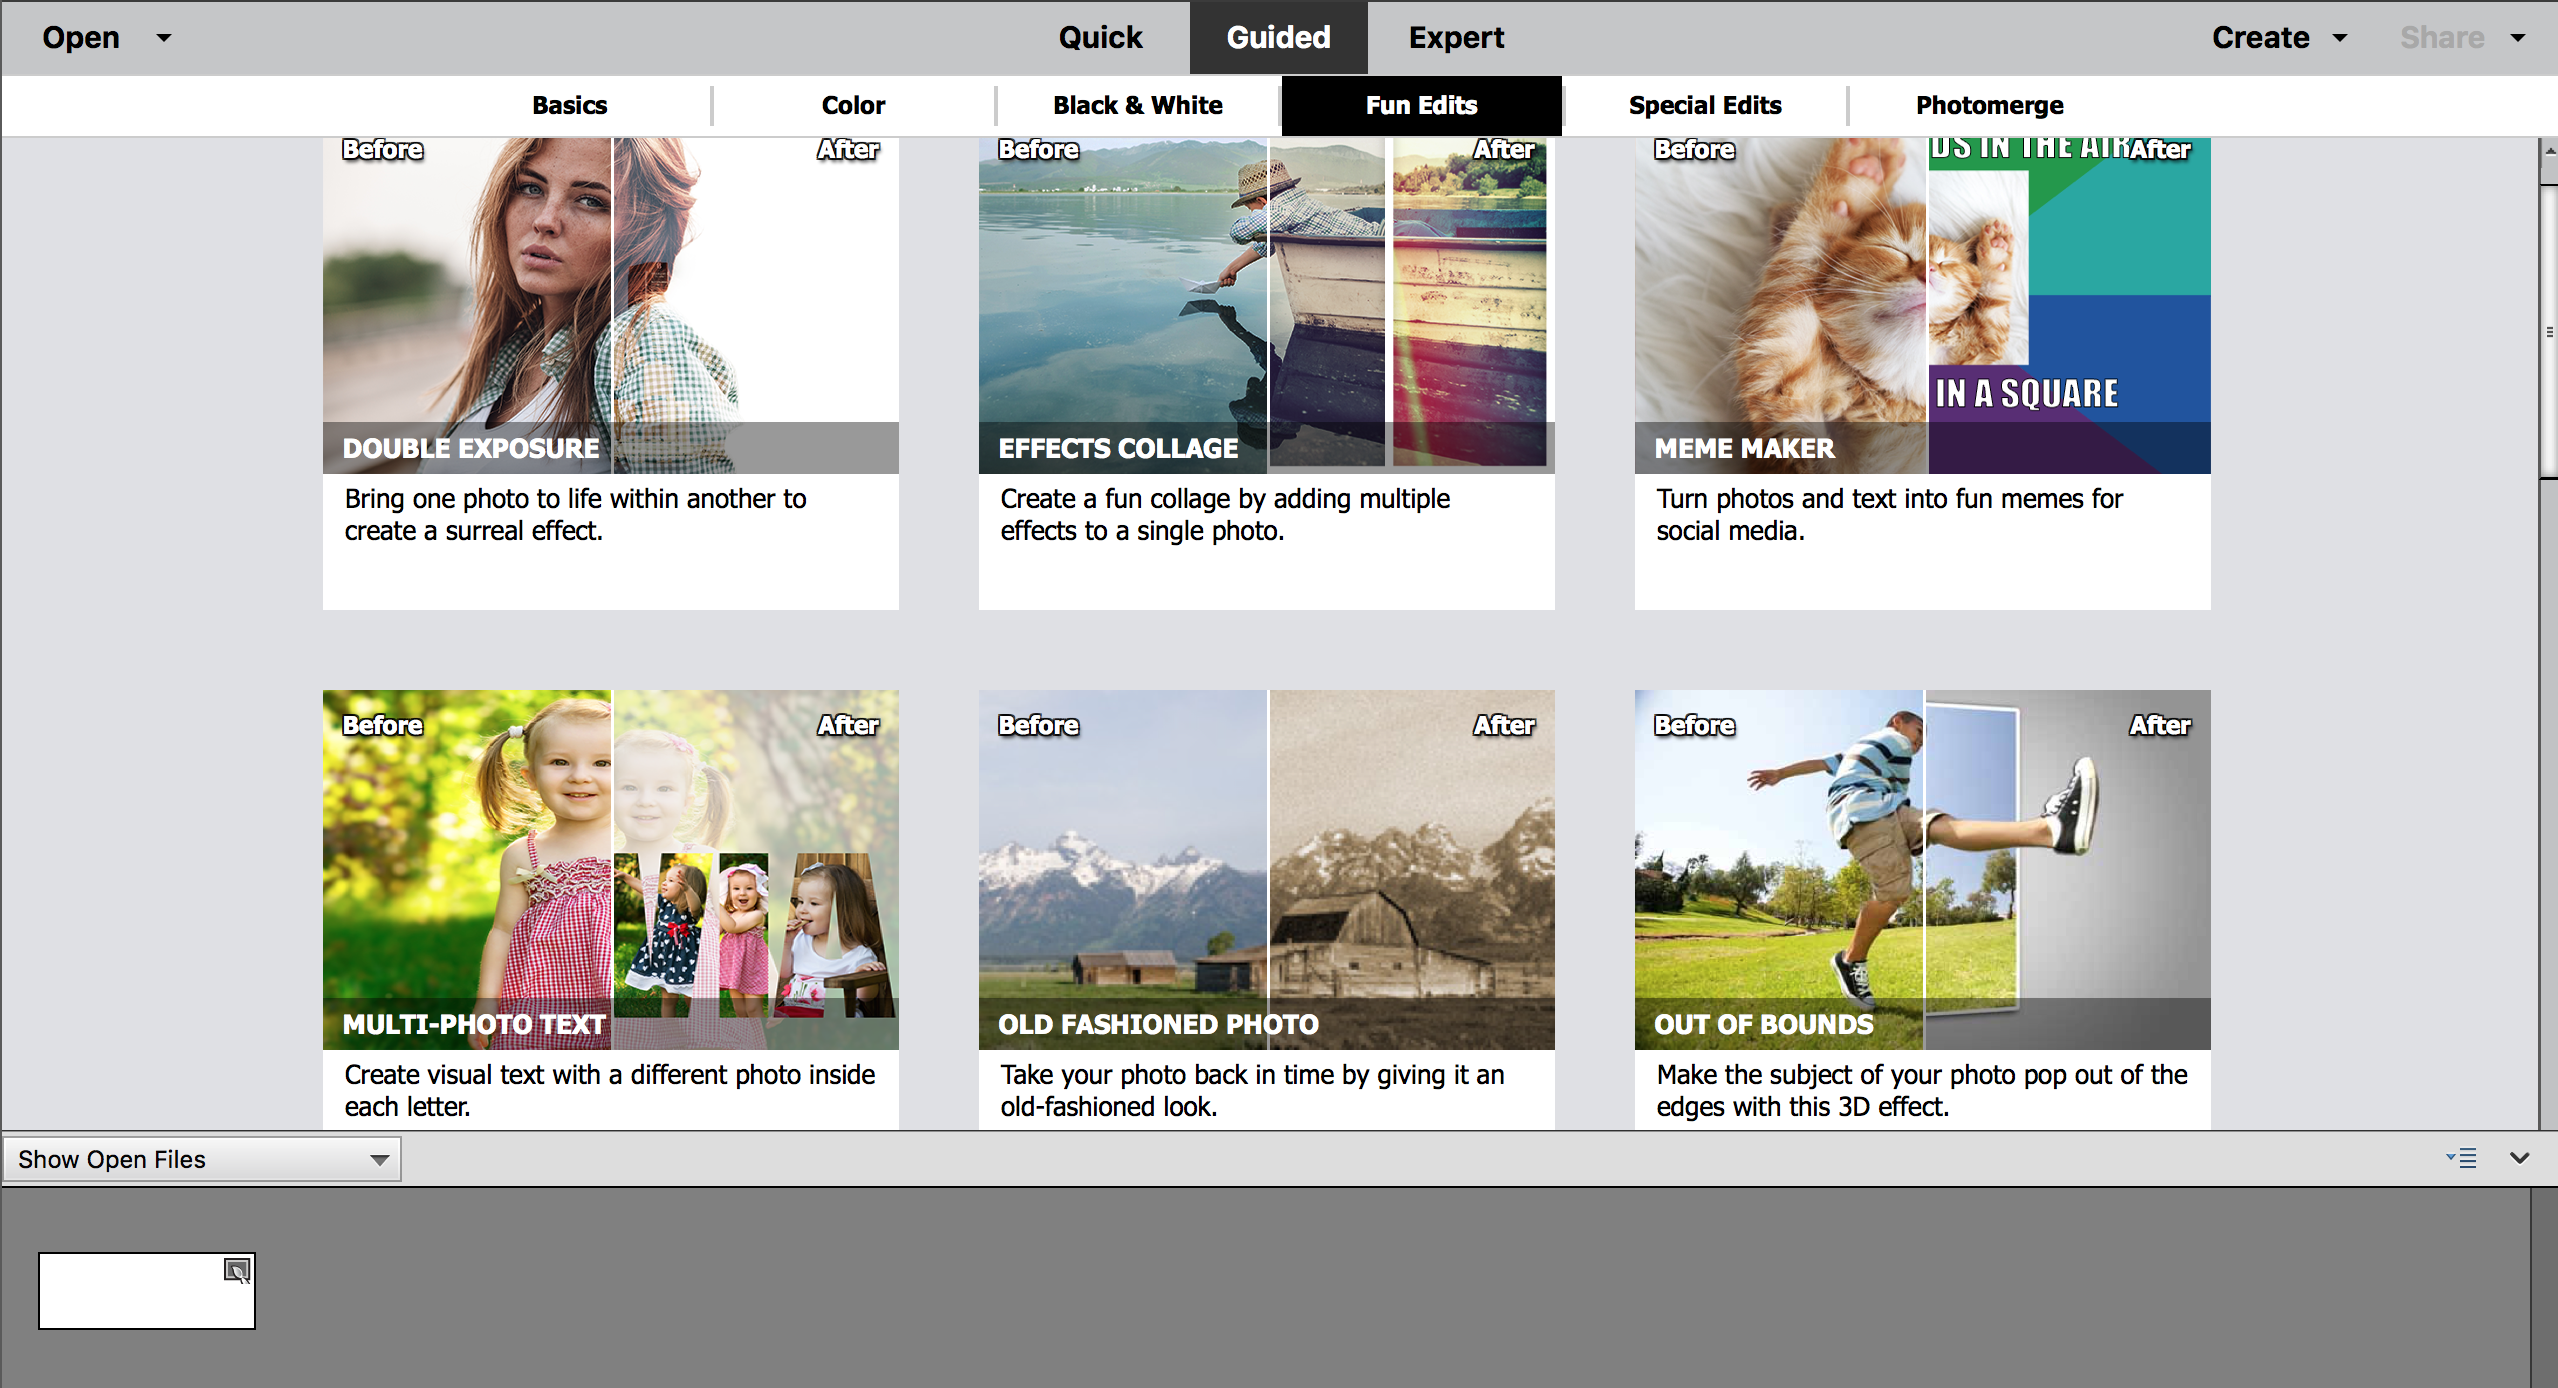
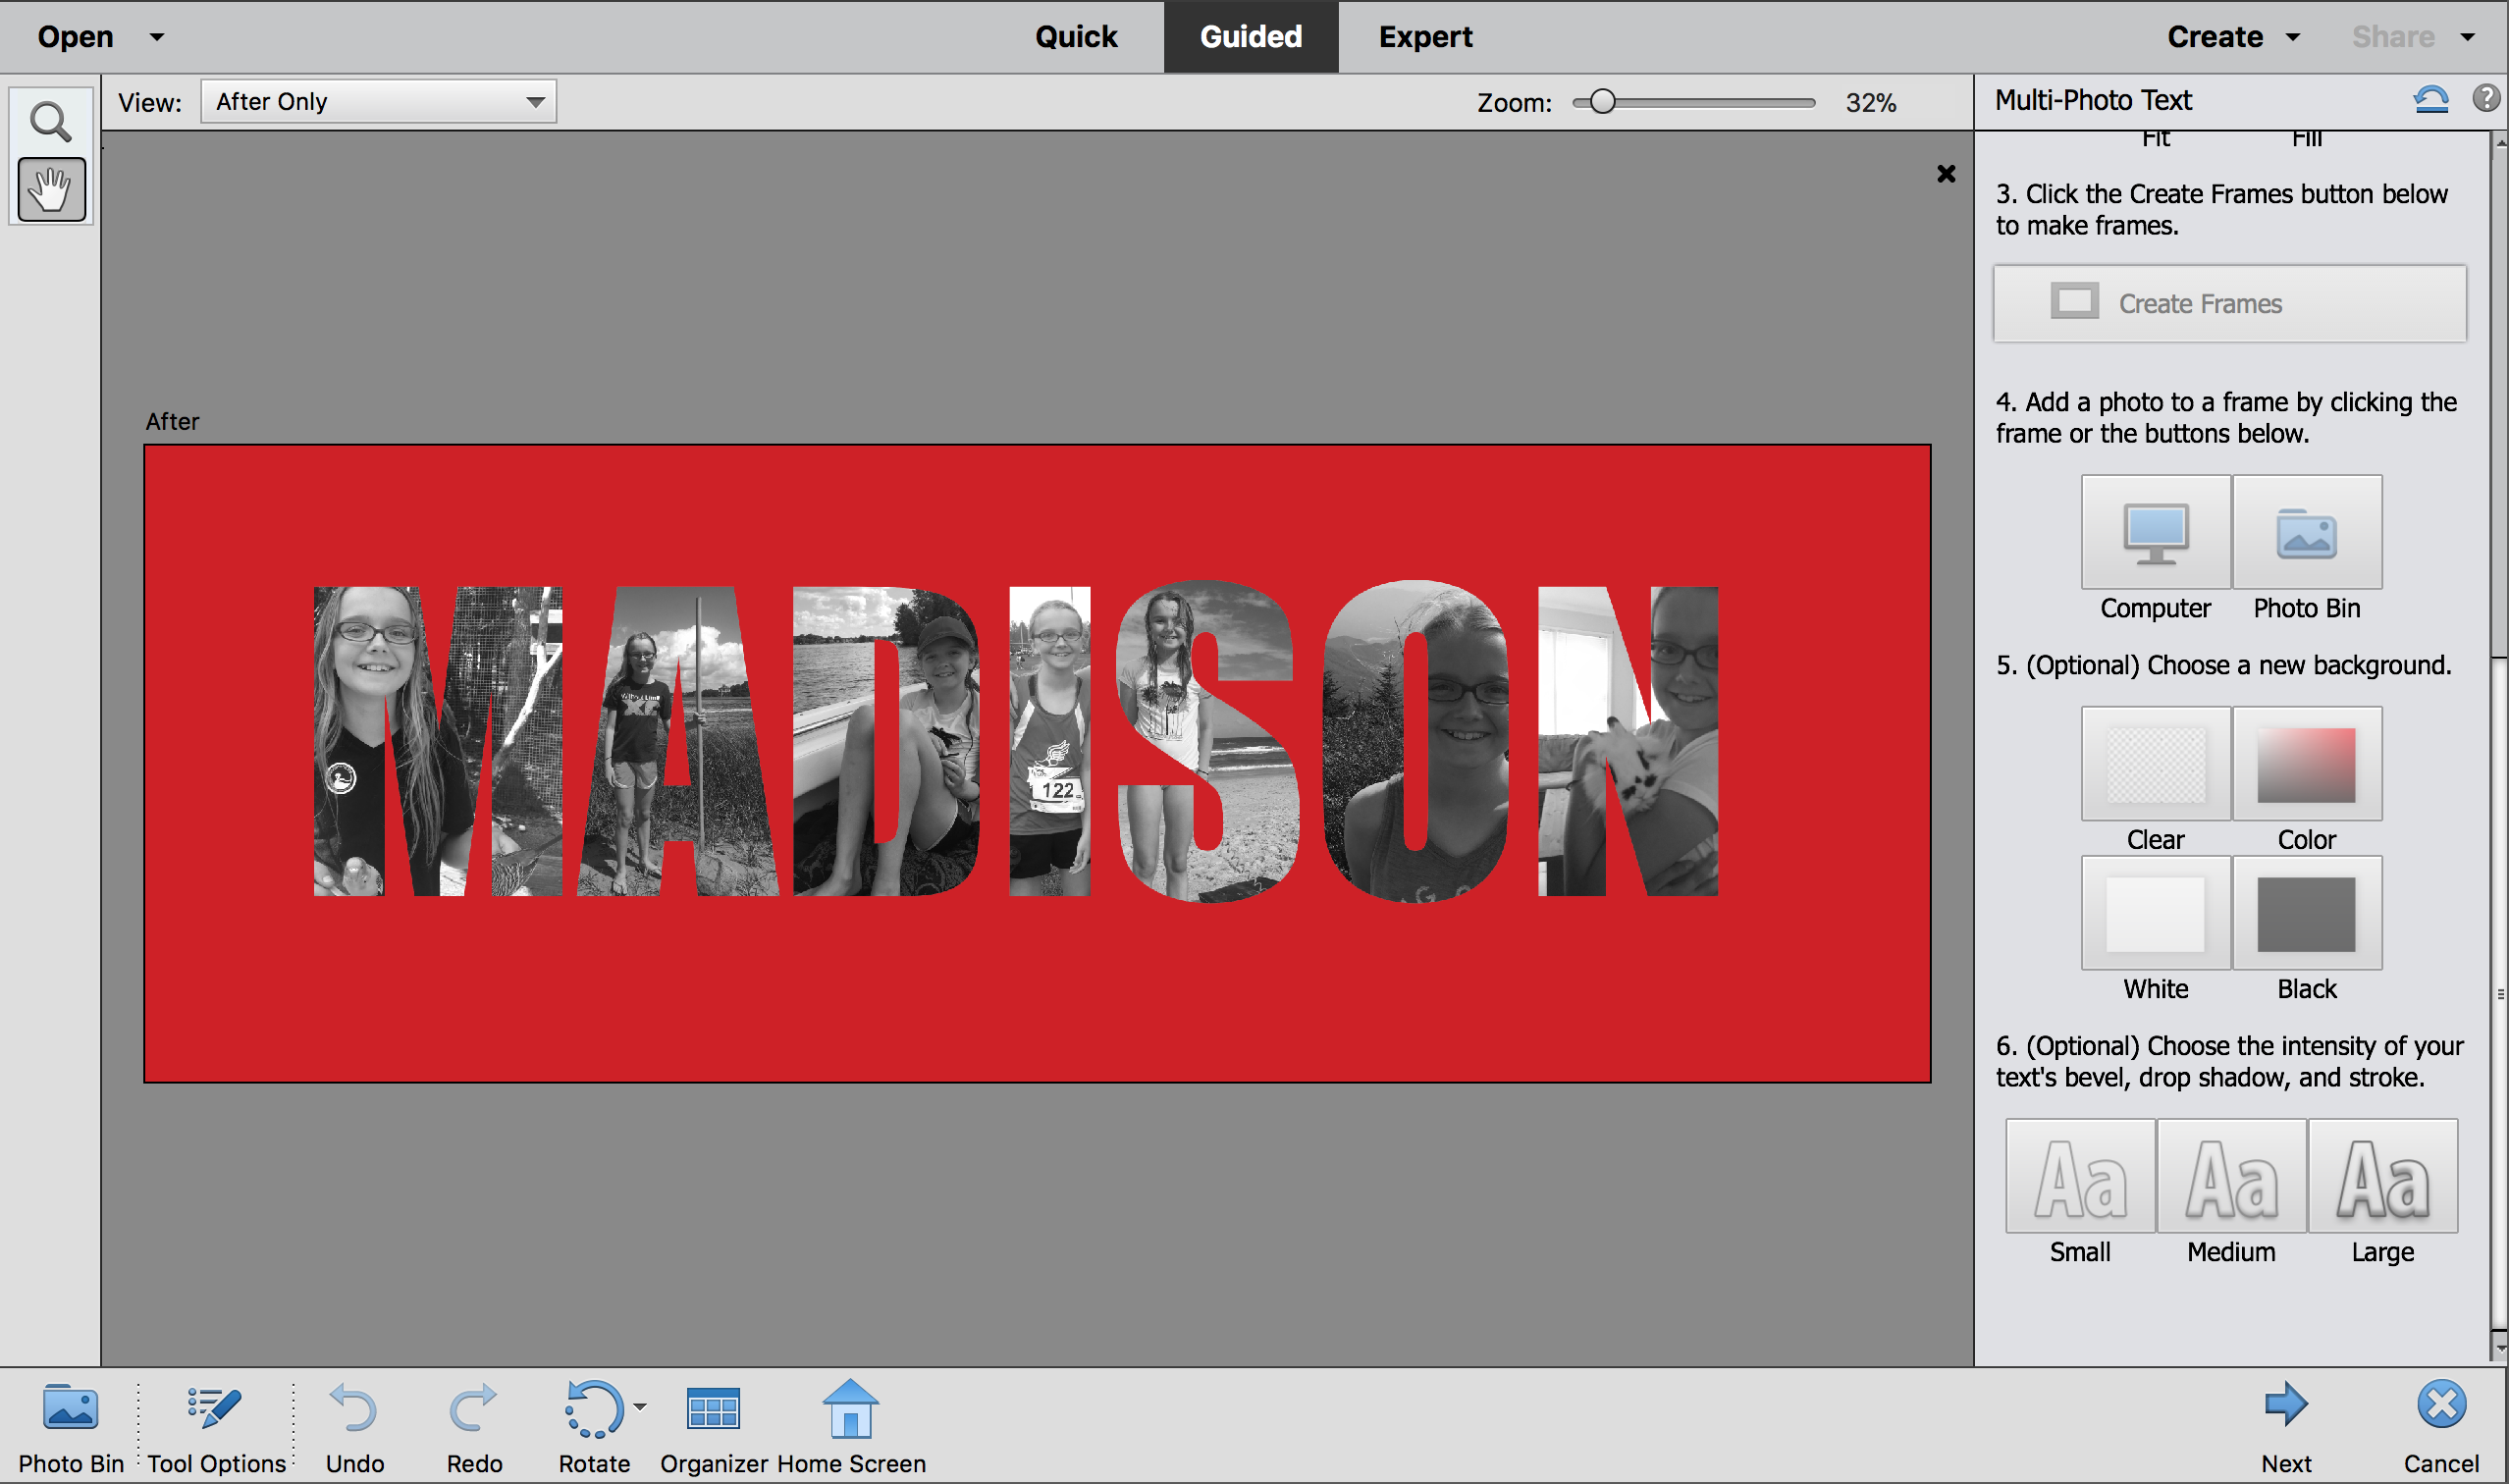
Next, click on “Guided” at the top of the screen to take you to the Guided Edits feature. Under “Fun Edits”, choose “Multi-Photo Text”
In “Multi-Photo Text” click on the Type Tool on the right hand side and enter your text. You can resize your text and move the text box around. When you have your text the way you want it, click the green arrow.
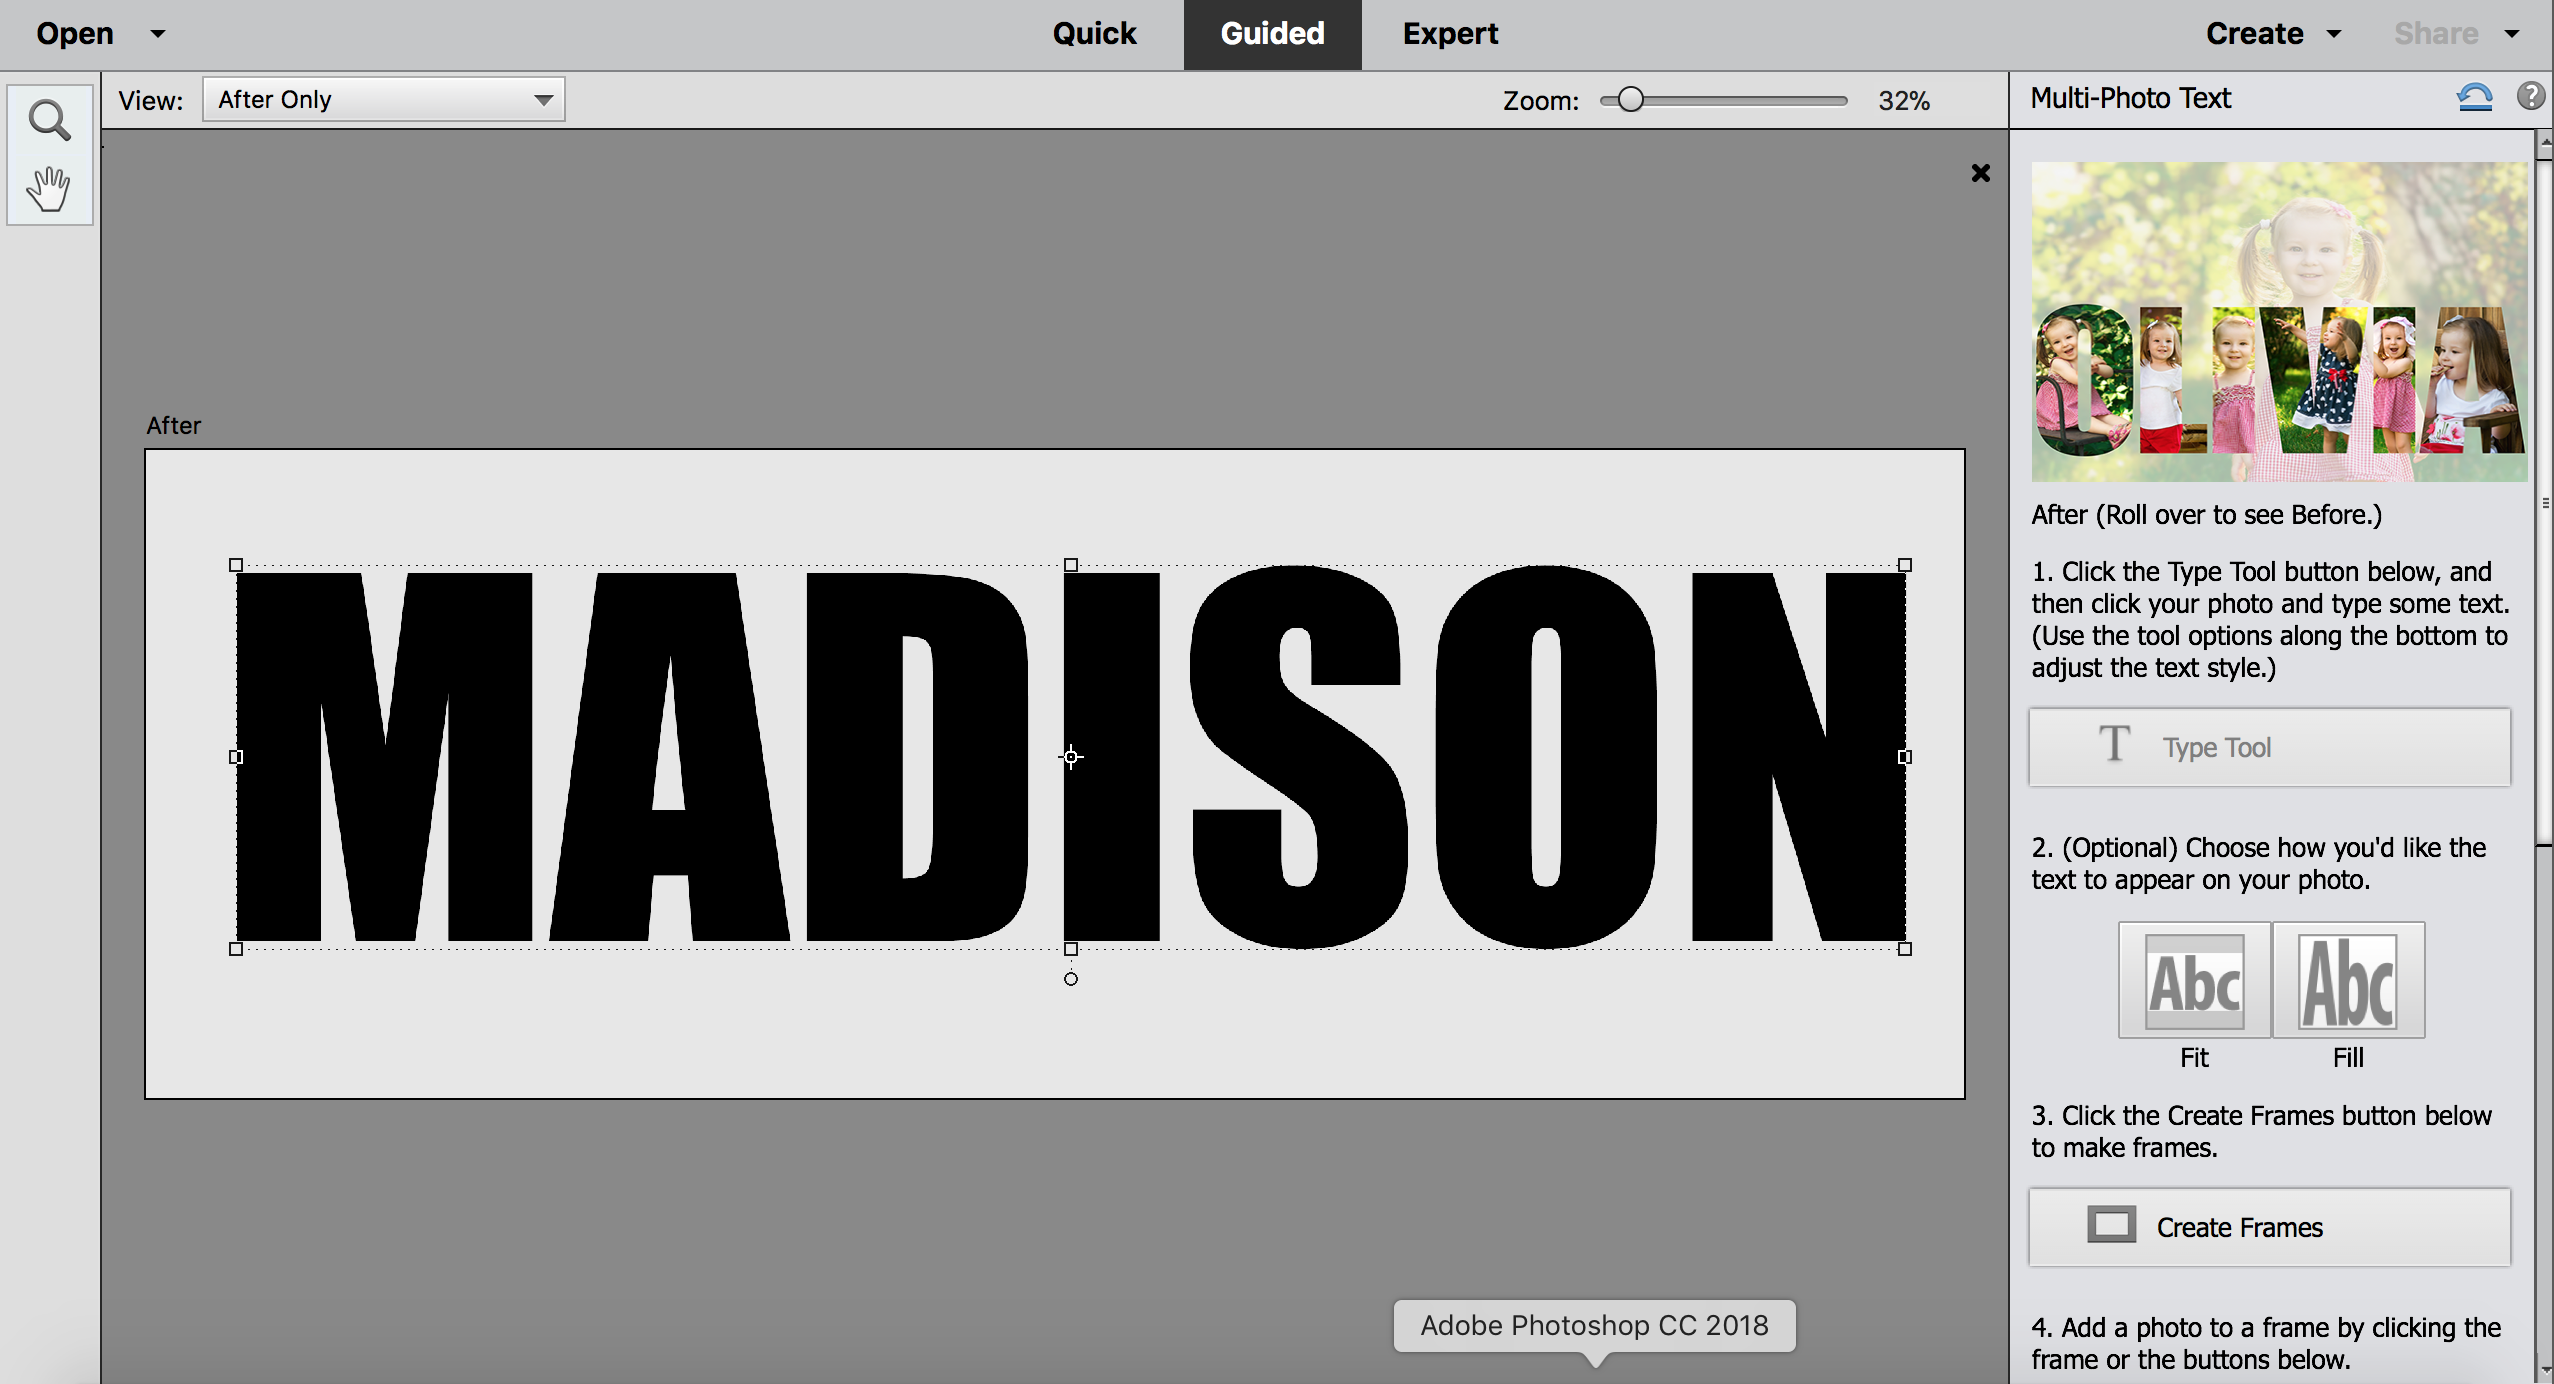
Next, click on “Create Frames” on the right hand side of the screen. This will turn each letter into a separate frame.
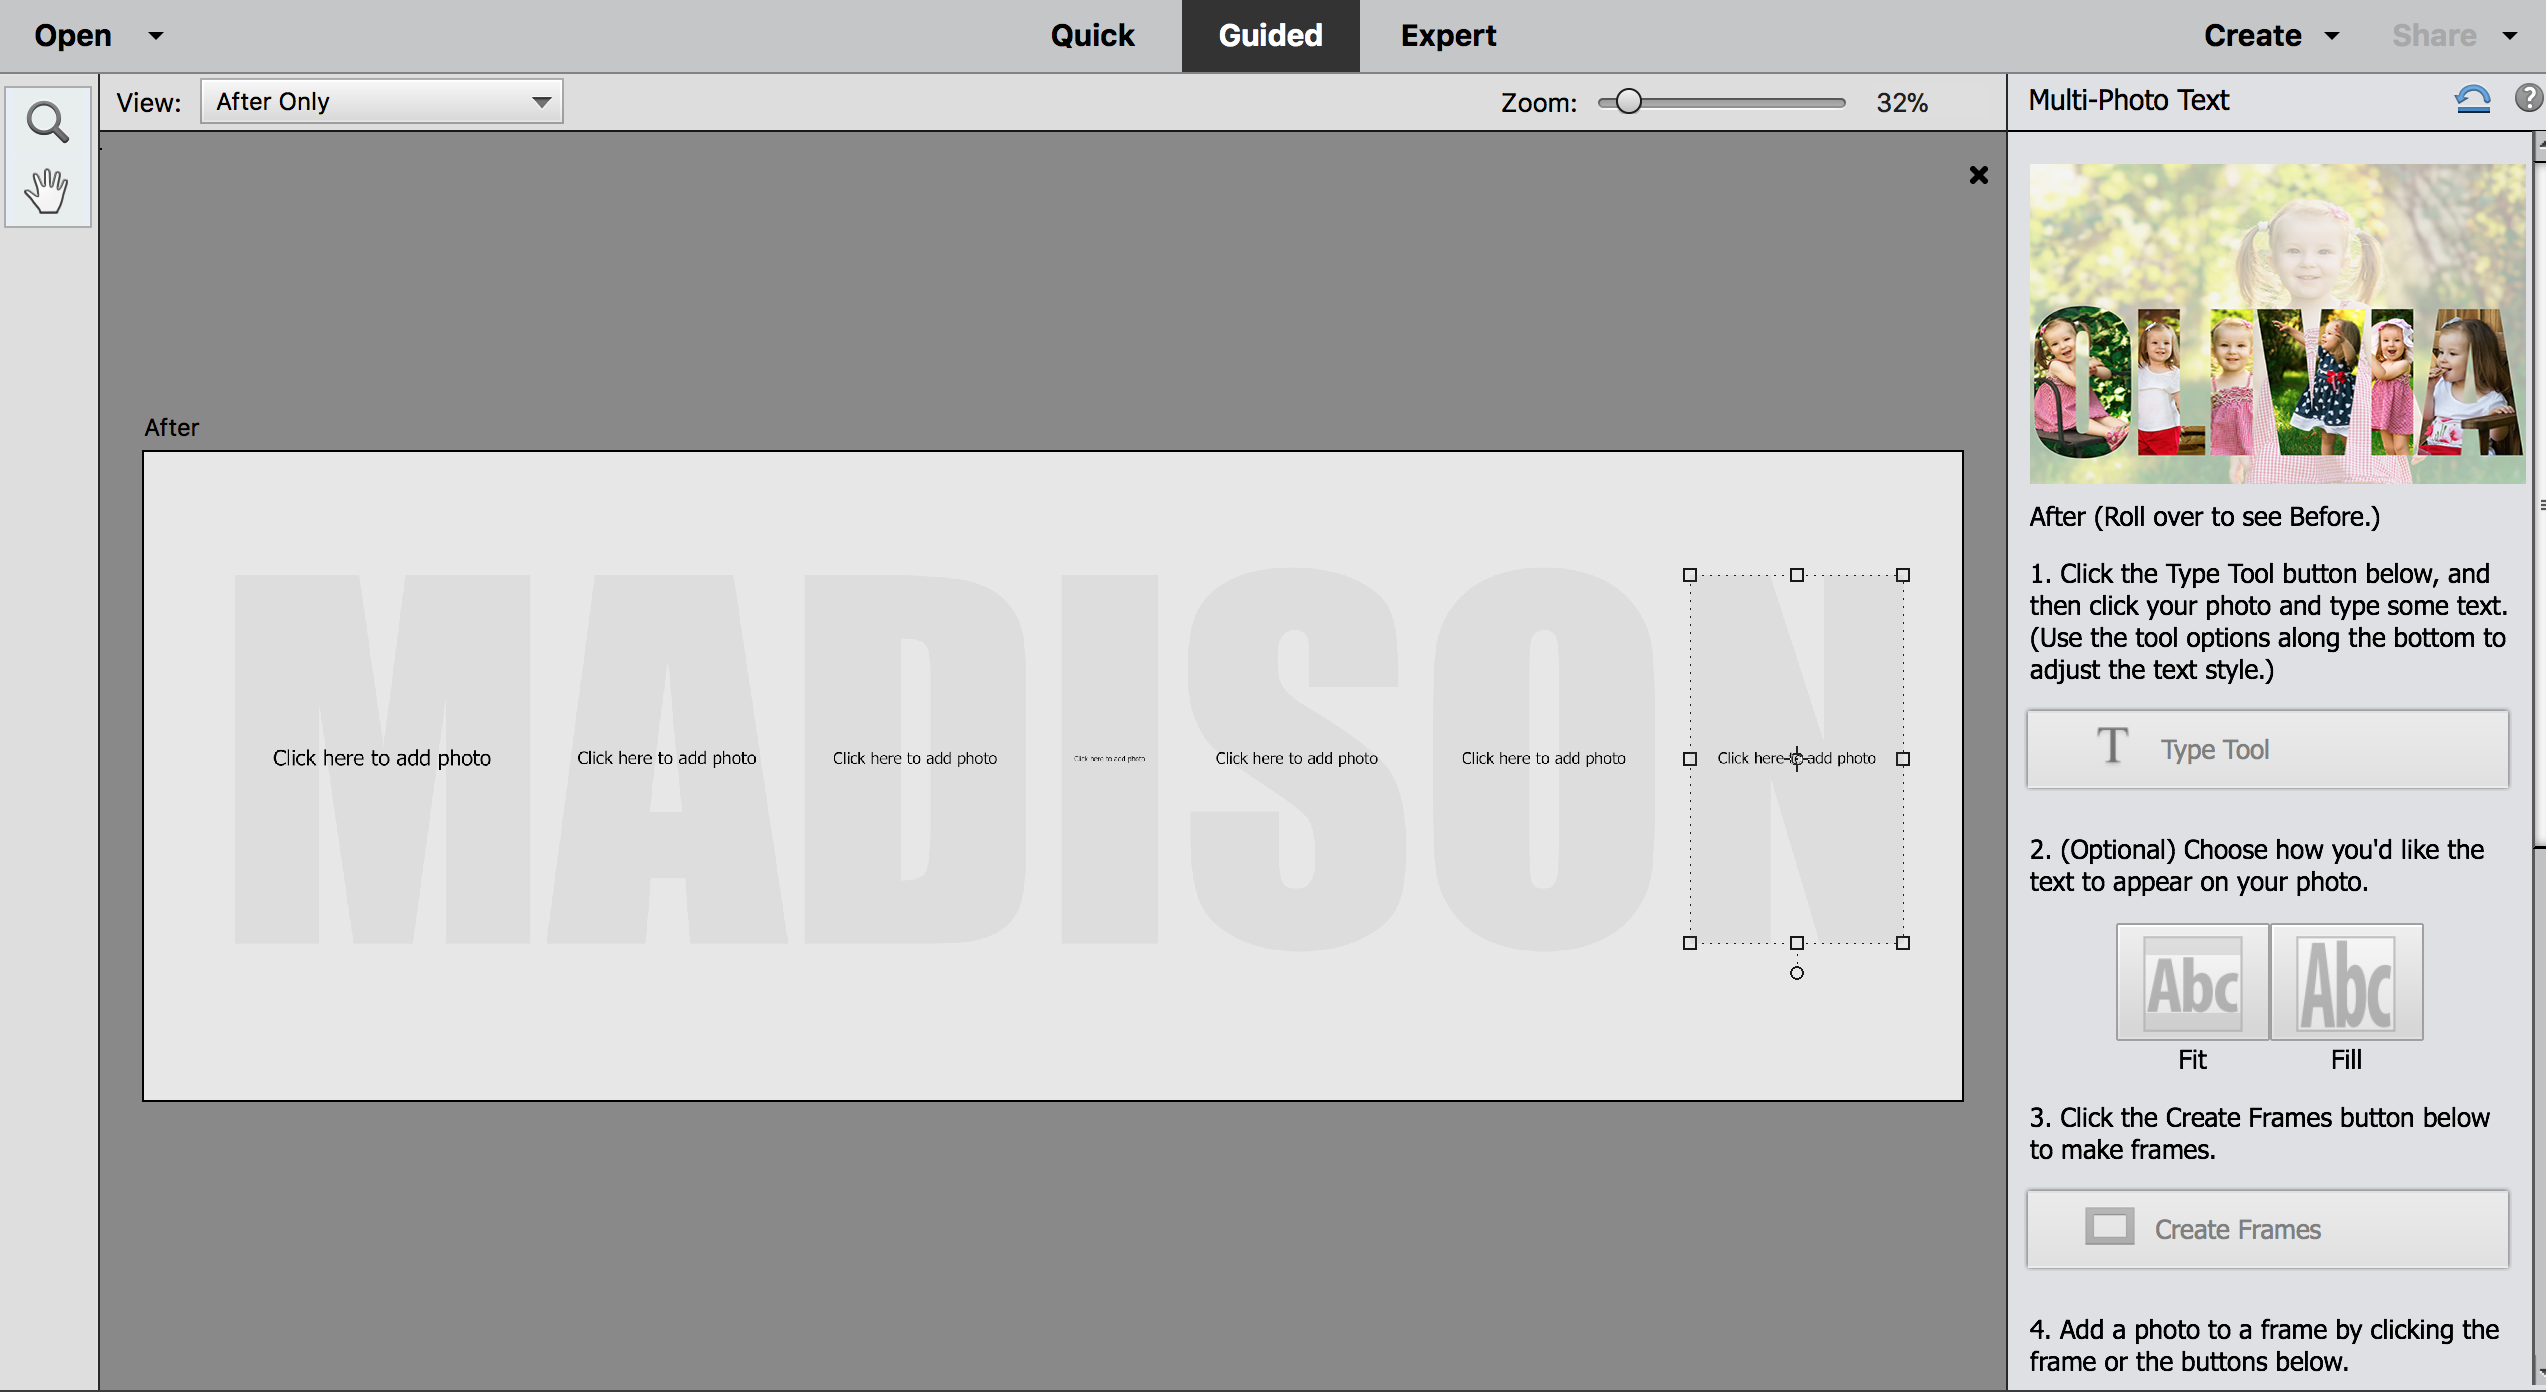
Click on the first letter and then click on “Computer” to add a photo. Navigate to where your photo is saved and open it. The photo will be placed inside the letter. Do this for each photo. You can edit the photo within each letter by double clicking on it. This will allow you to resize the photo or move it around in the letter. If you would like to change the background color of your wrapping paper, click on the “Color” button and choose a color. Click “Next” and save this image as a JPEG.
HOW TO PRINT YOUR PERSONALIZED WRAPPING PAPER
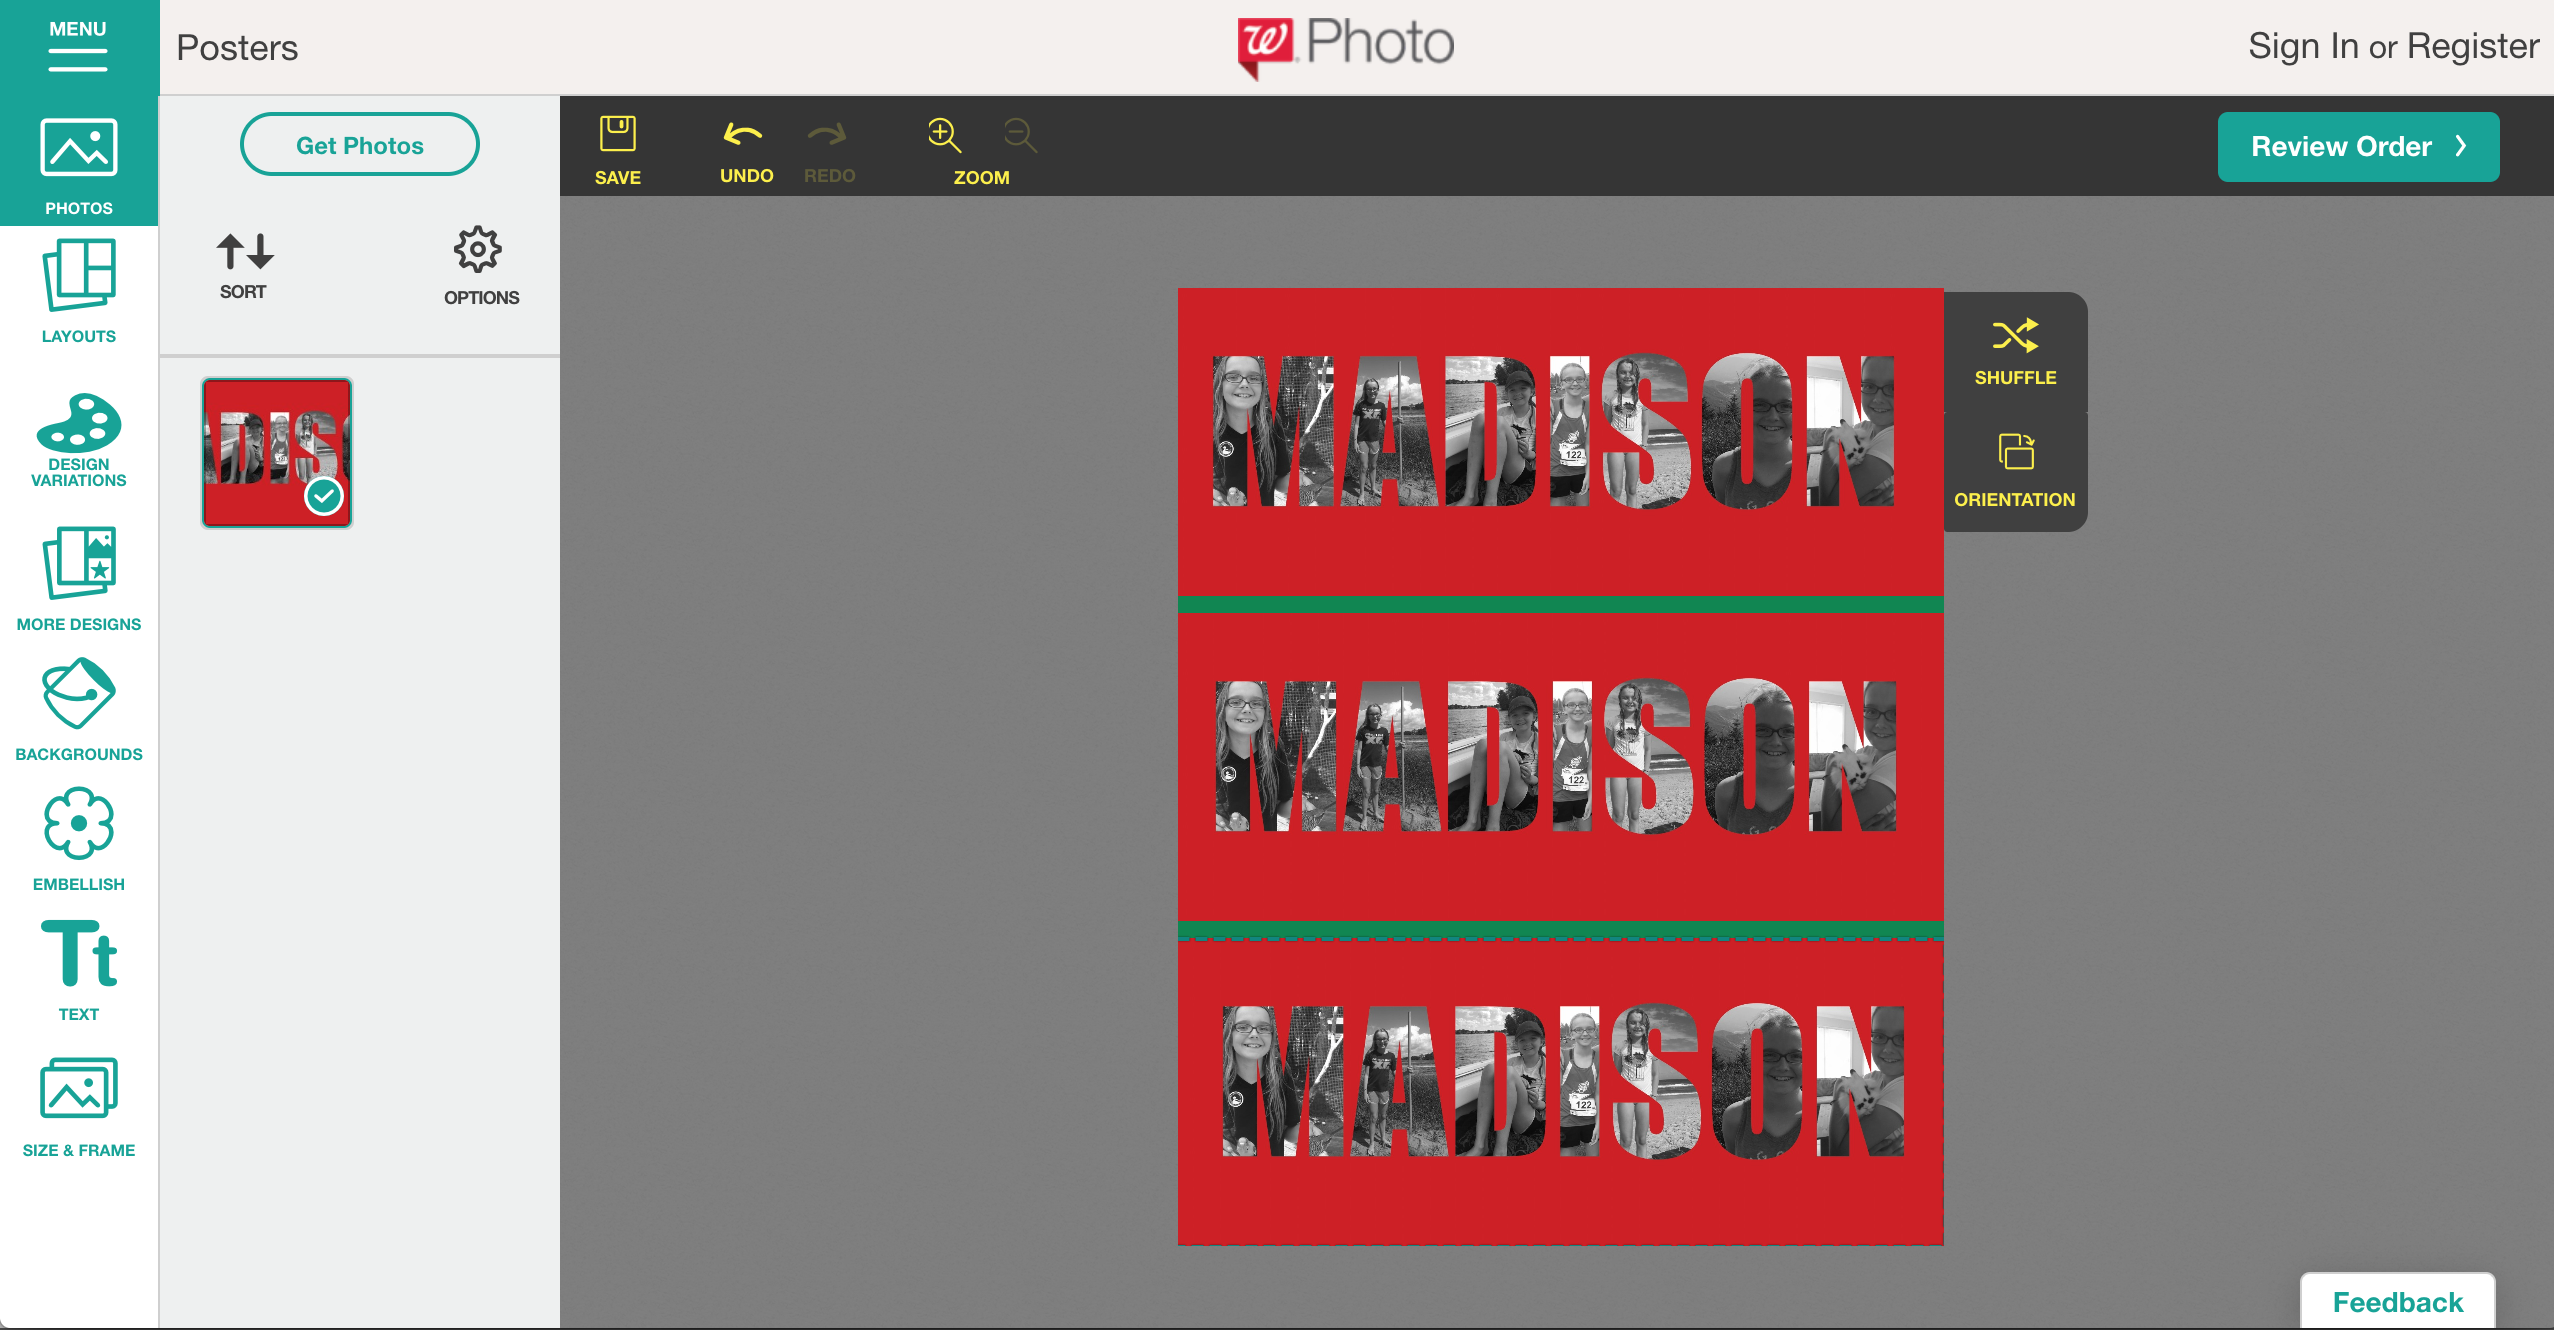
When I think of anything personalized, I think of extra long processing and shipping times. But I found the perfect solution to get your personalized wrapping paper printed FAST. Remember when I said I was sizing my file to print as a poster? Did you know Walgreens has same day pickup for posters? Me neither until I went searching for a good way to get this printed. Upload your design to Walgreens as a poster. I recommend a 16×20. There are several layouts to choose from. I chose the layout below and my design fit nicely onto it in three rows. The green stripe that you see between each row was added in the Walgreens app and not in PSE.
One sheet of 16×20 was just enough to wrap one small gift box.
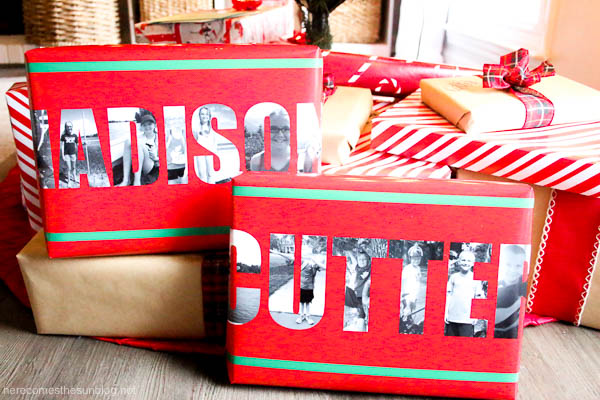
The first and last letters of the kids names folded over the ends so if I make personalized wrapping paper next year, I’ll be sure to leave a little room on the sides so the entire name fits on the front of the box. I just love how these look under the tree. I’m sure the kids will be excited to see photos of themselves on their presents!


LOVE IT? PIN IT!
YOU MAY ALSO LIKE
10 Creative Ways to Wrap a Gift
How to Make a Gift Tag with a Silhouette Machine
10 Printable Christmas Gift Tags
Washi Tape Gift Tags
Printable Christmas Gift Tags