
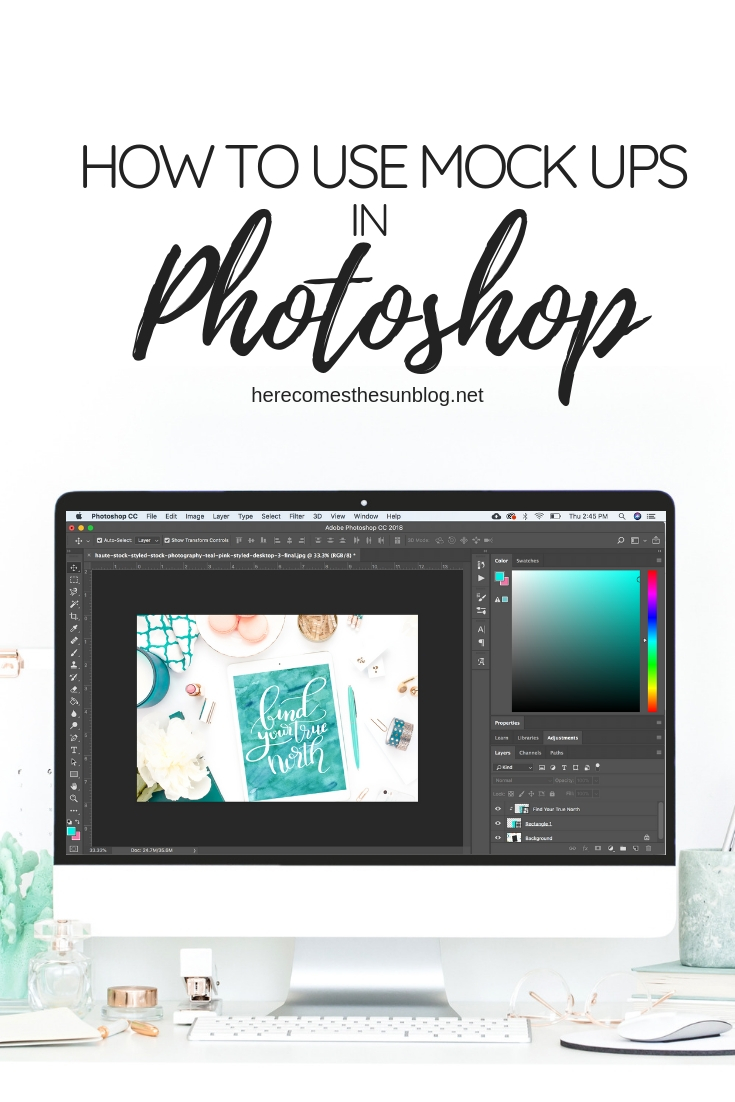
How to Use Mockups in Photoshop
Learn how to use mockups in Photoshop to show off your beautiful designs.
I use mockups in almost every post that I write to create staged photos of my digital designs and hand lettering. Mockups are great to use if you have limited photography skills and they are an easy way to present your designs in a professional looking way. Today I’ll be showing you how to use mockups in Photoshop.
WHAT IS A MOCKUP?
A mockup is a staged photo that you can overlay designs onto. Mockups showcase your designs in a real-life setting but you don’t have to create the real-life setting yourself. They are useful if you need to create “scenes” containing your artwork. They can also be used for branding or to create promotional photos.

WHERE TO FIND QUALITY MOCK UPS
The mockups that I use on this site and in my Etsy shop come from:
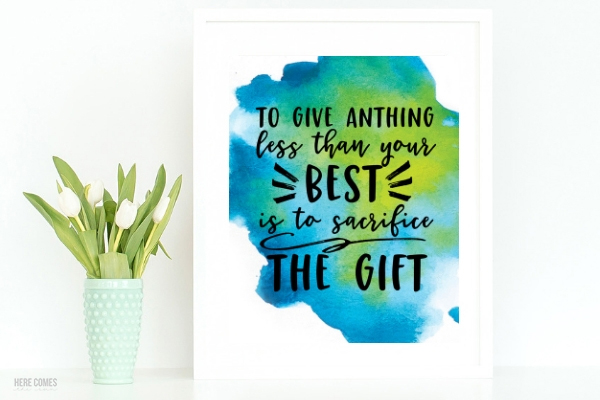
- Haute Stock – Haute Stock is a subscription service where you get access to an entire library of photographs. They release new collections every month. The mockups are feminine and are good for small business owners and lifestyle bloggers. Here are some examples of photos I created using mock ups from Haute Stock:

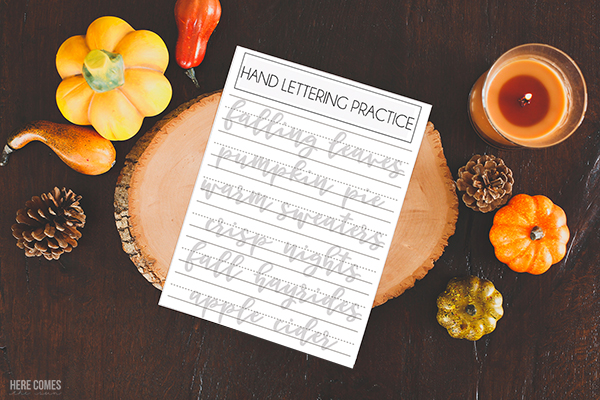
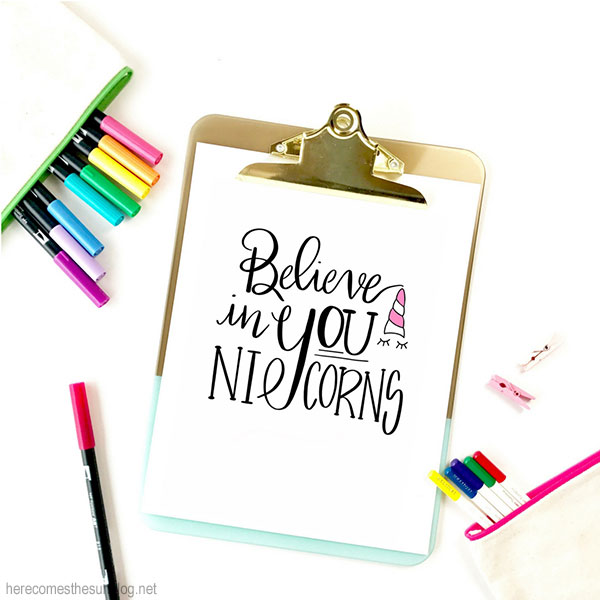
- Dawn Nicole Designs – Dawn is a blogger friend of mine and she gives away free mockups if you sign up for her emails. Here are some examples of photos I created using mockups from Dawn’s collection:
- Creative Market – Creative Market is an online marketplace where you can find almost anything related to digital designs. They have great bundle deals where you can get a LOT of items for a super discounted price.

You can also find free mock ups online but sometimes it takes a while to sift through things to find exactly what you need and always be sure to read the license terms. Most free items are not licensed for commercial use.
HOW TO USE MOCKUPS IN PHOTOSHOP
There may be several ways to use mockups in Photoshop but this is the way that I do it. This is not a tutorial for using mockups with smart objects. This tutorial will teach you how to use a mockup that comes in JPEG format. Please note that I work mainly with digital files. If you create artwork such as drawings, paintings or hand lettering using paper and pen/markers, the first step would be to either photograph your artwork or scan it into your computer.
-
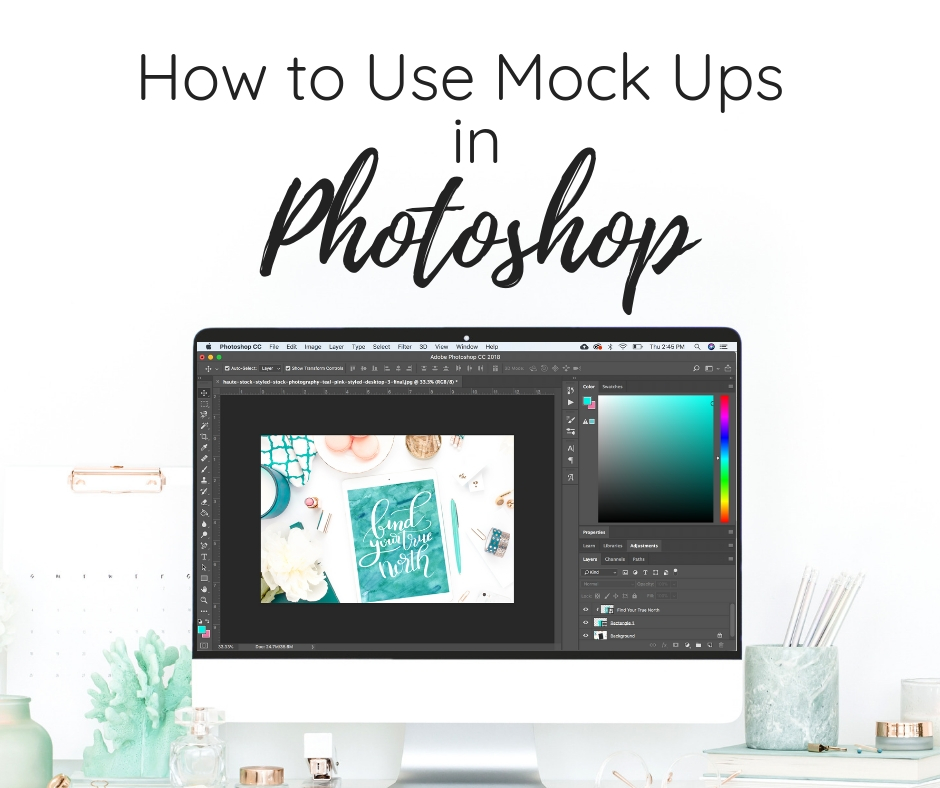
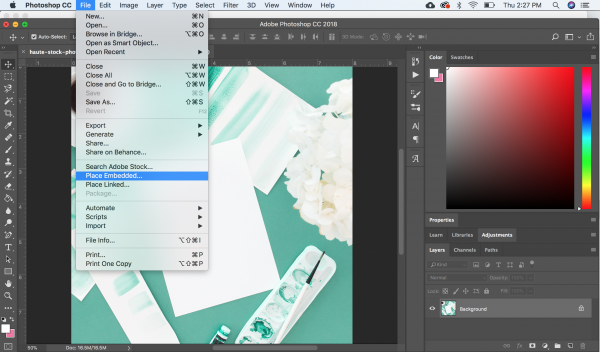
- Open up the mockup in Photoshop
- Click File>Place>Embedded and navigate to the file on your computer. Hit “Open”. Your file will show up as a new layer. Hit “Enter” to place the file.
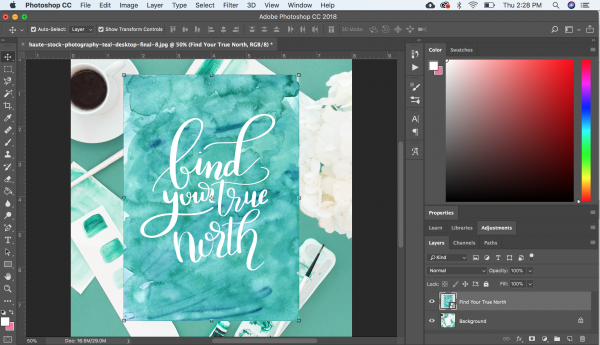
- Resize/rotate/move your file as needed. The easiest way to do this is to select your layer in the layer panel and then click and drag the corners to resize/rotate. Move your file by clicking on the “Move” tool (upper left side) and then click and drag your file.
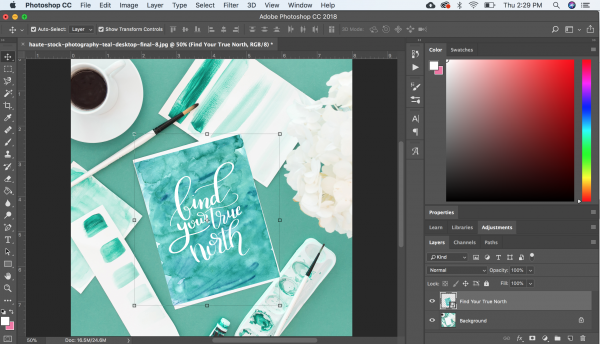
- Center your file over the area of the mock up that is designated for your artwork. In this case, it is the white piece of paper. If your image looks good, you can go ahead and save it. However, sometimes things don’t line up quite right after you resize and rotate like as shown below. If this is the case for you, read on for tips on how to fix this problem.
Want to use a mock up but don't know how? Get the easy tutorial here!
- Open up the mockup in Photoshop

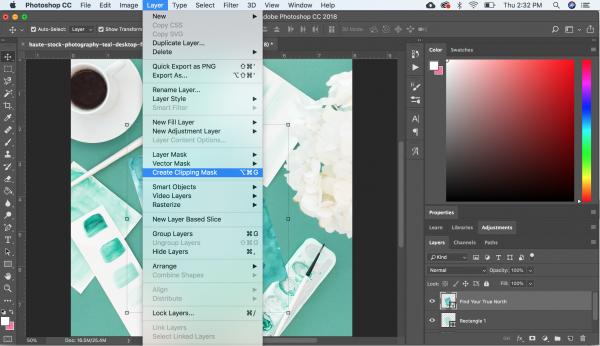
ADVANCED TECHNIQUE: CLIPPING MASK
If your artwork is not lining up exactly, you can use a clipping mask and/or layer masks to make it look correct on a mockup. Here are the steps to use a clipping mask:
- Follow steps 1-3, above.
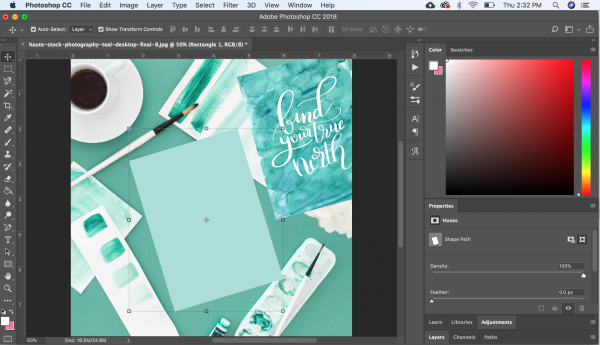
- Use the “Move” tool to move your artwork to the side.
- Using the “Rectangle” Tool, draw a rectangle (on a separate layer) over the spot where you want your artwork to be placed. Resize the rectangle to match the opening exactly.
- Move your artwork back to its original place so it overlays the rectangle that you just drew. Make sure the rectangle layer is below your artwork layer in the layer panel. Select the artwork layer in the layer panel and hit “LAYER>CREATE CLIPPING MASK”
You can see that the artwork now takes the shape of the rectangle and anything outside the rectangle has been “clipped”. If you are satisfied with how your design looks, you can save it and be done. But in this case, there is still a bit of overlap between the artwork and the paint tray that I want to take care of.
ADVANCED TECHNIQUE: LAYER MASK
To fix the spot where the artwork overlays the paint tray, create a layer mask. A layer mask is a non-destructive form of editing. Create the layer mask by clicking on the icon under the layer panel that looks like a rectangle with a hole in it.
The layer mask will show up as a white box next to the selected layer as shown above. Make sure that the layer mask is next to the rectangle layer. You can drag the layer mask up and down in the layer panel to move it.
Now all you need to do is use the paintbrush tool to “paint” on the portion of the image that you want to disappear. In this case, you will paint on the portion of the artwork that is overlaying onto the paint tray. Set the paintbrush color to black and make sure that the layer mask is selected in the layer panel. Then just paint over the area and the background will be revealed. If you mess up, all you need to do is “paint” over the area again using white and the artwork layer reappears. You aren’t deleting/erasing anything, you are just masking the layers to reveal the background layer.
And there you go! Your artwork is now displayed beautifully and you can use the images in either an online shop, your website or wherever else you want to display them.
Here is another image I created using a mockup. I created this one using the clipping mask technique but did not have to use a layer mask because there weren’t any items that were overlayed onto the tablet screen.
I’m planning on having a video tutorial up soon if you learn better through videos. I find that it is easier for me to learn by watching the process happen in a video.
LOVE IT? PIN IT!
YOU MAY ALSO LIKE
5 ESSENTIAL PHOTOSHOP TOOLS I CAN’T LIVE WITHOUT
HOW TO CREATE CLIPPING MASKS IN PHOTOSHOP ELEMENTS
HOW TO USE THE BRUSH TOOL IN PHOTOSHOP ELEMENTS


That’s very useful. Thanks a lot for this info.
Been trying to create a mockup tutorial and this helped a lot.