
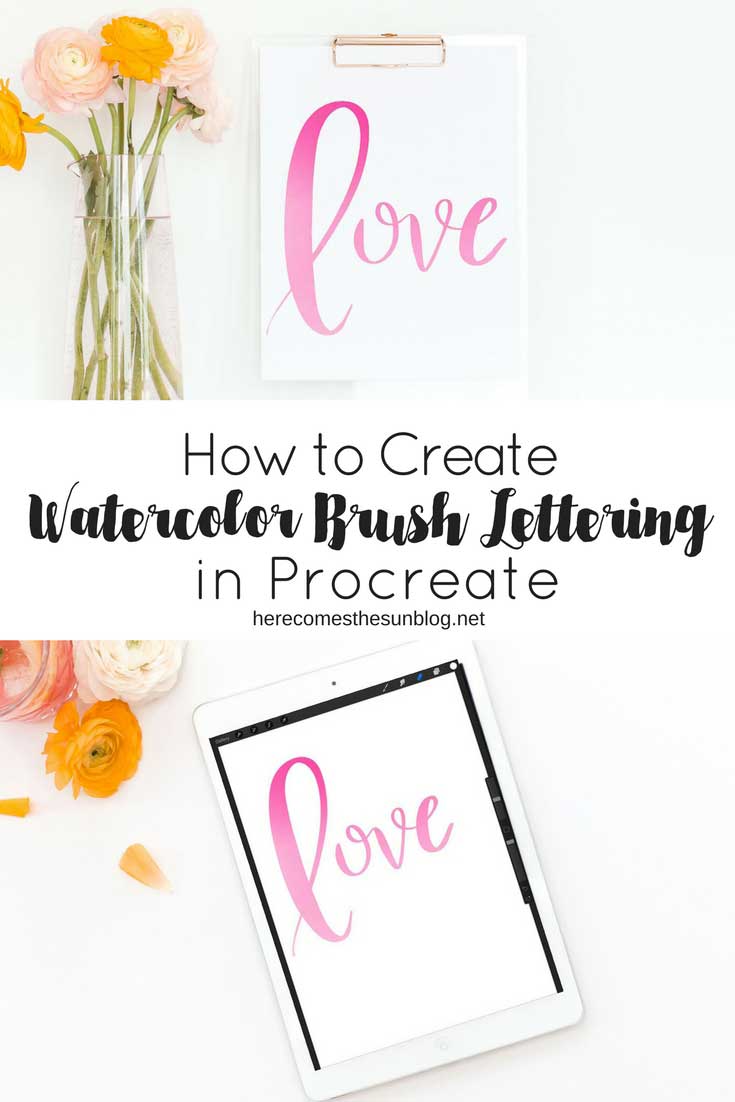
How to Create Watercolor Brush Lettering in Procreate
Learn my secret to create watercolor brush lettering in Procreate
If you don’t know by now, I’m obsessed with my iPad Pro. Specifically a little app called Procreate. I do most of my hand lettering on this app and today I wanted to show you how to create watercolor brush lettering in Procreate on the iPad Pro.
There are probably many ways to do this and I am no expert but this is the way I have learned and most importantly, it is easy. And you don’t need to purchase any special procreate brushes. Everything that I’m going to teach you is included in the Procreate app. Ready? Let’s get started.
HOW TO CREATE WATERCOLOR BRUSH LETTERING IN PROCREATE
If you are not familiar with how to hand letter on the iPad Pro, you can head over to this post to check out my process. You can also find some basic lettering practice sheets here if you want to practice with pen and paper first.
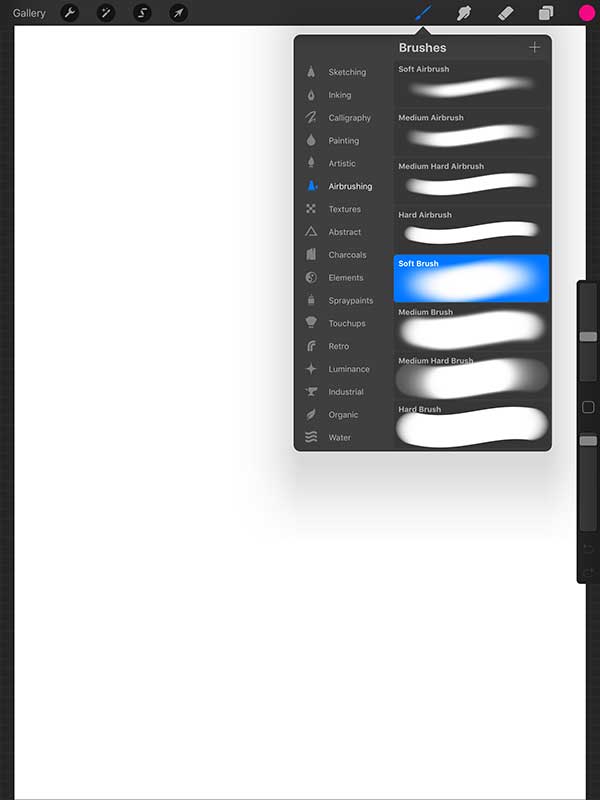
- Open a new file (it doesn’t matter what size). Under the BRUSHES menu, choose AIRBRUSHING > SOFT BRUSH. We are going to use this brush to create a “watercolor” background like in the photo above.

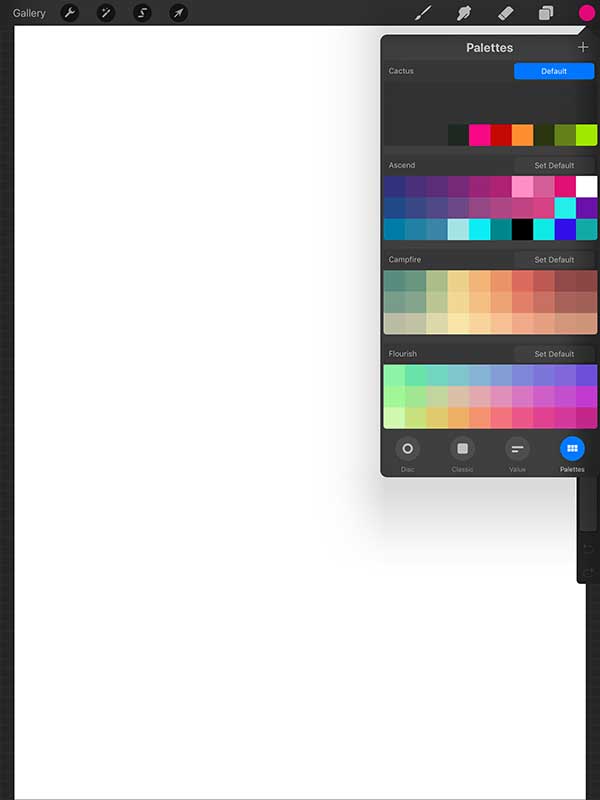
- Choose a color and size for your brush. I’ve chosen a bright fuscia. I like to size my brush pretty big. Increase/decrease the size of your brush with the slider on the right.
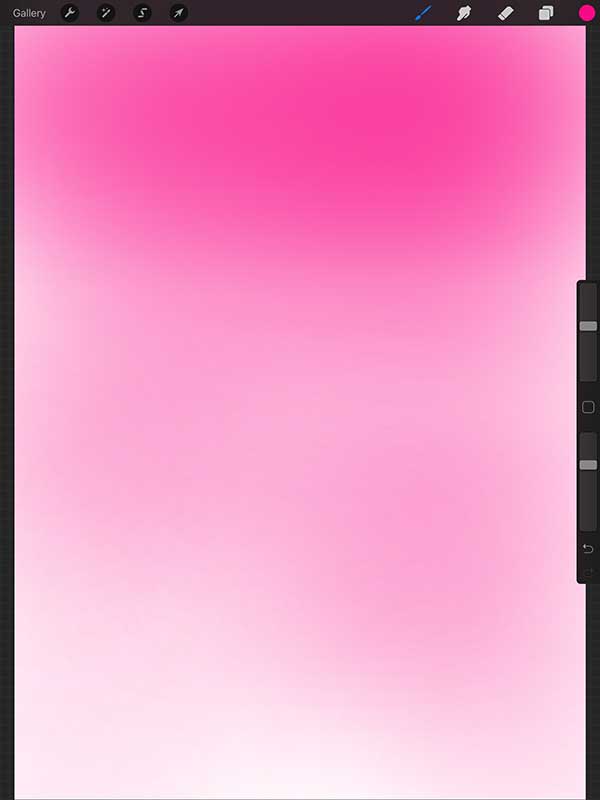
- Paint the top third of your document with your chosen color. The harder you press, the darker the color will be. You want the darkest shade to be at the top for the ombre effect.
- Paint the middle third the same color but don’t press down as hard. This will give you a lighter version of the same color.
- Repeat the process for the bottom third, pressing even lighter.
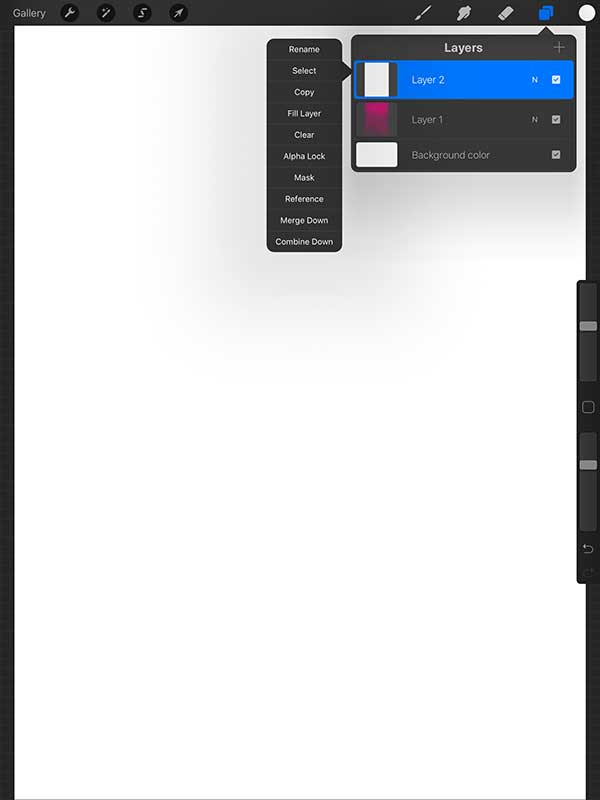
- Add a new layer and make sure the fill is set to white.
- Choose the eraser tool and pick CALLIGRAPHY > BRUSH PEN. Adjust the brush pen size with the slider on the right.
- Hand letter your phrase, making sure the white layer is selected. You are actually erasing the white layer to reveal the color underneath.
- If you make a mistake or are unhappy with your lettering, simply hit the undo button (the back arrow underneath the size and opcacity sliders).

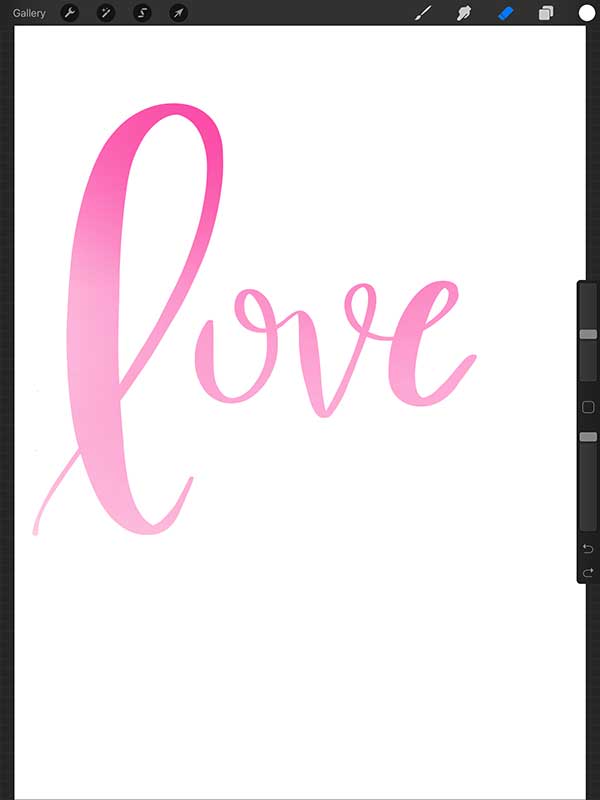
You now have a beautiful hand lettered print that has a watercolor look to it. I hope you enjoyed this Procreate tutorial and found it helpful. If so, please consider sharing it.
LOVE IT? PIN IT!
YOU MAY ALSO LIKE:
How to Hand Letter on the iPad Pro
How to Create Rainbow Lettering in Procreate
How to Use Hand Lettering Practice Sheets in Procreate