
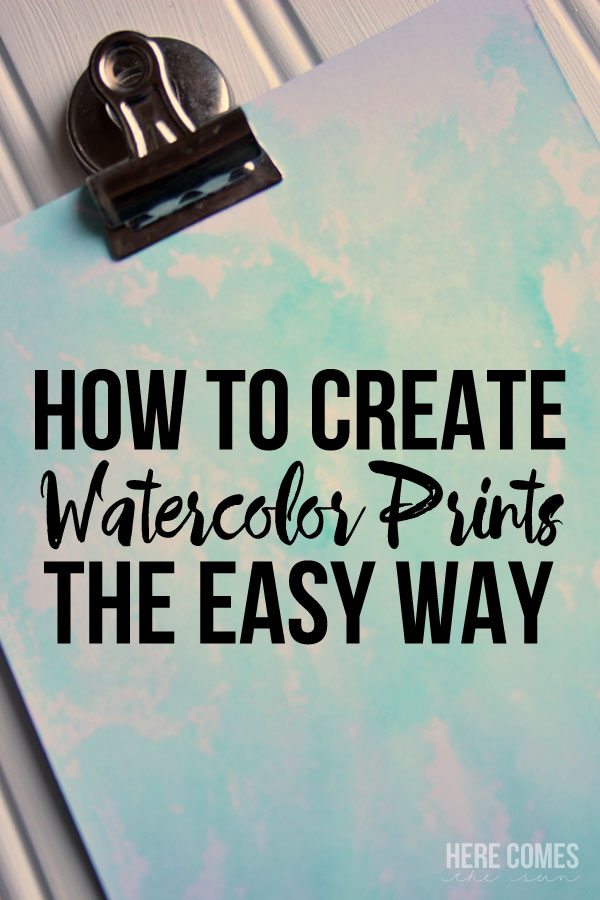
How to Create Watercolor Prints the Easy Way
You love to paint and you love the watercolor trend that is sweeping the craft world right now. But you aren’t a professional and you don’t know how people make their watercolors looks so beautiful. Sound familiar? Yep. Me too. I’ve tried for a long time to achieve the perfect watercolor look. But it just wasn’t happening. I was going to throw in the paintbrush until I learned a simple trick to create watercolor prints the easy way.
^^^PIN THIS SO YOU REMEMBER HOW TO DO THIS TECHNIQUE^^^
Again, I am not an expert at all. I will go ahead and classify myself as a total beginner in the watercolor department. But I still wanted to create beautiful backgrounds. And I needed an easy way to do it. If you follow me on Instagram you may have seen a few recent watercolor prints that I made.
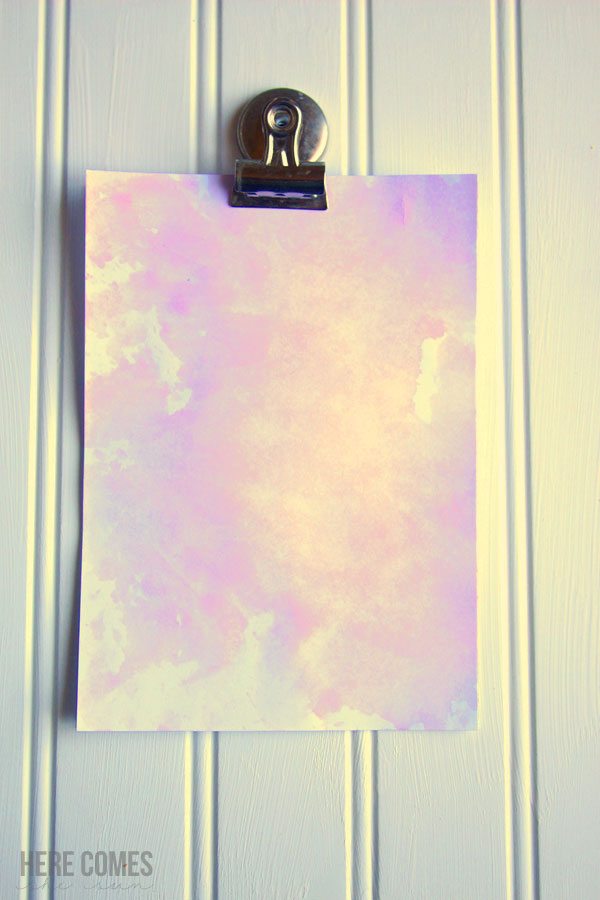
I really love this one. The saying really encompasses all that is “me”.
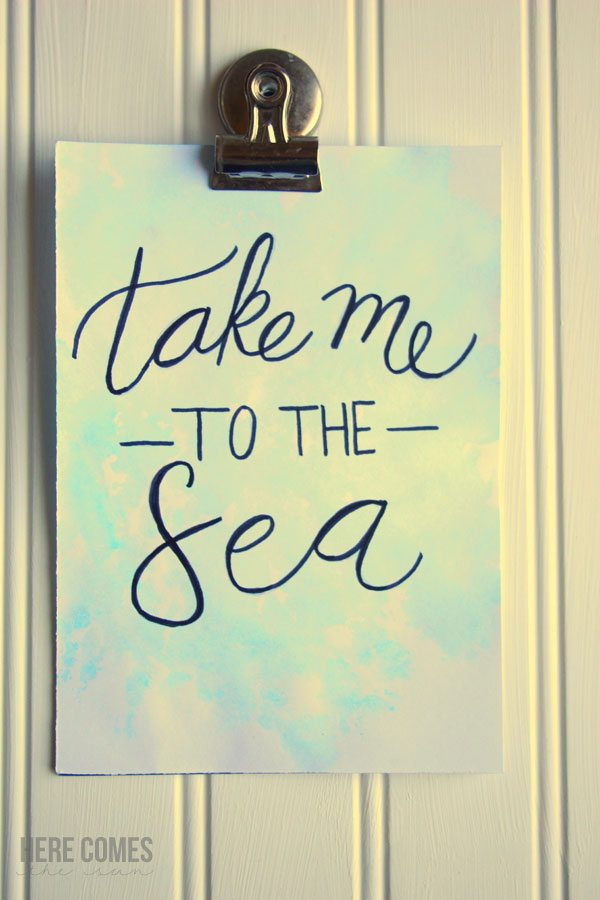
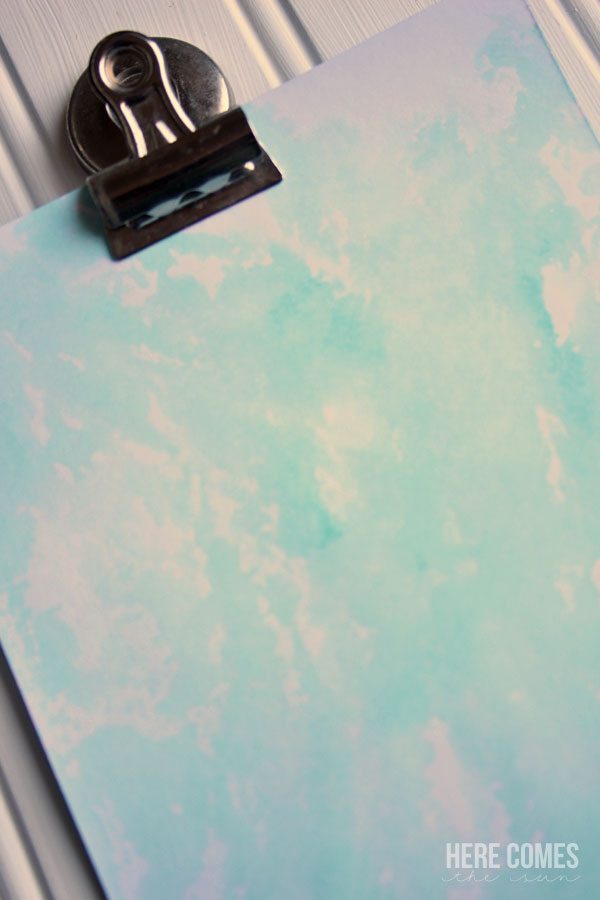
And here is another one I made the other day.

I’m going to let you in on a secret. I don’t really “paint” the paper at all. You heard me… a brush never touches the paper. And no, my fingers don’t touch the paper either.
Wait, what?
Is it digital, you ask?
Nope.
HOW do you paint with watercolors then without the brush touching the paper?
Easy.
You use plastic.
PLASTIC?
Yep. Plastic.
I first learned this technique from my friend Amy at One Artsy Mama. She uses Tombow Brush Markers (aff. link) to create her art but we are going to use actual watercolors. Either way, the technique is the same.
HOW TO CREATE WATERCOLOR PRINTS
SUPPLIES
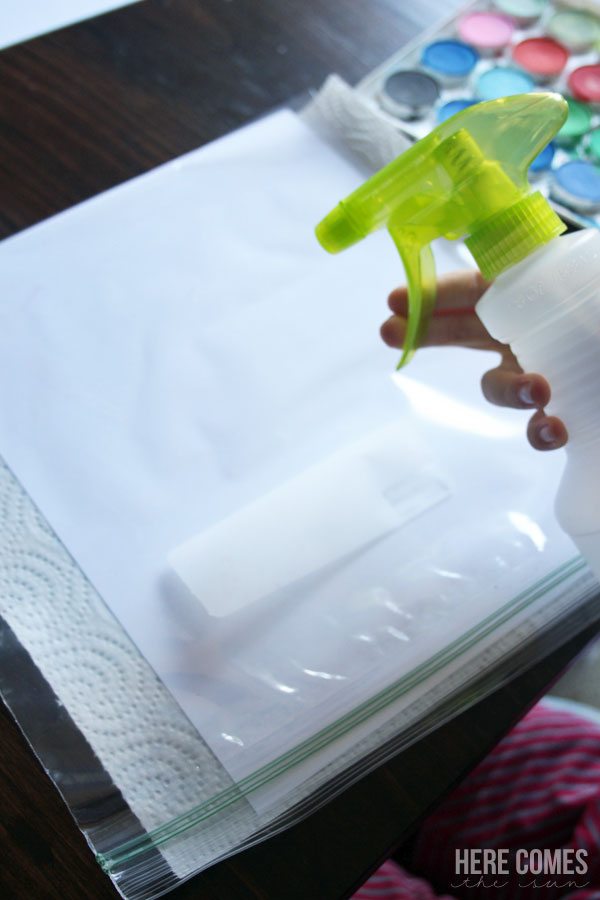
Plastic Ziploc bag (gallon size)
Spray bottle
Watercolors
Brush
8.5″ x 11″ Paper
DIRECTIONS
- Lay your plastic bag out flat and spray water onto it.

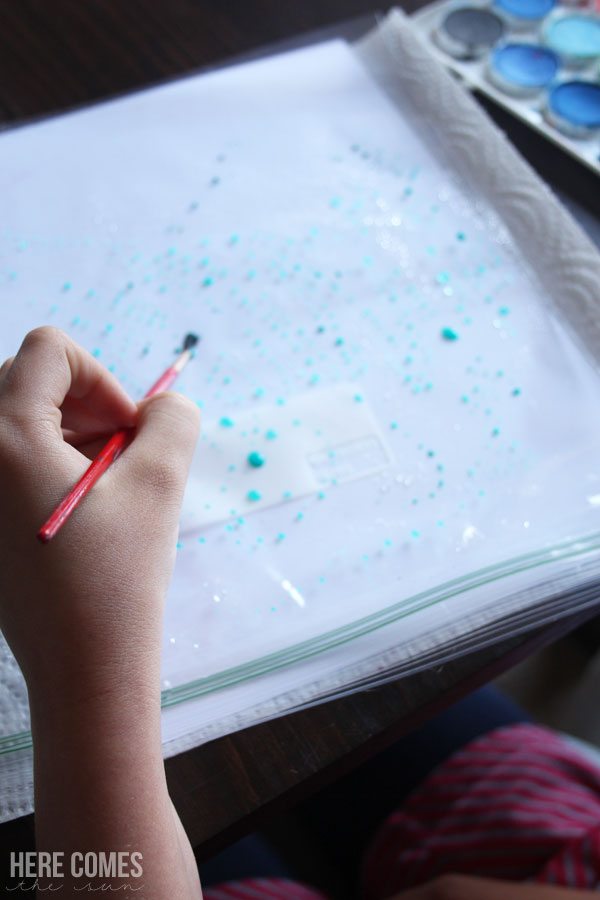
- Next, paint onto the plastic. This works best with one color but feel free to use as many as you want. The paint will bead up into little drops.
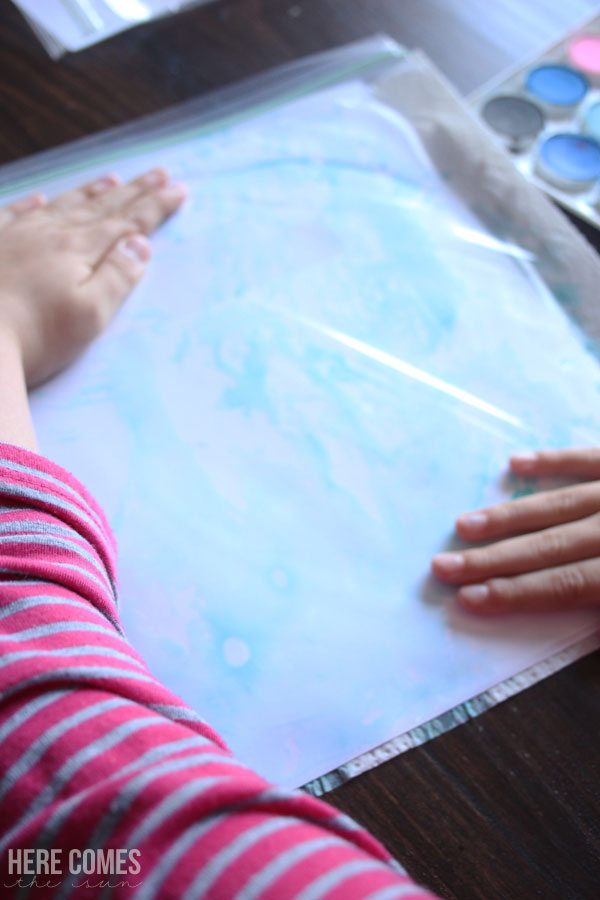
- Take your piece of 8.5″ x 11″ paper and place it down on top of the plastic. Holding the paper and plastic bag together, flip them over so the plastic is on top.
- Use your hands on top of the plastic to smear the paint around.
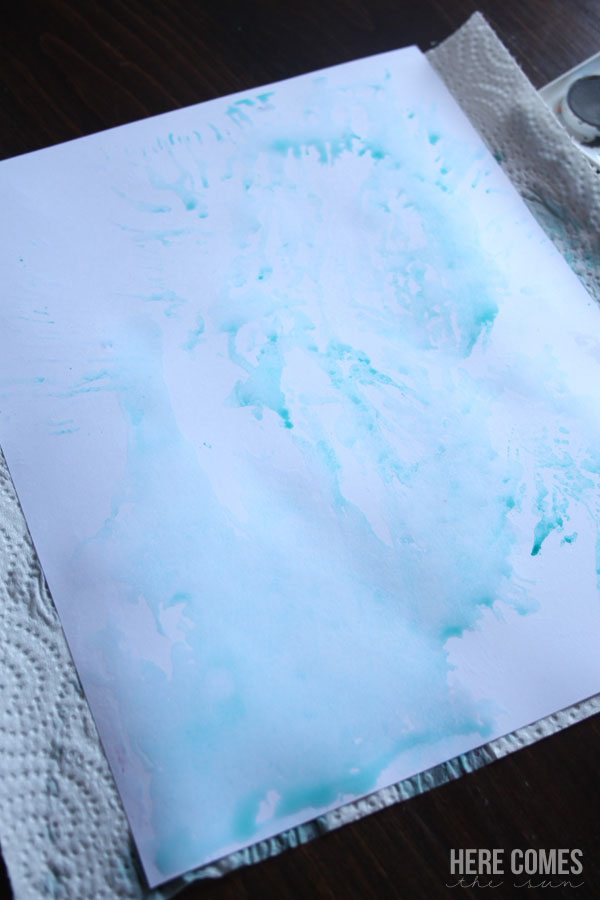
- Pull back the plastic and you have a beautiful watercolor print.
How AMAZING is that? This method is so awesome because it takes a fraction of the time that “real” painting takes. You can “smooth” out any drips by placing the plastic bag back over the paper and running your hands over it to get rid of drips. My kids and I can whip up a gazillion of these in a a short amount of time. It’s our new favorite thing to do.
I’m so excited about this method of “painting”. It has opened a whole new world to me when it comes to design. I’m even considering adding prints like this to my Etsy store along with my digital designs.
Now that you know my secret for creating watercolor prints, what’s the first color print you are going to make? Remember… no professional experience needed!
If you like this post, be sure to check out my Watercolor Spring Printable.
Subscribe to my emails and get tips, tutorials and more delivered to you inbox every week! Just enter your info in the box below.
This is such a unique idea!! I want to try this with a bunch of different things now!
https://www.etsy.com/shop/BoundlessJoyStudios
What a great idea! I’ve been trying to make my own watercolor backgrounds from scratch but I don’t quite have the eye for it yet… Thanks for the tips! 🙂
Kim | simplylovebirds.com