
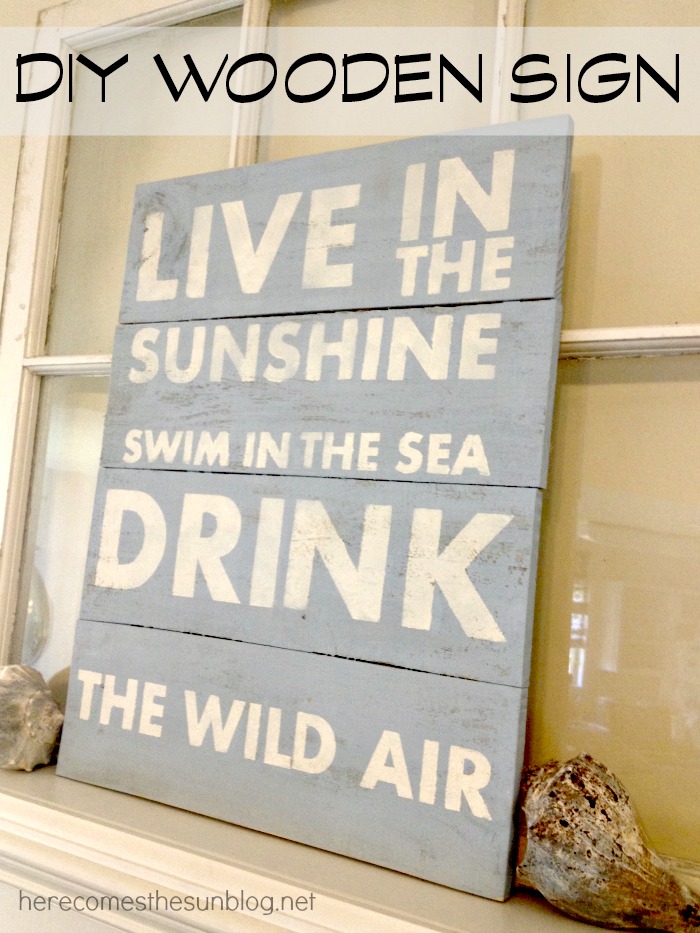
How to Make a DIY Wooden Sign
I love of signs. Whenever I need to fill up a big empty wall space, I usually make a sign. I decided that I needed a new one for my decor so I made this DIY Wooden Sign.
This post contains affiliate links. You can read my disclosure policy here.
I’ve made signs before but I think this one is my absolute favorite. I tried to make one last year with this saying but it didn’t turn out like I planned. But this one turned out perfect.
DIY WOODEN SIGN INSTRUCTIONS
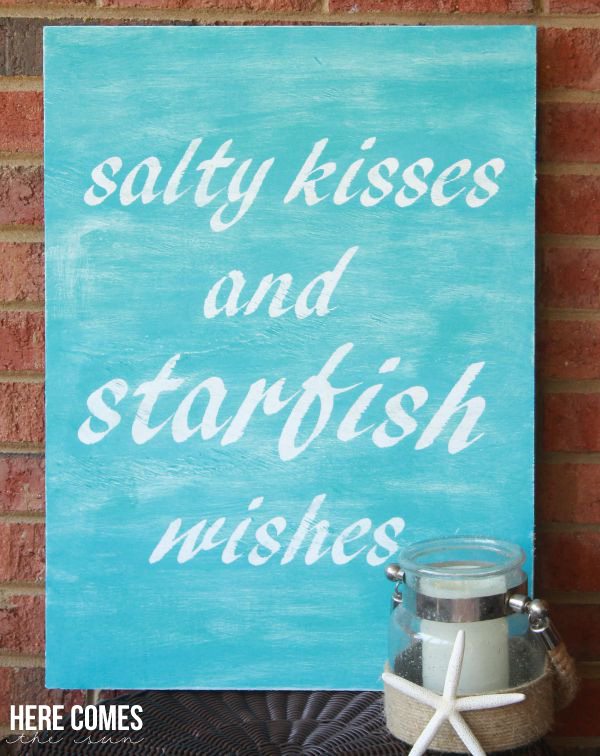
I used scrap wood for this project and cut it down to size. To hold the wood together, I attached three paint stirrers to the back of the wood. Drill pilot holes first and then put your screws in. I placed 3 screws in each paint stirrer. After I attached all the wood together, I sanded it with a palm sander and 120 grit sandpaper. This step (sanding) is optional as I will explain below.
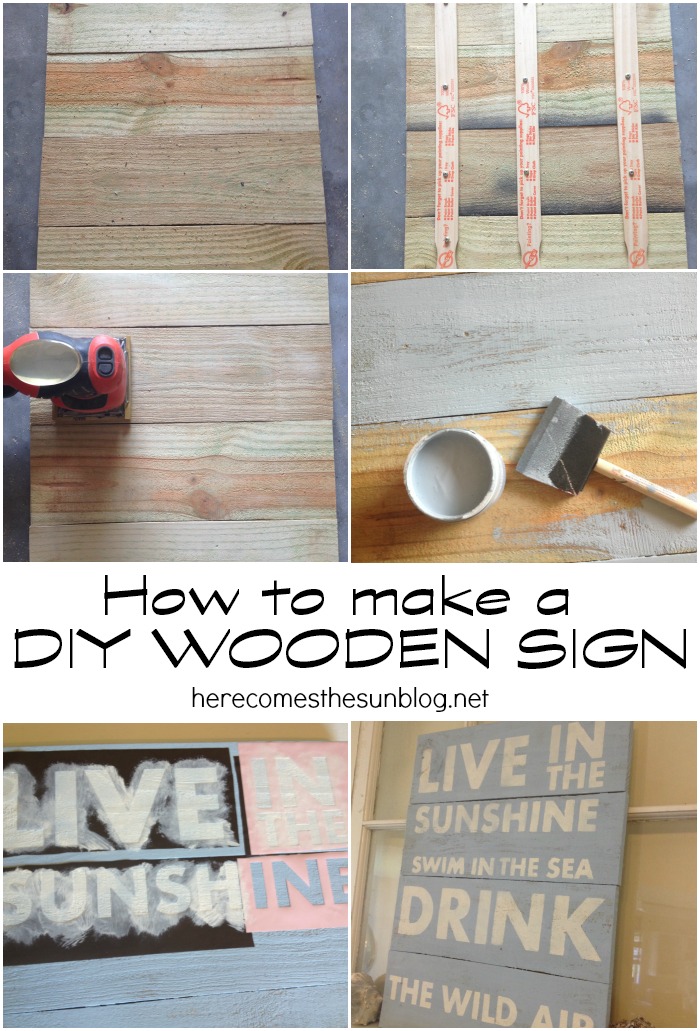
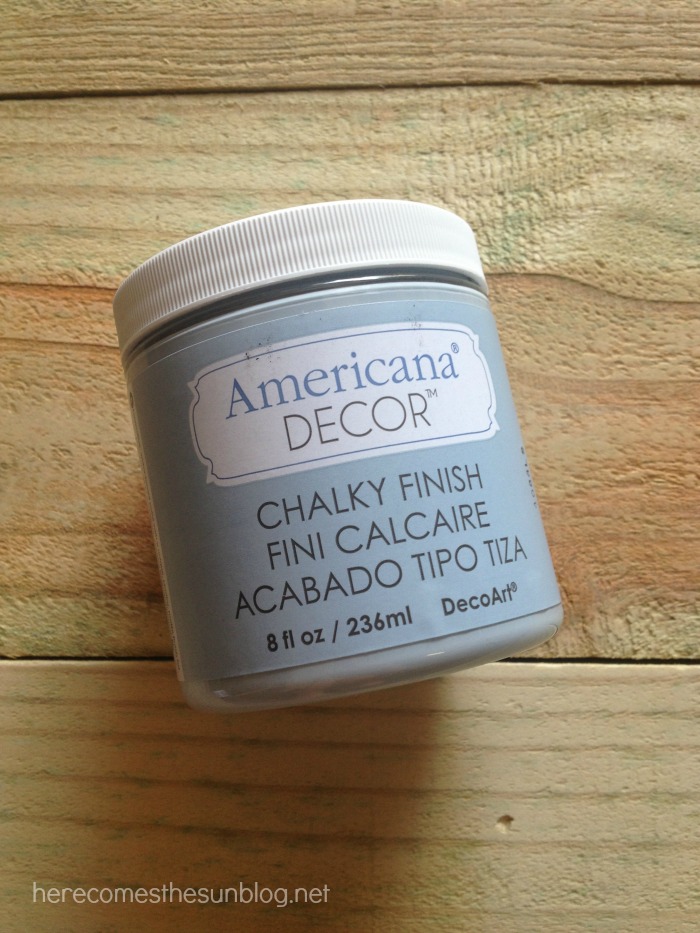
After sanding, I gave it a coat of DecoArt Chalky Finish Paint in Serene. This is the first time I have used this paint and I love it. It gave my sign a nice weathered look which is exactly what I was going for. The best thing about chalky finish paint? You don’t have to sand or prime the wood. I chose to sand it because I wanted a smooth surface but you don’t have to.
I created a stencil using my Silhouette cutting machine and vinyl, placed the stencil onto the sign and painted it with white paint.
Cost of this project: NOTHING! I used everything that I had on hand.
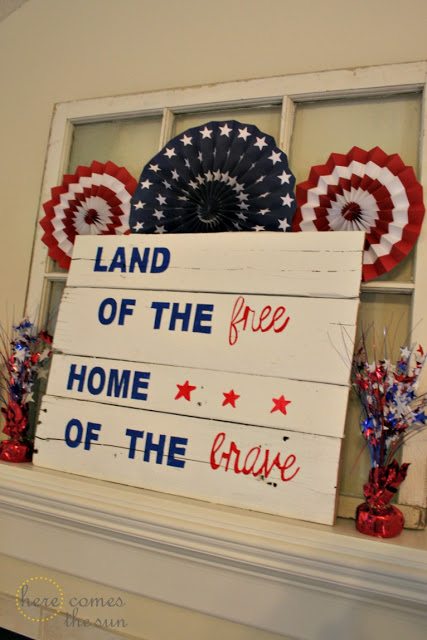
If you like this post, check out:
Love your signs can’t wait to try one out! Where did you find your rustic window behind your signs? I’ve been looking for one!
Thanks so much! I bought the window at a flea market a few years ago.
Thank you so much for show us to make this! May I ask if you seal it afterwards?
I did not seal it since I use mine inside. However, DecoArt makes a product called Soft-Touch Varnish that is made specifically for sealing chalky finish paint.
Very nice! How do you keep the paint from bleeding under the stencil?
To minimize paint from bleeding under the stencil, make sure to press the vinyl down well. Also, I paint from the outside in towards the middle of the letters so the paint is being pushed toward the middle of the letters and not under the stencil.
WHAT TYPE OF PAINT DID YOU USE FOR THE STENCILED LETTERS?
Hi Taylor! Thanks for stopping by. I don’t quite remember what type of paint I used. However, any white paint would work. I would suggest a flat/matte paint if you are going for the weathered look.
Love these!
Hello, this is the exact tutorial I’ve been looking for! What kind of vinyl did you use to make the stencil? I’m worried the vinyl I normally use would damage the paint job when I pulled it up (I believe it’s the permanent one though).
Thanks!
Hi Kayla.. I don’t recall what brand vinyl I used. However, just make sure that you use non-permanent vinyl. It will peel right off and not damage the paint job.
Thank you!
Hi Kelly, I’m trying to make some of these stencils but never know what the best font to use. I like the font you used in the DIY sign you made, May I ask what font it is? WE are also in NC. Moved NORTH to Mayodan, NC last year from raleigh.
Susan,
Unfortunately I do not remember the specific font that I used for the sign. I suggest using a font that is thick and chunky if you want to get the same look that I did. A good choice is IMPACT font.
Can you make these stencils using anything other then vinyl>Like a sticker paper or parchment paper?
Hi Heidi!
Yes, you can use other materials to make a stencil. I use adhesive vinyl so the paint does not seep under the stencil.