
How to Install Brushes into Procreate
Confused about how to install brushes into Procreate? This tutorial will show you how to do it step by step.
It’s no secret, I’m in love with the Procreate app for the iPad Pro. It’s where I do 99% of my hand lettering and I’m completely hooked. I’m in love with all the resources available for Procreate like brushes. There are some crazy talented brush designers out there and I just want ALL.THE.BRUSHES. The right brush can make or break a project. Want a watercolor effect? There’s a brush for that. How about a chalk effect? There’s a brush for that. Need some wispy hair strands or a neon sign look? You guessed it, there are brushes for everything. But how do you get all these wonderful brushes into Procreate so you can use them? Today I’m going to show you exactly how to install brushes into Procreate.
HOW TO INSTALL BRUSHES INTO PROCREATE
I have not yet ventured into creating assets for Procreate, although it is on my list of things to do this year. Since I haven’t learned how to create my own brushes, I’m always on the lookout for fun and unique brushes from other designers. Two of my fabulous brush designers are my friend Dawn at Dawn Nicole Designs and Holly Pixels. The brushes that I’m showing you how to install today are from these designers. There are two ways to install brushes into Procreate: install one brush or install a set of brushes all at once.
HOW TO INSTALL A SINGLE BRUSH INTO PROCREATE
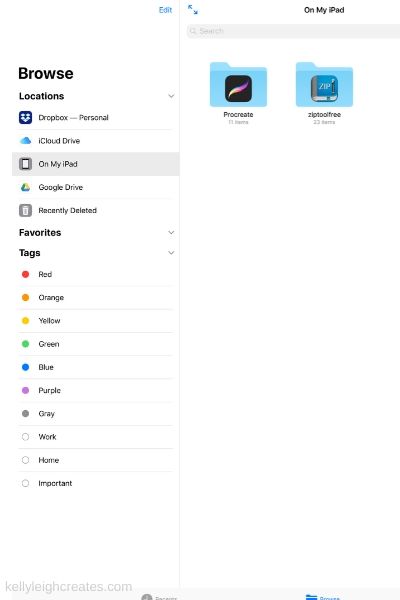
- Download the brush from the designer and save it to your iPad, DropBox or wherever you store your brush files.
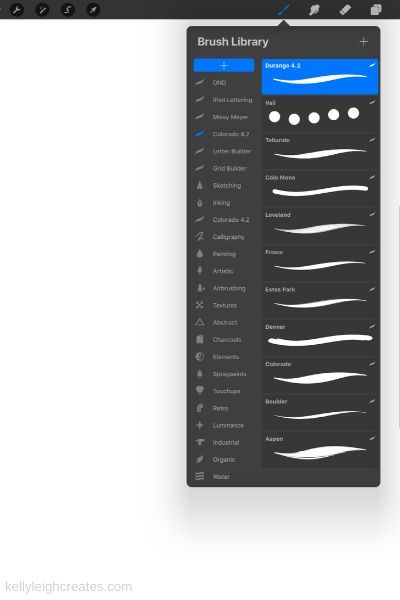
- Open the brush library and tap on the “+” sign in the top left to create a new brush set. I do this to keep all the brushes from one designer together. I named this set DND (for Dawn Nicole Designs). Make sure the new brush set is selected (it should be blue).

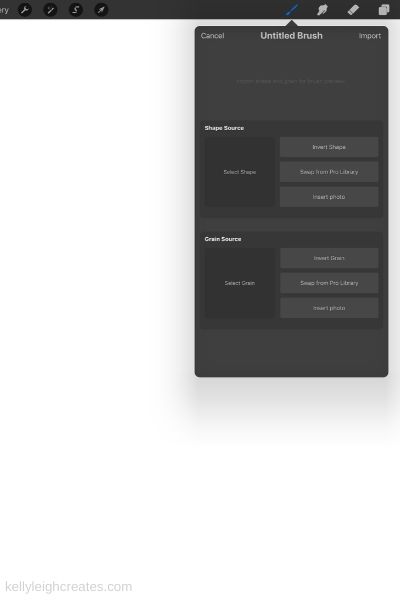
- Tap the “+” sign in the upper right to import a new brush
- This is the screen that pops up. Tap “import”
- Navigate to where you saved the brush
- Tap on the brush and it will automatically install in Procreate
- Your new brush will be at the top, in the new brush set that you created.

HOW TO IMPORT MULTIPLE BRUSHES INTO PROCREATE
If you purchase an entire set of brushes, they will probably come as a zip file. You will need an unzipping app to import a brush set. I use ZipToolFree to import procreate brushes from zip files.
- Download the brush set from the designer and unzip with the app.
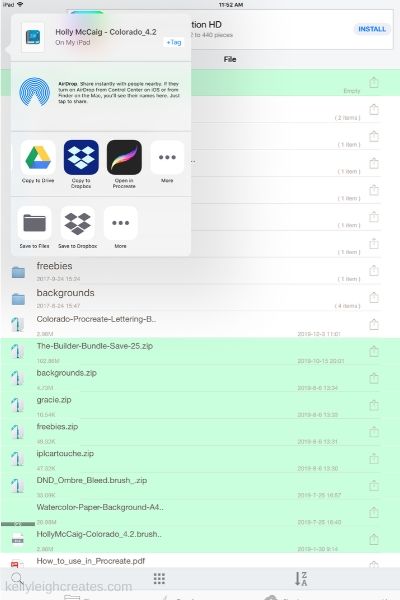
- While in the app, tap on the brush set file and tap “open in”
- A window will pop up. Tap “Open in Procreate”
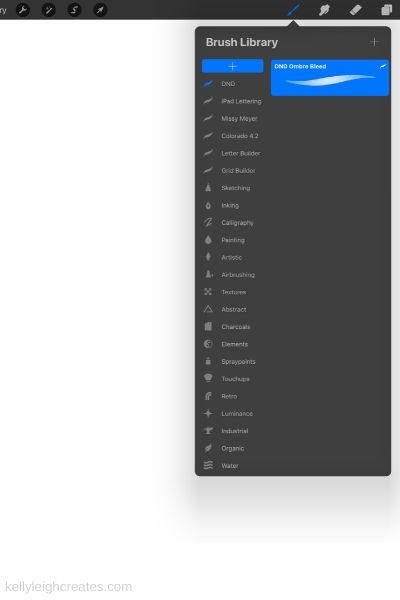
- Your brush set is now loaded and appears at the top of the brush library. The brush set in the example above is the Colorado set from Holly Pixels. I absolutely adore this set!
I hope this tutorial helped you better understand how to install brushes into Procreate.


LOVE IT? PIN IT

YOU MAY ALSO LIKE