
Preschool Desk and Chair Makeover: Chase the Star
This post may contain links to affiliate websites, such as Amazon and we receive an affiliate commission for any purchases made by you using these links.

Hi everyone! My name is Barbara from Chase the Star, a blog about decorating, DIY furniture renovations, crafting, and more, all on a budget. I’m such a big fan of Kelly’s so needless to say, I’m ecstatic to be a part of the Back to School Series here on Here Comes the Sun!
I recently updated a school desk and chair for my little boy! My son, appropriately named Chase, is old enough for Preschool, and I plan on homeschooling him this year.
I almost always shop second hand for furniture pieces, and try my best to use what I have in my crafting closet to make them over. A few months ago, I had scored some great pieces on Craigslist for free, including this wood chair, this Thomasville desk, and a little child size desk and chair set, that my son’s been using as a t.v. table. T.v. table no more, this little desk and chair is just the right size to start mastering the ABC’s and 123’s!

My plan is to teach him in what is now his playroom, so I wanted to stick to the fun whimsical look already in there.
 |
| Chase the Star |
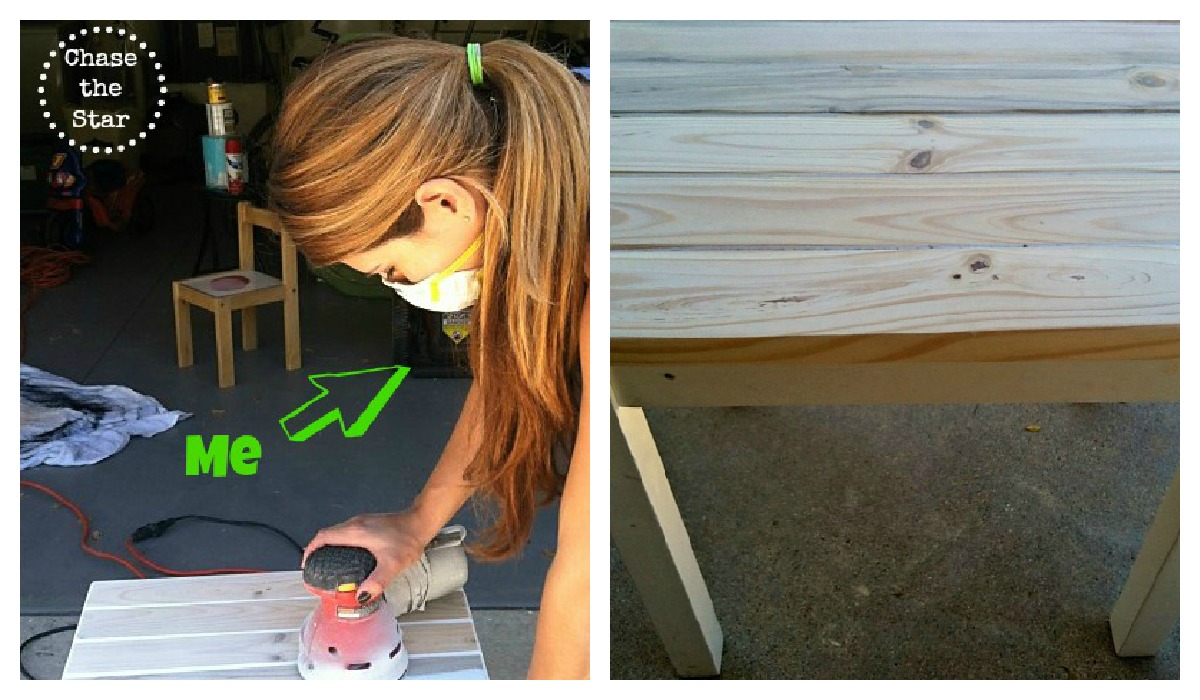
The set was in great shape, just had typical wear on it. So I my got gear on (o.k. just a mask) and went to town!
Kid’s Desk and Chair Makeover Tutorial:
{Prep}:
With an orbital sander and a course grit disc, I removed all of the paint from the top, and most from the apron and legs of the desk. Using a fine grit disc I went over the chair lightly.
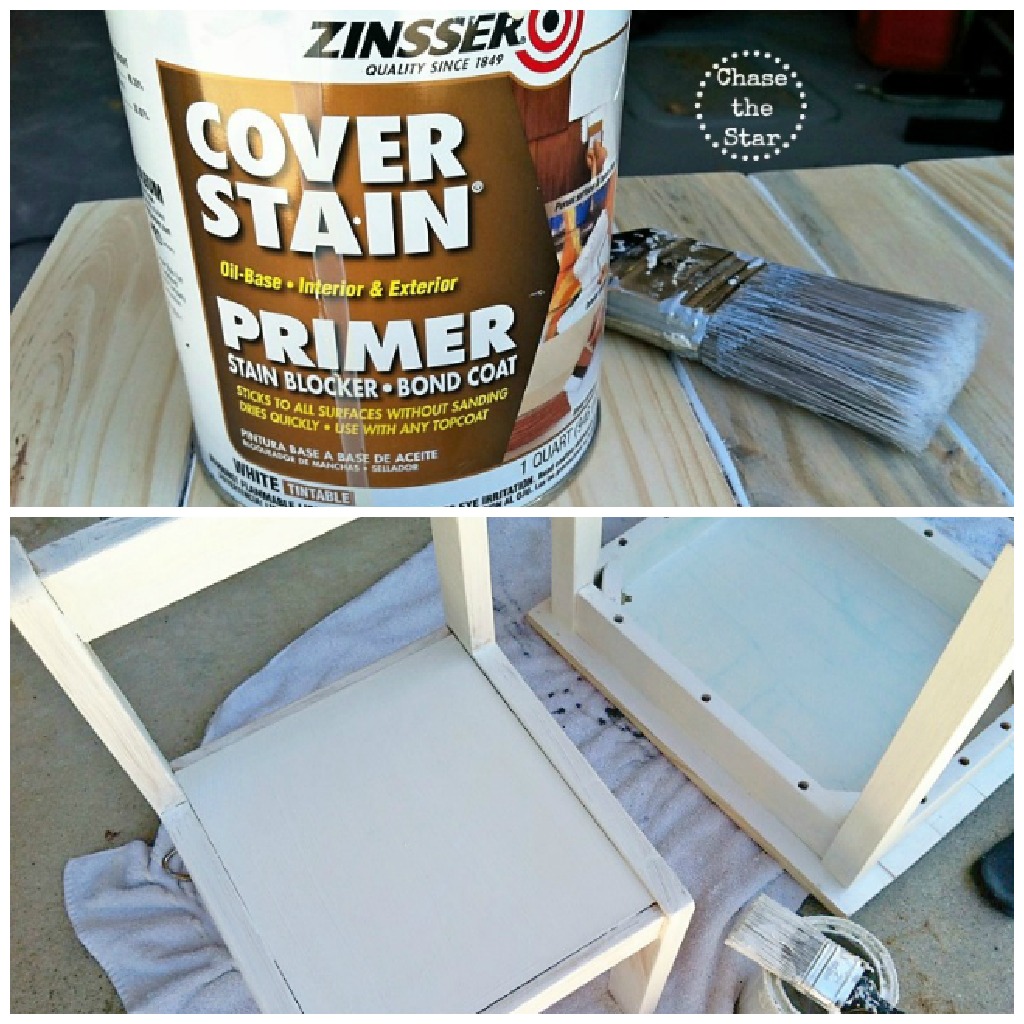
I primed both pieces (except the top of the desk) with
Zinsser Cover Stain primer.
{Desk}:
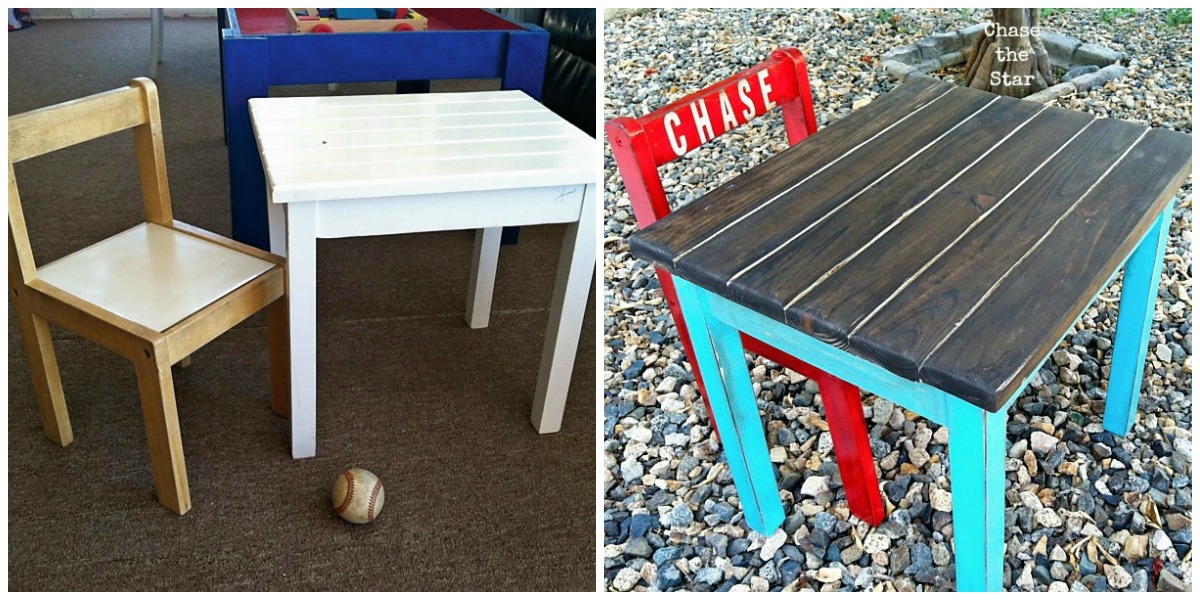
I painted the legs and apron a perfect shade of turquoise (in my humble opinion!) and added a dark walnut stain to the top with a foam brush.
Already loving the combination!

{Distressing and creating an aged (glazed) look}:
With sand paper I went over all of the edges (on the legs and apron) to slightly reveal the bare wood underneath. Using the same stain and foam brush I went over the sanded edges lightly, and wiped the excess off with a damp paper towel.
{Chair}:
I had some vinyl letter stickers in my craft closet, so to personalize the project, I spelled out his name at the top of the primed chair, and then with spray paint added two good coats of Candy Apple Red by Rustoleum.

How ‘about that glossy red finish?!
Then simply peeled the stickers off when the piece was dry to the touch (about 30 minutes), and used the same method to distress/age it.

Both pieces got a coat of polyurethane as a sealer.
I recommend letting the entire project dry overnight before handling it!

I’m seriously loving the red and turquoise together!
Take another look at the ‘before and after’:
Let’s do the math:
Chair $0 (Craigslist)
Desk $0 (Craigslist)
Turquoise Paint (craft closet)
Wood Stain (craft closet)
Polyurethane (craft closet)
Vinyl letters (craft closet)
Foam brush (craft closet)
Red spray paint $4 (you got me!)
Total Cost: $4 {Oh yeah!}
If you don’t already, take a look at the ‘free’ section on Craigslist. Sometimes it’s junk, but sometimes it can be a treasure!
For more of my DIY makeovers, crafts, and more, check out my blog, and find me here:


Thank you Kelly for letting me share my {Pre}School Desk & Chair tutorial with your awesome readers!!
Happy Back-to-School everyone!

I absolutely love Barbara & I love this makeover so much! Barbara, you are so talented, love it 🙂
Oh that looks amazing, I wish we had craigslist, I don’t think we do.
Thank you so much Mel and Tara! XO 🙂
This is great really cute, he will have a great creative place to learn!
thank you Kim!