
Buffalo Check Christmas Reverse Canvas
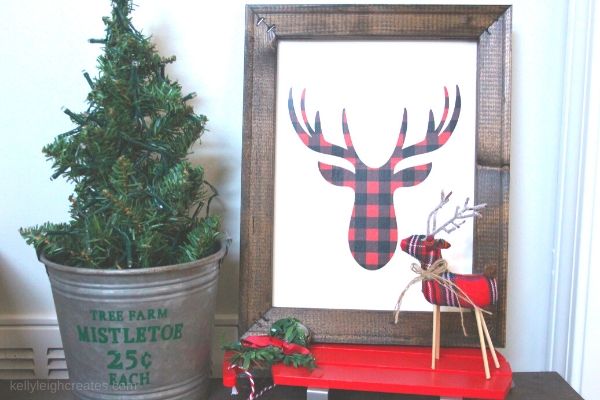
This Buffalo check Christmas reverse canvas project is the perfect addition to your Christmas decor. It’s easy and affordable to make.
I’m on a reverse canvas kick lately. I made some for Thanksgiving and today I’m showing you my Buffalo check Christmas reverse canvas. This year I’m going with a Buffalo check theme for Christmas so I had to grab some Buffalo check vinyl while out shopping the other day. At first I didn’t know what I was going to make with it but then I remembered about the canvases I had at home. This project is super easy and only takes about 15-20 minutes start to finish. (minus staining the wood)
BUFFALO CHECK CHRISTMAS REVERSE CANVAS SUPPLIES
- Canvas (11×14)
- Wood Stain (optional)
- Scissors
- HTV Vinyl
- Weeding Tools
- Iron or Heat Press
- Silhouette or Cricut
- Hot Glue Gun
- Deer head cut file.
HOW TO MAKE A REVERSE CANVAS
A reverse canvas is made by taking apart a canvas and using the interior frame on the outside. The basic steps are:
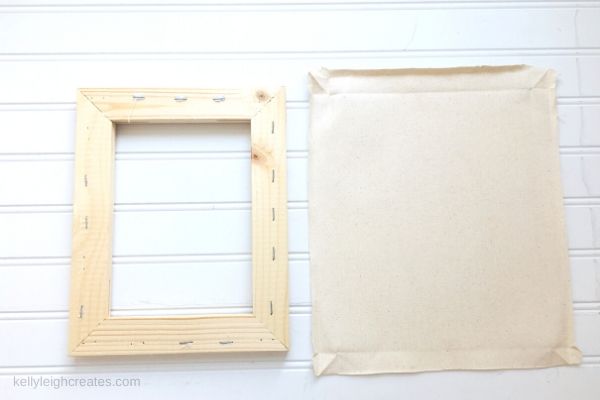
- Remove canvas from frame
- Stain frame (optional)
- Cut out file on heat transfer vinyl
- Adhere file to canvas
- Reattach frame to canvas
Since I’ve done several posts on reverse canvases, you can check out the basic reverse canvas tutorial here. This post will walk you through how to make a reverse canvas in detail. The only things that I did differently this time around were I used a different cut file and I cut the canvas to the size of the frame before I attached it to the frame.
You can get a deer head cut file pretty much anywhere that sells SVG files such as So Fontsy or Creative Market. Or you can make your own cut file from a JPEG or PNG.
This buffalo check Christmas reverse canvas is going to go perfectly with my Christmas theme this year. It also goes great with rustic Christmas decor.
LOVE IT? PIN IT!

YOU MAY ALSO LIKE
Rustic Christmas Home Tour
Thanksgiving Reverse Canvas Sign
Beginner’s Guide to Heat Transfer Vinyl