
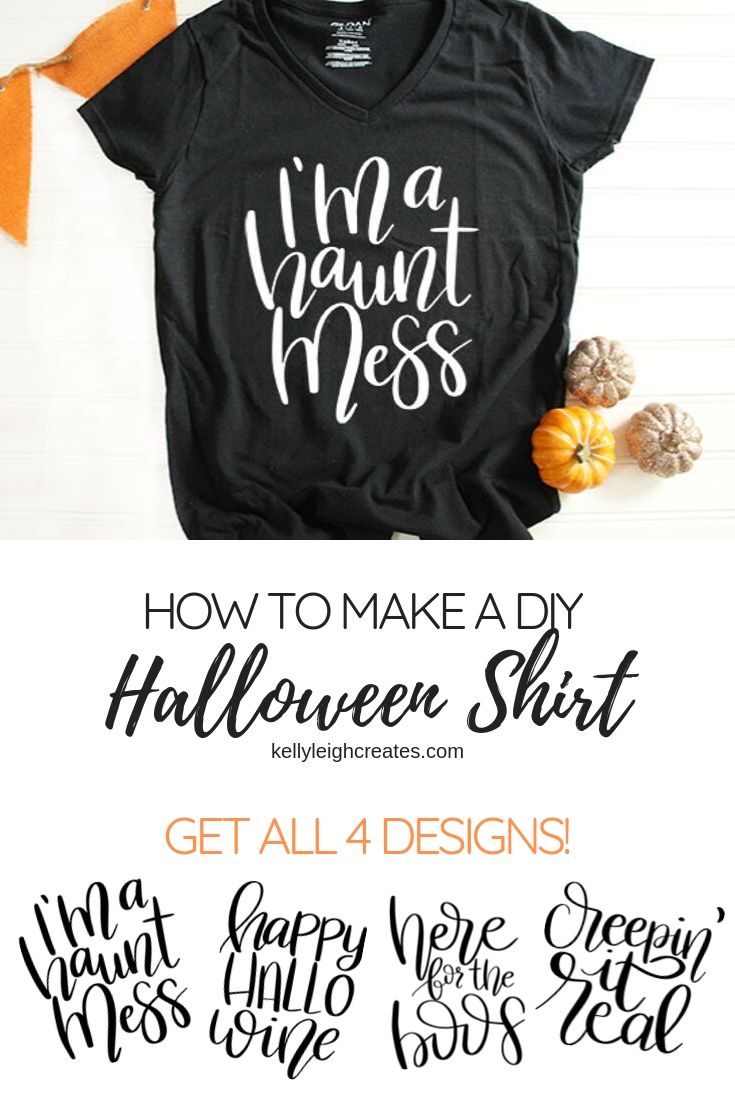
DIY Halloween Shirt – “I’m a Haunt Mess”
Create a fun DIY Halloween shirt with this hilarious cut file.
If there was ever a saying that describes me…it’s hot mess. In pajamas until noon with a messy bun? Check! Dishes and laundry left undone? Check. Getting to the end of the day and wondering where the time went? Yup, that’s me. It would be different if I had babies at home and they took up all my time but both the kids are in school ALL.DAY.LONG. Yet the time still gets sucked away and there are so many days when I ask myself “how long has it been since I showered?” Spoiler alert…sometimes it’s 3 days. I decided to take the phrase “hot mess” and put a little spin on it. Because it’s coming up on Halloween, I give you the… “I’m a Haunt Mess” DIY Halloween Shirt.

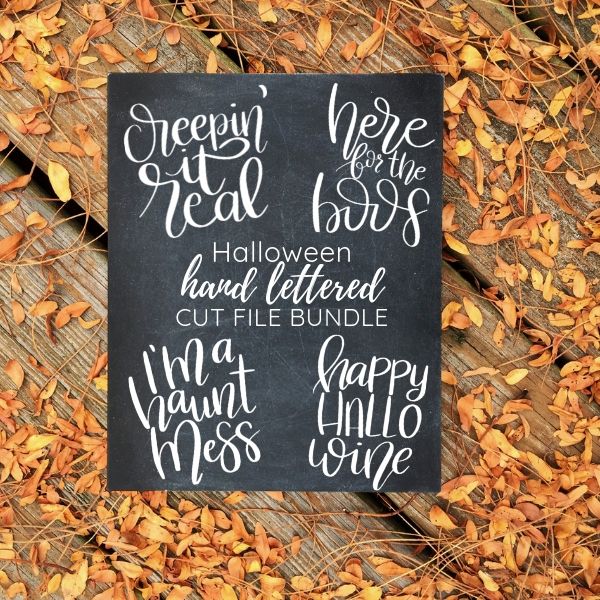
This cut file is part of my Hand Lettered Halloween bundle. You can get the bundle here. I’m giddy just thinking of all the fun stuff that I can make with these cut files.
DIY HALLOWEEN SHIRT SUPPLIES
- Black shirt (or whatever color you like)
- Heat transfer vinyl
- I’m A Haunt Mess cut file (or choose from 3 more)
- Silhouette or Cricut
- Weeding tools
- Cricut Easy Press
- Cricut Easy Press Mat
HOW TO MAKE THE DIY HALLOWEEN SHIRT
If you’ve been hanging out with me lately, you know that I use heat transfer vinyl (HTV) a LOT. The process to make this shirt is easy. If you are not familiar with cut files, you may want to first read this post about how to use SVG files. SVG stands for scalable vector graphic and it is the format that most cut files come in. In addition to SVG format, I’m also offering the file(s) as a PNG. Learn how to convert a PNG into a cut file.
- Cut the file out on heat transfer vinyl. Don’t forget to mirror the image before you cut it.
- Weed the design. Weeding just means removing the excess vinyl from the design that you don’t want transferred to the shirt.
- Place the easy Press mat inside the shirt. Center the design on your shirt and press with a Cricut Easy Press or an iron. I recommend an Easy Press because it heats more evenly. Press for 30 seconds at 315 degrees. Peel of the carrier sheet while it is warm.
- Flip the shirt over and press for 30 seconds on the back.
Don’t try to peel the carrier sheet off right away after removing the iron/heat press. Let the vinyl sit for a minute or so and then peel (while the sheet is still warm but not hot). I have made the mistake of peeling too early and the vinyl has not adhered. But if I am patient and wait for it to cool just a little, the vinyl adheres easily.
SVG CUT FILE FAQs
How do I open these files in my Silhouette software?
First, download the file and save it to your computer. If it is a zip file, unzip it.
Next, open your Silhouette software and click FILE>OPEN and navigate to where you saved the file. You can also import the file(s) to your Silhouette library by clicking FILE>LIBRARY>IMPORT TO LIBRARY and navigating to where you saved the file.
Can I open SVG files in the Silhouette Basic Edition?
No. You must have Silhouette Designer Edition to open SVG files. If you have Silhouette Basic Edition, you can only open STUDIO files and DXF files. STUDIO files are specific to Silhouette. However, PNG files can be converted to cut file using this tutorial.
Can this file be used with a Cricut?
Yes. Any SVG file can be used in Cricut Design Space.
How do I cut different layers in different colors?
If you want your finished product to contain multiple colors of vinyl, read this post to learn how to cut layers with the Silhouette.
Please note that all printables and cut files are for personal use only. You may not sell or redistribute them. Thank you for respecting my work.
LOVE IT? PIN IT!
YOU MAY ALSO LIKE
Chalkboard Halloween Sign
Paper Bag Luminaries
Halloween Treat Bags