
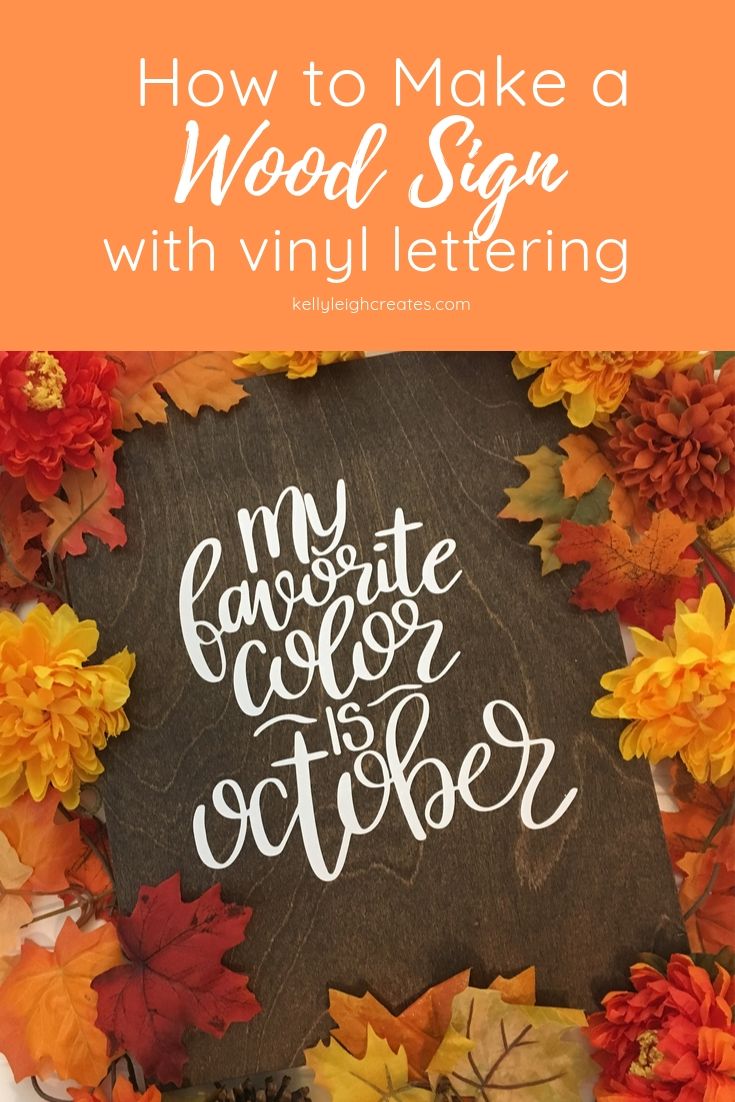
How to Make A Wooden Sign with Vinyl Lettering
Learn how to make a gorgeous wooden sign with vinyl lettering.
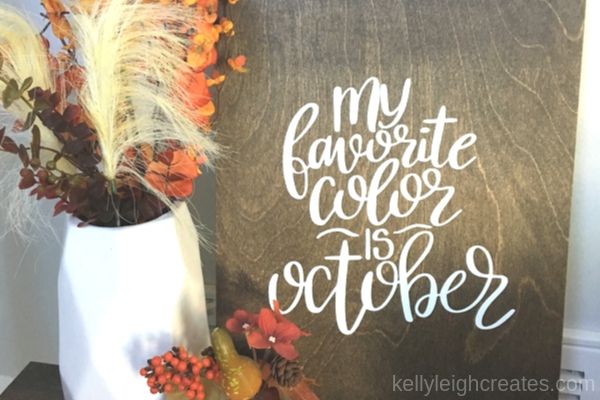
When I see vinyl lettering on wood signs, my heart skips a beat. Making signs with vinyl lettering is probably one of my favorite types of crafts to make. I have made so many that my attic is overflowing with signs for all occasions. I have mainly Christmas signs but this year I chose to make one for my favorite season, Fall. Today I’m going to show you exactly how to make a wooden sign with vinyl lettering.
SUPPLIES FOR WOODEN SIGN
- A piece of wood cut to your specific dimensions
- Wood stain
- Paint brush
- Rag
- Plastic drop cloth
- Plastic gloves
- Vinyl
- Silhouette or Cricut
- Fall Quote SVG Bundle
HOW TO MAKE A WOODEN SIGN
The dimensions of the piece of wood that you use is up to you. I usually use small pieces because they can be used either on the wall or an entry table for decor.
Once you have your wood cut to size, use a paintbrush to apply stain. Place a plastic drop cloth down to protect your work surface from the stain and make sure to wear gloves. Also be sure to work in a well ventilated area. The stain that I like is Minwax Espresso. I have found that vinyl sticks more easily to stain than to painted wood. Apply the stain in the direction of the grain, let sit, and then wipe off with a clean rag. The longer you let the stain sit on the wood before wiping, the darker the color will be. Stain the sides and the back (optional). Let the wood dry overnight.
CUT THE VINYL
Once your wood is dry, it is time to prepare the vinyl. The saying that I used for this sign is from my Fall Quotes SVG bundle. The bundle includes numerous fall phrases so just pick one that you like. Making a Christmas sign? I also have a holiday quote bundle as well.
Open the SVG file in Silhouette Studio and resize the file to match the size of your wood. Place a piece of vinyl onto the cutting mat and send the design to cut. Adjust the settings/blade for the type of vinyl you are using.
You can also make vinyl signs using a Cricut. I do not use a Cricut but there are many great tutorials out there on how to cut vinyl with a Cricut.
APPLY THE VINYL LETTERING
Once the vinyl is cut, weed the design and apply transfer tape to the design. Adhere the design to the sign using the transfer tape. Remove the transfer tape to reveal your new beautiful sign. If you would like to seal the vinyl lettering (not necessary if you are using it indoors), I recommend a light coat of Mod Podge. I have also read that Polycrylic is good to use to seal projects that will be used outdoors. Just make sure to use Polycrylic and not polyeurethane. Polyeurethane will yellow over time and your vinyl can become discolored.
LOVE IT? PIN IT!
YOU MAY ALSO LIKE
The Easiest Way to Layer Vinyl
How to Make a Stencil with Vinyl