
The Best Way to Layer Heat Transfer Vinyl
Want to learn the best (and easiest) way to layer heat transfer vinyl? This tutorial will teach you how to layer vinyl like a pro without adding tons of bulk to your design.
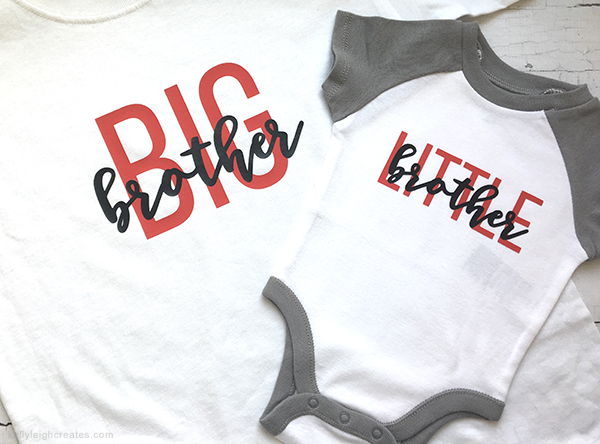
I absolutely love creating shirts with heat transfer vinyl. You can make absolutely any design you want and have a completely unique wardrobe. My sister just had her second baby and I decided to make him (and his brother) matching shirts/onesies. Want to know how I did it? Read on to learn how to layer heat transfer vinyl.

SUPPLIES TO LAYER HEAT TRANSFER VINYL
If you are new to heat transfer vinyl, you’ll want to read my beginner’s guide to heat transfer vinyl
- Silhouette
- Heat Transfer Vinyl from Silhouette, Cricut or Expressions Vinyl
- Amazon
- Iron or Cricut Easy Press (Cricut | Amazon)
- Easy Press Mat
THE BEST WAY TO LAYER HEAT TRANSFER VINYL
In this tutorial, I’ll be using a Silhouette cutting machine. If you have a Cricut, the steps may be a bit different but you should be able to perform the same functions. Please note that this tutorial does not cover how to layer glitter heat transfer vinyl.
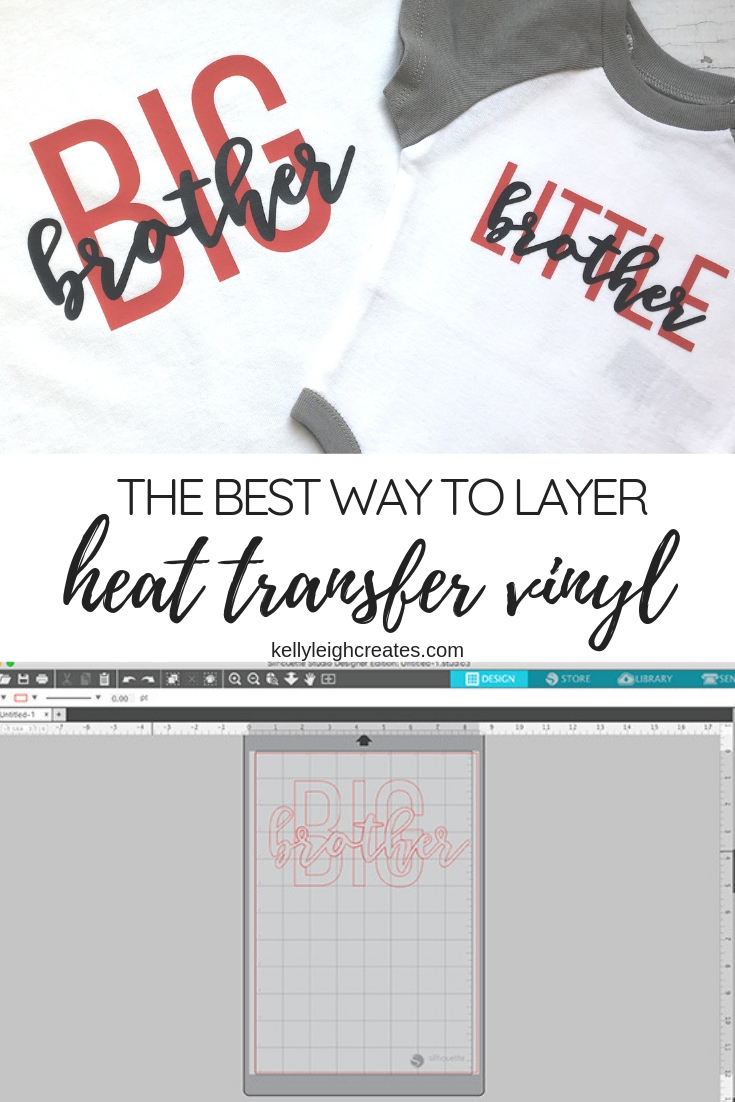
Design your file in the Silhouette software or use a premade cut file. I’m using one of my favorite fonts, Magnolia.
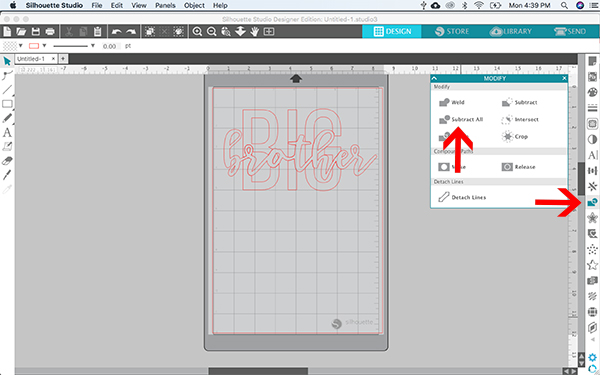
In Silhouette Studio, configure the layers the way that you want them to be on your finished product. Since I wanted the “BIG” to be on the bottom, I placed it as the bottom layer and placed “brother” on top of it.
![]()
When you have the design the way you want it, select both layers, click on the MODIFY panel and use the “SUBTRACT ALL” tool. This will subtract out the top layer from the bottom layer. Move the bottom layer to the side
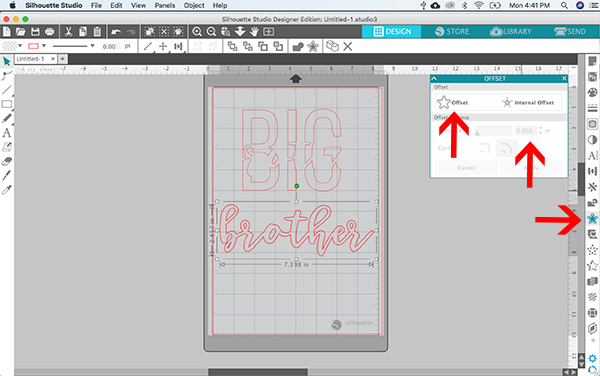
Now you are going to use the “OFFSET” tool. With the top layer selected, click OFFSET and enter .015. This places a very small offset around the layer. This offset is what is going to allow you to layer your heat transfer vinyl without any gaps between the layers. Delete the original top layer so all you have is the bottom layer and the offset top layer.
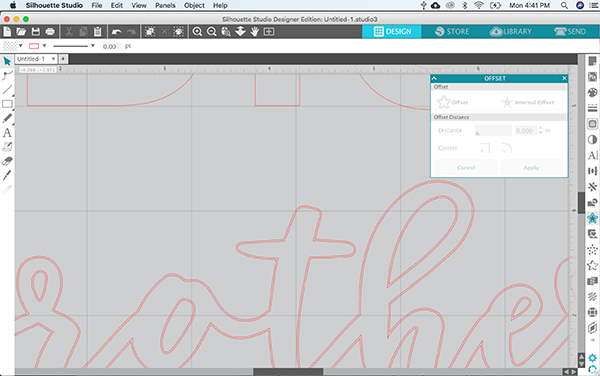
This is a close up of the offset. It is sort of hard to see but there are two lines. The line you want to delete is the inside line, leaving you with just the offset.
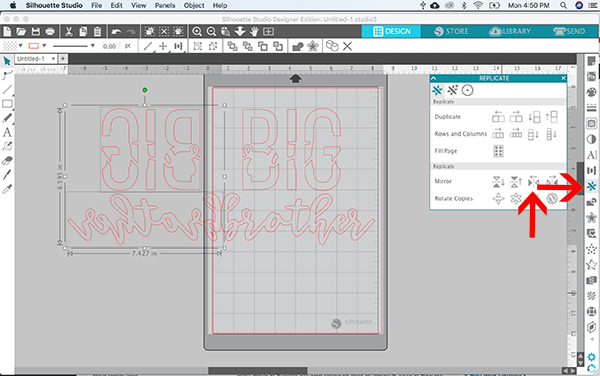
Cut out each layer of your vinyl design. Since this is heat transfer vinyl, you’ll want to make sure to mirror the image before you cut it.
HOW TO CREATE A LAYERED CUT FILE VIDEO TUTORIAL
Once you have cut out and weeded all the layers of your design, prepare your surface. Set the Easy Press to the recommended temperature. In this case, it was 315 degrees. Press the surface for 5 seconds to remove all moisture.
Next, place the first layer onto your surface, set the Cricut Easy Press to 315 degrees and press it for 3-5 seconds. You won’t want to press it for the full amount of time (30 seconds) because it’s going to get more heat with the next layer. By pressing it for only 3-5 seconds, you are just tacking it down lightly. Remove the carrier sheet. If you do not have a Cricut Easy Press, you can also do this step with an iron. Set the iron to cotton setting with no steam.
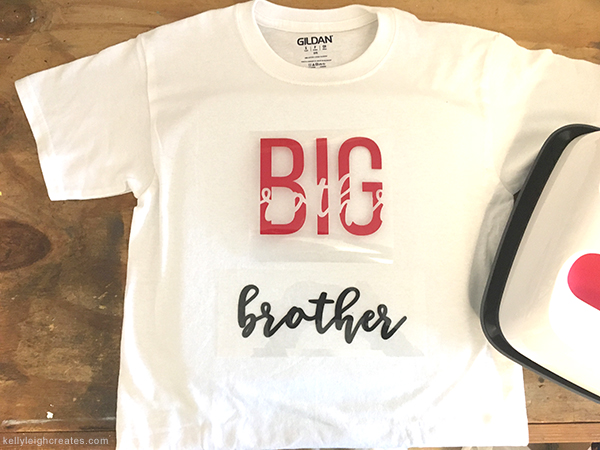
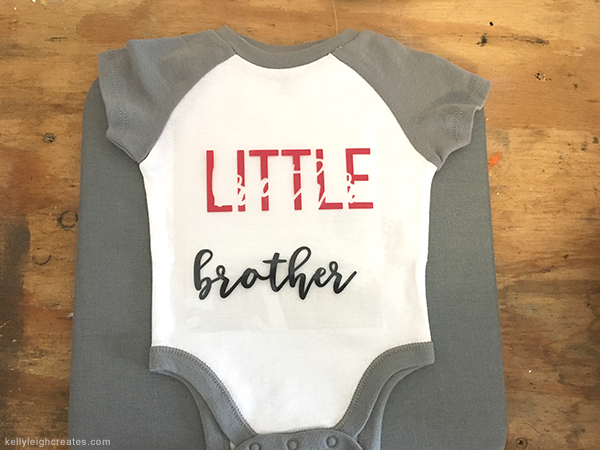
The photos below show the shirts before I pressed the vinyl. You can see how the letters from “brother” are cut out of the words “big” and “little”.
Position the top layer exactly so you cover the holes left by the “subtract” tool. Press for a full 30 seconds. If there is exposed vinyl from the bottom layer, cover it with parchment paper. You don’t want the Easy Press or iron plate touching any exposed vinyl. Remove the carrier sheet.
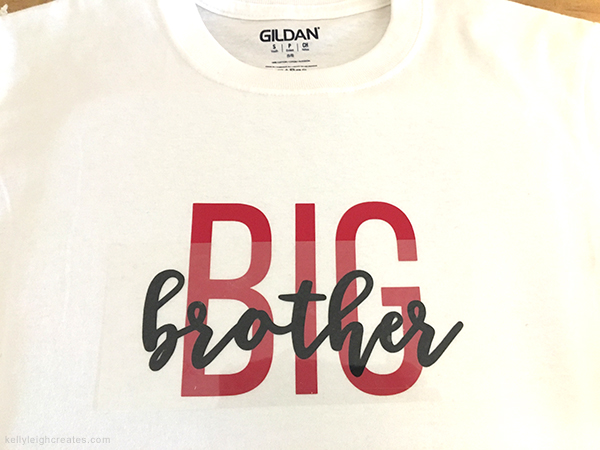
Your finished product now has a layered effect but all the layers are adhered to the shirt instead of to one another. No bulk!
LOVE IT? PIN IT!
YOU MAY ALSO LIKE
Beginner’s Guide to Heat Transfer Vinyl
How to Cut Multiple Colors of Vinyl with a Silhouette
How to Use SVG Files: Tips, Tricks and Ideas