
How to Create Galaxy Brush Lettering on the iPad Pro
Learn how to create gorgeous galaxy brush lettering on the iPad Pro using the Procreate app.
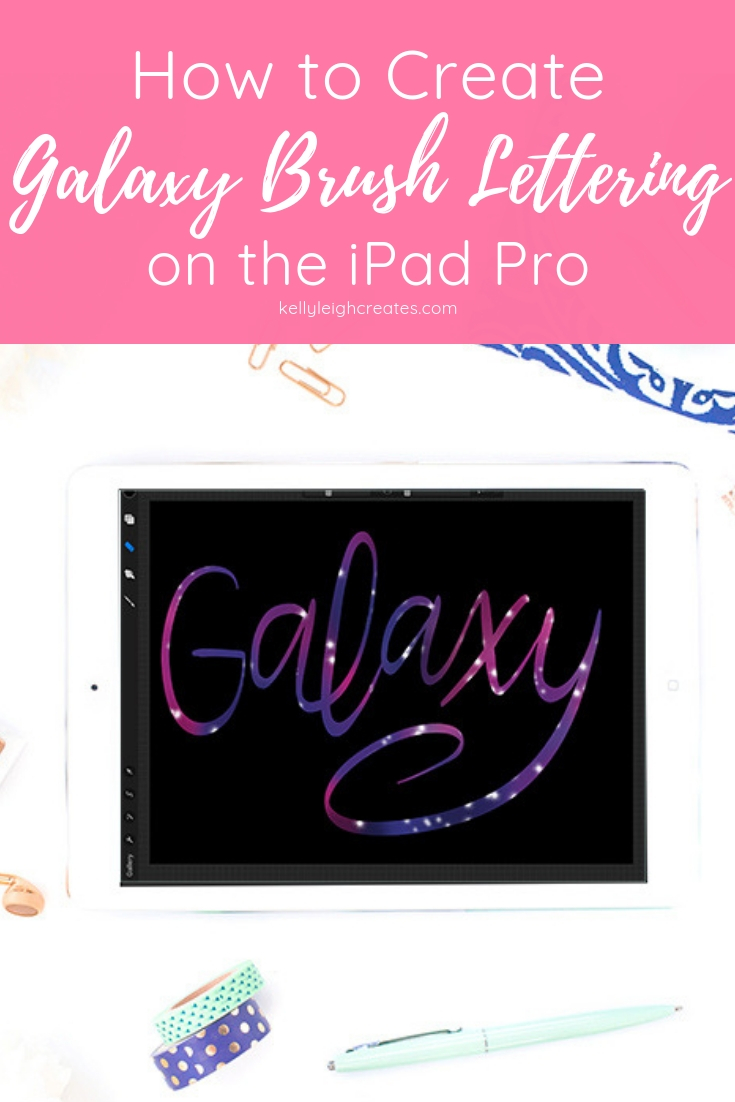
Have you seen all the gorgeous galaxy brush lettering lately? I’m in love with the look of it. Lettering on the iPad Pro is one of my favorite things to do. It relaxes me and if I make a mistake, I can just “undo” and try again. I love learning new techniques to create stunning designs. There is just so much that you can do with the iPad Pro and Procreate app. Today I’m going to show you how easy it is to create galaxy brush lettering using the iPad pro and Procreate app.

TOOLS YOU NEED TO CREATE GALAXY BRUSH LETTERING
- iPad Pro – this tutorial will not work on a regular iPad. You must have an iPad Pro. I have the 12.9″ version.
- Procreate App – you can purchase this from the App Store. When I purchased it, it was about $10. I’m not sure if the price has gone up since then.
- Apple Pencil – you need an Apple Pencil to draw in the Procreate app.
HOW TO CREATE GALAXY BRUSH LETTERING ON IPAD PRO
All the brushes that I am going to use in this tutorial come with the Procreate app. There are many other brushes that you can purchase but for this tutorial, I’m keeping things simple.
- Open up the Procreate App and create a new canvas by clicking on the “+” sign in the upper right corner and choosing the size canvas that you want. For this example, I’m choosing screen size.
- When your canvas opens, it will fill the screen. You can use your fingers and”pinch” it to make it smaller so you can see the entire canvas.

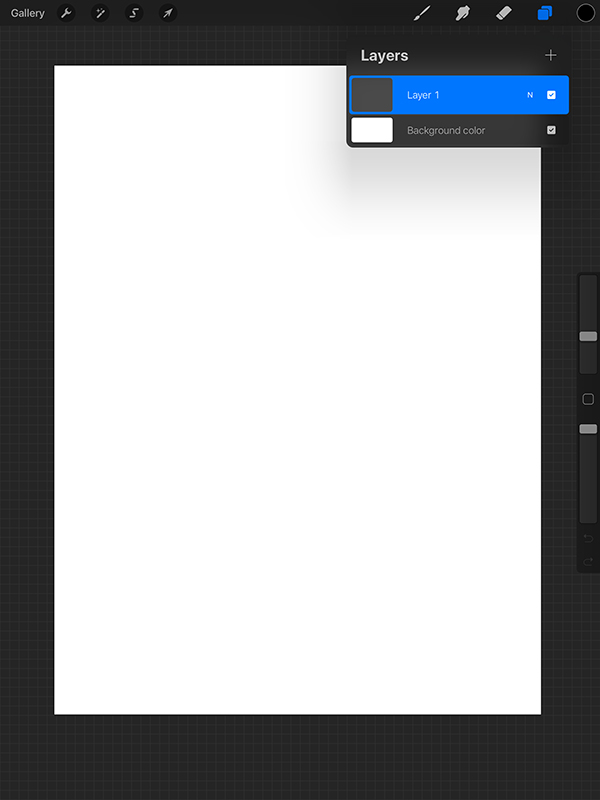
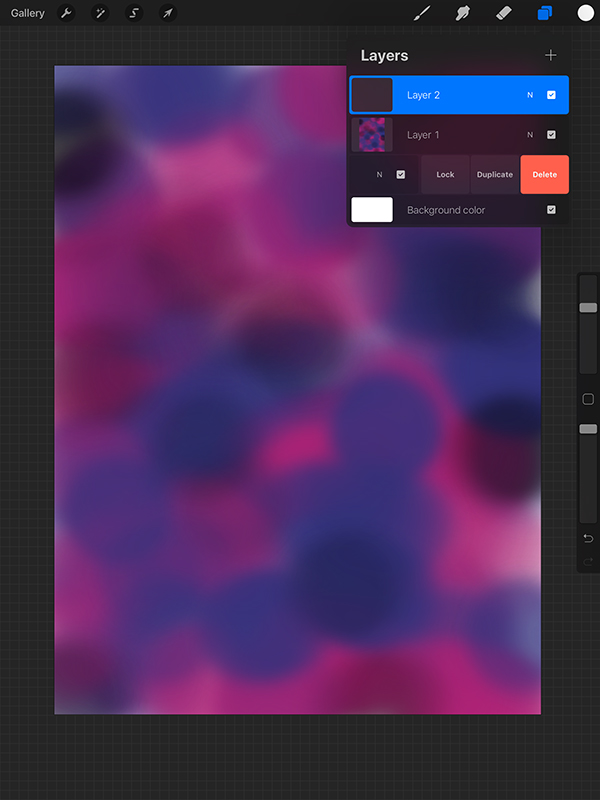
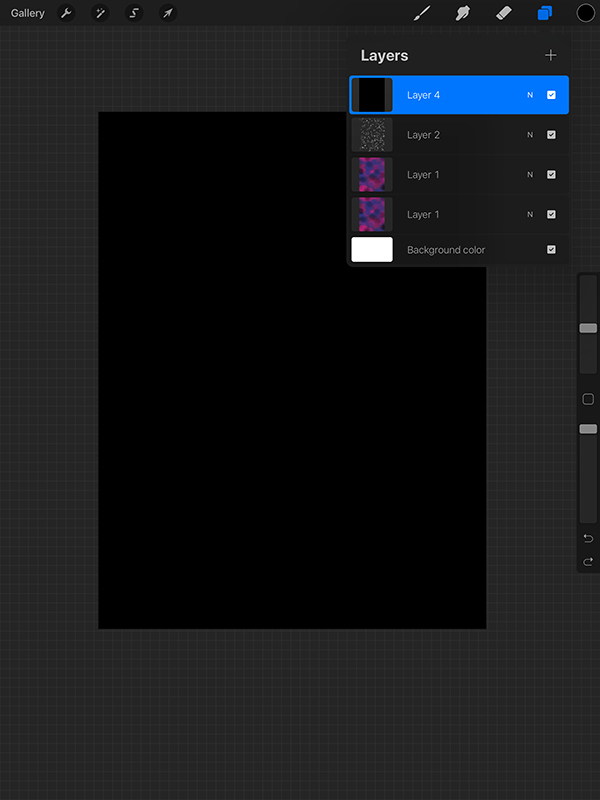
- Click on the “Layer” icon in the upper right corner and then click the “+” sign to add a new layer.
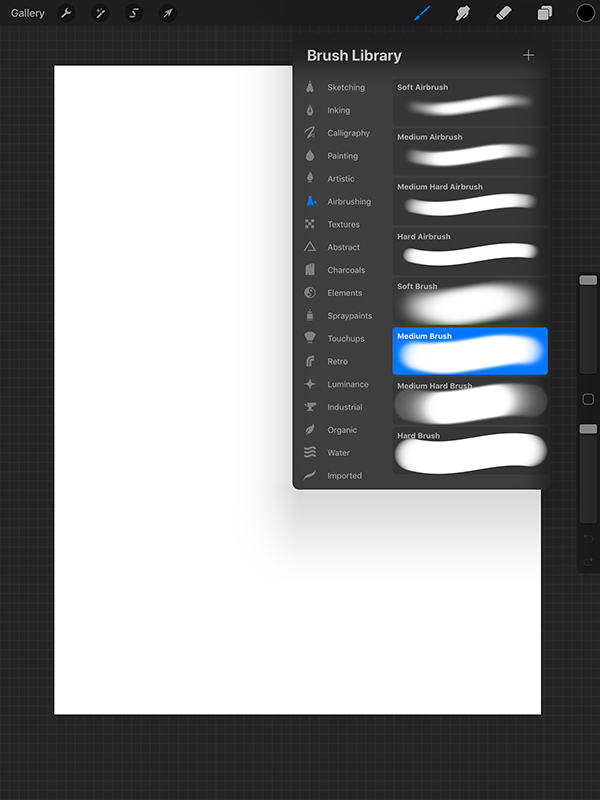
- Click on the “Brush” icon and select Airbrushing > Medium Brush.
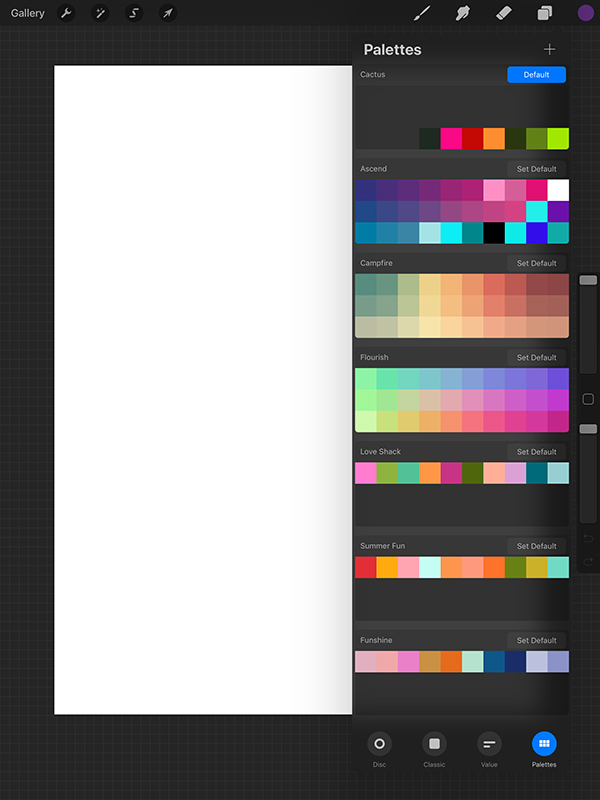
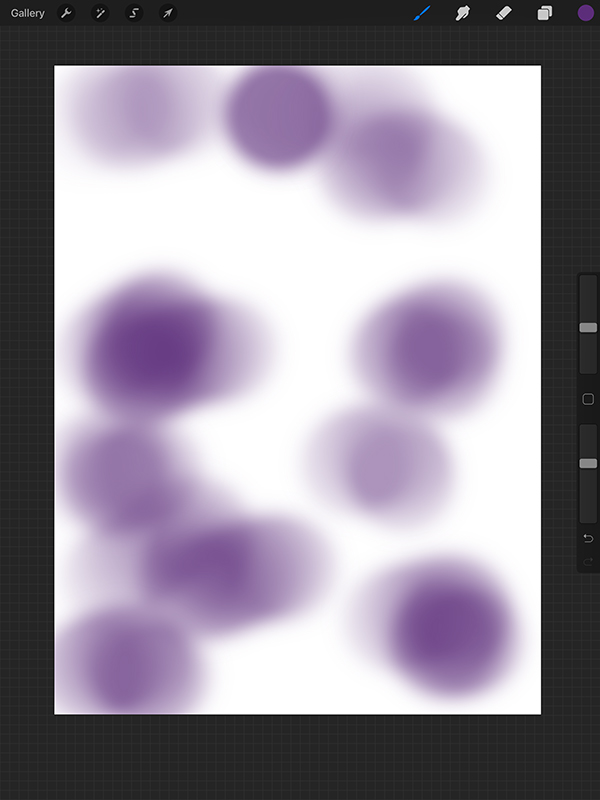
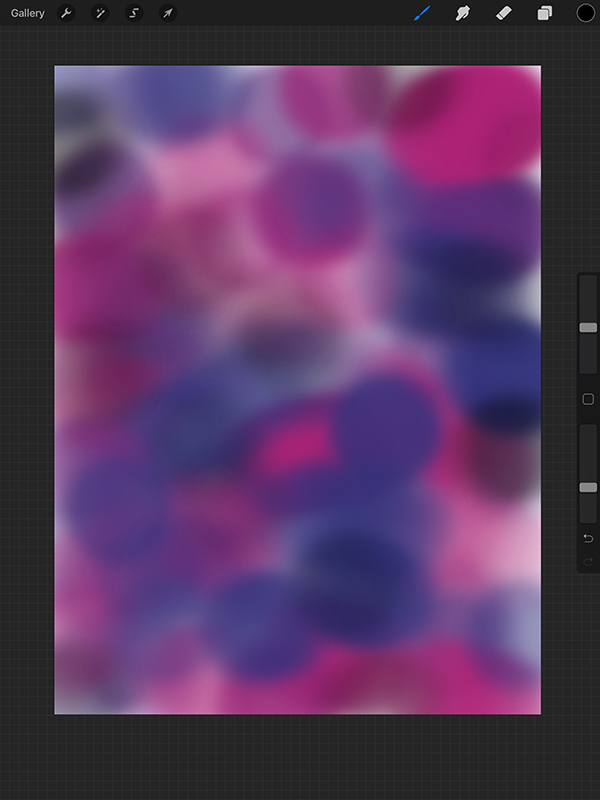
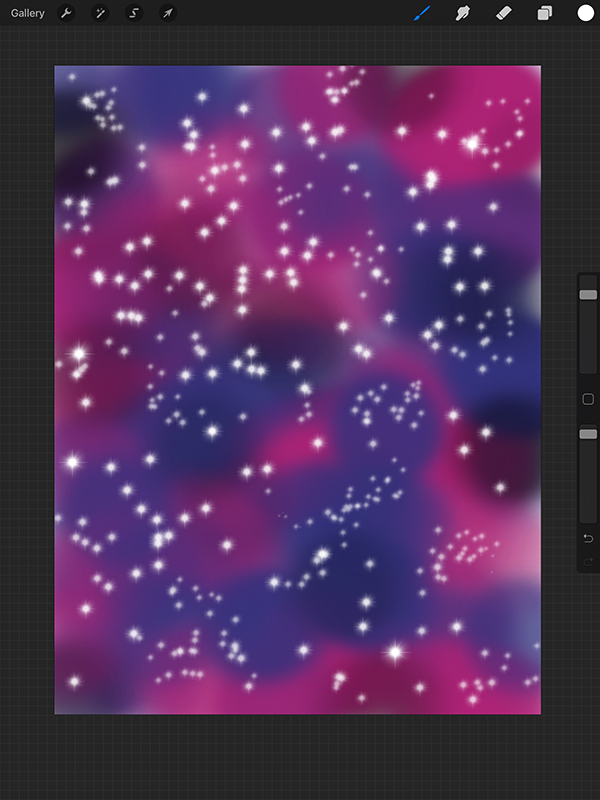
- Click on the color selector in the upper right and choose a color. For this tutorial, I’m will be using purple, pink, and blue. You can choose a color from your existing palettes or use the “Disk”, “Classic” or “Value” tools to choose a color.
- Using the Apple Pencil, draw random splotches over your canvas. You can change the opacity and brush size of the pencil with the slider on the side of the screen.
- Repeat this process using several other colors.
- Duplicate this layer by swiping left on the layer and clicking “duplicate”. This will make the galaxy darker.
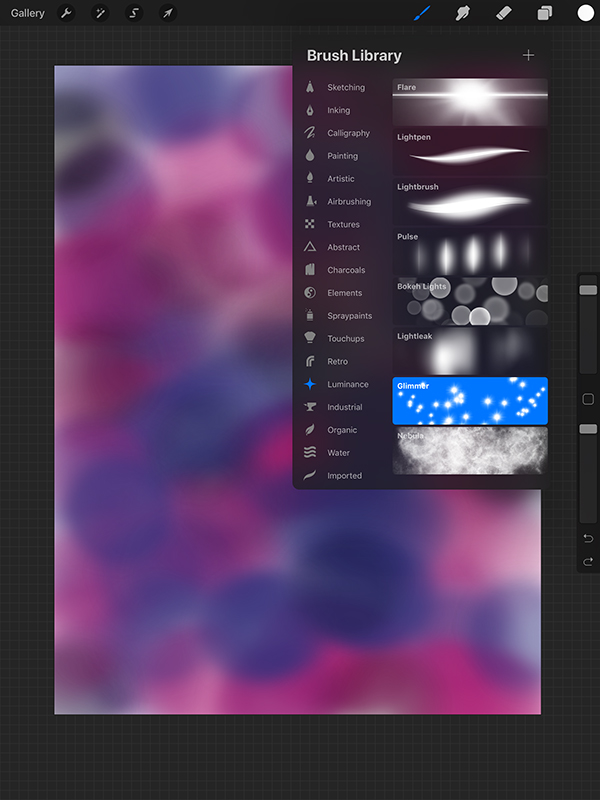
- Go back to the Brush Library and choose Luminance > Glimmer. Set the brush color to white.
- Use this brush to create “stars” on the canvas.
- Create a new layer and fill it with either black or white.
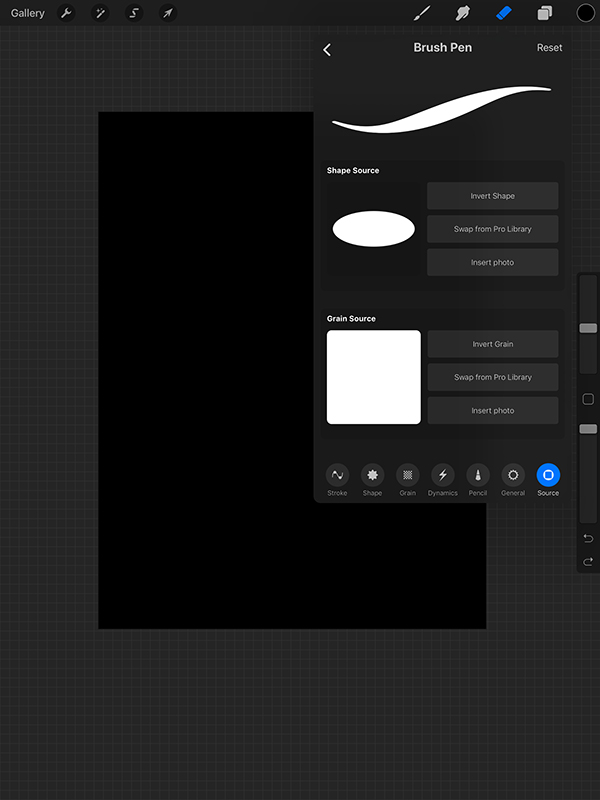
- Click on the “Eraser” tool and select Calligraphy > Brush Pen.
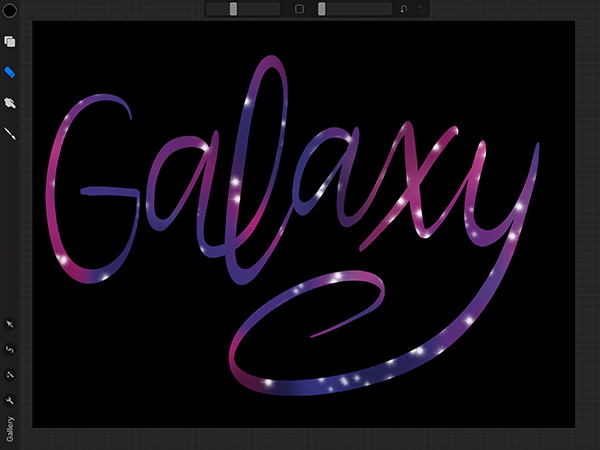
- Making sure you are on the black or white layer that you just made, create your lettering. Since you chose the eraser tool, this will erase the top layer to reveal the galaxy design beneath.
Isn’t that awesome? Think of all the other types of lettering that you can create with this technique! The possibilities are endless!
LOVE IT? PIN IT!
YOU MAY ALSO LIKE
HOW TO HAND LETTER ON THE IPAD PRO
HOW TO CREATE WATERCOLOR BRUSH LETTERING IN PROCREATE
HOW TO USE HAND LETTERED PRACTICE SHEETS IN PROCREATE
HOW TO CREATE RAINBOW LETTERING IN PROCREATE