
How to Create Printables in Photoshop
Learn the basics of how to create printables in Photoshop.
Creating printables is something that I love to do. Some people create printables for planners or checklists or for home binders but my specialty is creating printables for home decor. I offer an exclusive printable to my email subscribers every month in my newsletter (psst…to sign up for my newsletters, just enter your email info in the box on the sidebar). I’ve had many readers ask me how I create printables in Photoshop so I thought this simple tutorial would be a good place to start.
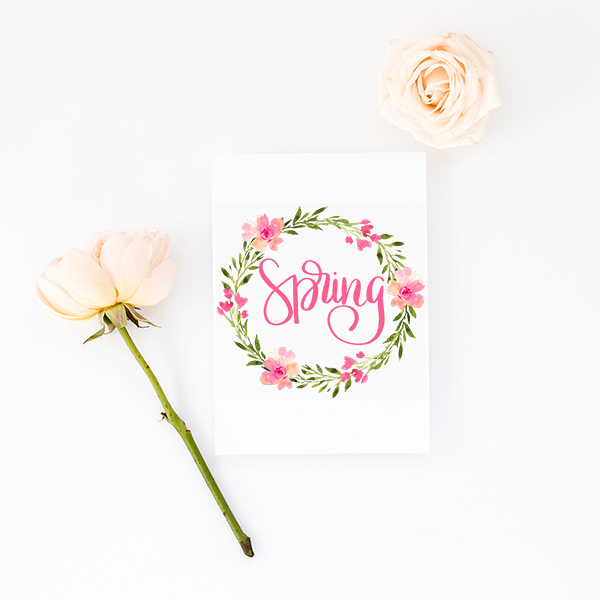
This is the printable that I offered to my newsletter subscribers this month and today I’m going to teach you how to create a printables in Photoshop similar to this one.
One of the reactions I hear the most when mentioning Photoshop is that it is too hard and overwhelming. Does Photoshop have a lot of tools? Yes. Do you need all those tools to create gorgeous printables? No. I’ll be honest… there are a lot of tools in Photoshop that I don’t use. Many of the tools are for photo editing and aren’t needed to create printables. So, who is ready to learn how to create printables in Photoshop? Let’s get started!
HOW TO CREATE PRINTABLES IN PHOTOSHOP
First, you’re going to need Photoshop. Photoshop is not a free program. You can either purchase it as an individual program or you can purchase it with a monthly subscription to Adobe Creative Cloud. I use the Creative Cloud version and everything I’m going to show you today is using that version.
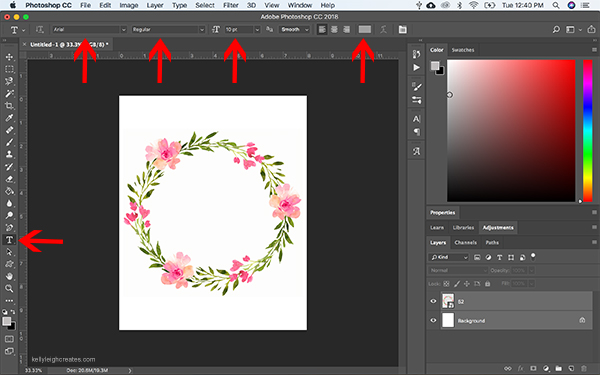
STEP ONE
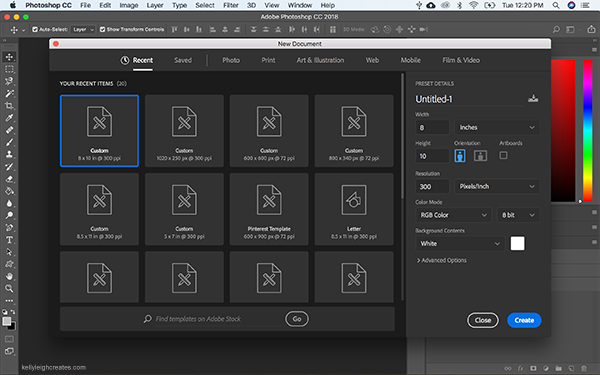
Open up Photoshop. Click FILE >NEW and choose either 8×10 or 5×7. I suggest these sizes because these are the most popular sizes for prints. If you are making a print that needs to be another size, just choose whatever size you need. I make all my prints at 8×10. Make sure you have is set at 300 pixels per inch. This is the resolution you will need for printing. Choose a white background. Hit CREATE. You now have a blank 8×10 document.

STEP TWO
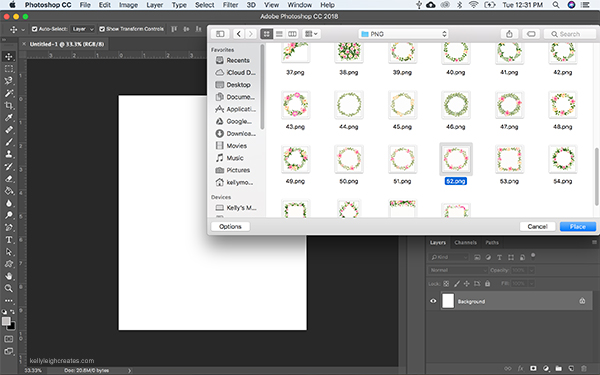
Next, we are going to add the floral wreath. This wreath is part of a clip art set that I got from Creative Market. When using elements from another designer, always be aware of the license that comes with the element. If you are going to be selling your prints, you need to purchase a commercial use license. Find a clipart wreath that you like and save it to your computer. Make sure that the file you are downloading is in PNG format with a transparent background.
Click FILE > PLACE EMBEDDED and navigate to the folder on your computer where you saved the clip art.
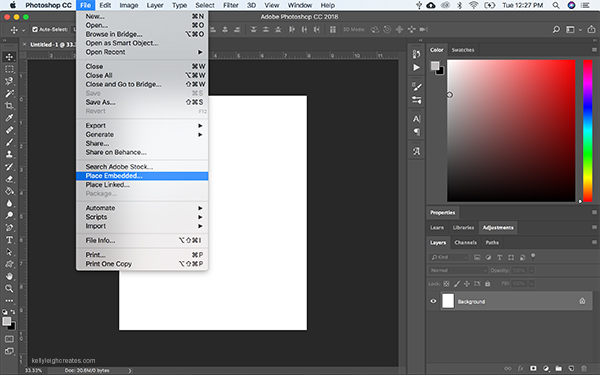
Click “Place” and the element will be placed into your document on a separate layer.
New to Photoshop? Learn how to create gorgeous prints in minutes! #graphicdesign #photoshop
STEP THREE
Click and drag the corners to size the wreath appropriately. To center the wreath onto your document, select both the wreath layer and the background layer in the layers panel and click “Align Vertical Centers” and “Align Horizontal Centers” in the top menu.

STEP FOUR
The final step is adding text. You can either add text using a font or you can use a premade file. The word “Spring” that I used is this print is a hand lettered file that I created. If you are using clip art text, place this file into your document the same way that you placed the wreath in step three.
If you do not want to use clip art text or cannot find one that you like, you can use a hand-lettered font to get the same effect. These are some of my favorite hand letterered fonts.
To add text, click on the TYPE tool in the left sidebar. Once you click on that tool, the cursor will change to a text cursor. Click inside the wreath and choose your font settings (font, size, style, and color) from the dropdown menus at the top. The font shown here is Magnolia and it’s one of my faves.
Type out the word “spring” and you’re done! If the text is not the size that you want it, select the text layer in the layers panel and click and drag the corners of the box around the text to resize it. To center the text inside the wreath, select both the text and the wreath layers in the layer panel and click on the “Align Vertical Centers” and “Align Horizontal Centers” tools in the top toolbar.

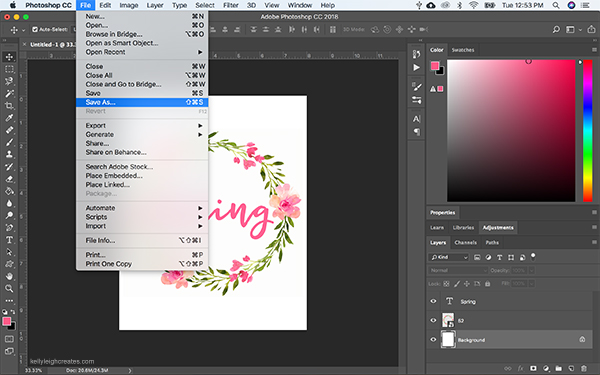
STEP FIVE
Save your file by clicking FILE>SAVE AS and navigate to where you want to save the file. Since you’ll be printing this out, I suggest saving it as a PDF. If you want to keep a working document so you can go back and make changes, you also want to save it as a PSD.
LOVE IT? PIN IT!

YOU MAY ALSO LIKE
How to Create Printables in Photoshop Elements
How to Create an Invitation In Canva
How to Create an Invitation in Illustrator
How to Create Printables Without Expensive Software
Hi! I am just curious if you’ve tried selling printables with templates or images and/or fonts that you got from the internet for free? Is that going to have like some copyright issues or something? Thanks!
Hi Joyce. You need to be very careful with items that you download for free. Most are only available for personal use. Each font and design comes with terms of use and each one is different. If you know that you are going to use the items to make things for sale, make sure that they are ok for commercial use. Usually, you have to purchase a separate commercial use license.
Hi Kelly
Thank you so much for this. It’s been really helpful. I have one question. When you’re creating the new file. What settings do you set in the advanced settings?
Many thanks
Holly
Hi Holly! Thanks for stopping by. I don’t change the advanced options. I leave them as they are. My defaults are currently set to sRGB.