
Add Shadows to Lettering in Procreate: 3 Ways

Learn 3 ways to add shadows to lettering in Procreate. These 3 easy ways to add shadows to lettering in Procreate will make your designs pop off the page.
I love hand lettering using the Procreate app but for the longest time, my letters look flat and dull. It was because I wasn’t adding any depth to my lettering with shadows. Adding shadows helps your lettering pop off the page and really brings your lettering from basic to beautiful. In this tutorial, I’m going to show you 3 different ways to add shadows to lettering in Procreate. There are many more than these three ways but I feel like these are the easiest to master.

HOW TO ADD SHADOWS TO LETTERING IN PROCREATE
First things first…if you haven’t checked out my intro to Procreate post, you’ll want to start there if you need the very basics of this app. That post will give you an overview of the tools in Procreate that you need to create lettering.
I’m going to assume that you already have your word or phrase lettered out and I’m going to start there. For this example, I’m using the word hello.
METHOD 1
The first type of shadow we’re going to create is called a drop shadow. To create this shadow, create a new layer below your lettering. Select the lettering layer by clicking it and choosing “select” from the flyout menu. Then click on the new layer and hit “fill” from the flyout menu. This will create a duplicate of the text on a new layer with your choice of fill color. Choose a darker color for the fill than your lettering.
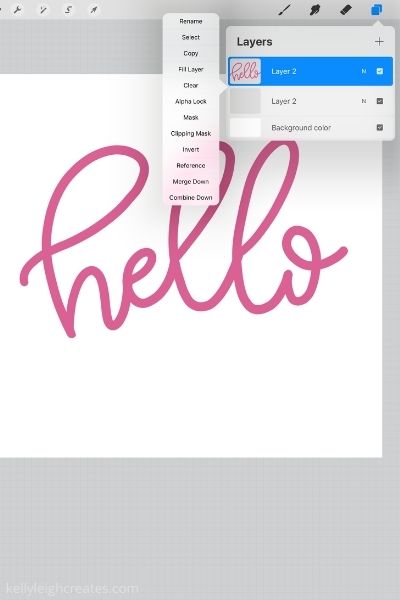
Tap on the bottom layer in the layer panel and then tap the select arrow in the upper left of the screen. This will give you a box around your lettering that allows you to move your lettering. Move it down and to the right or down and to the left depending on where you want your shadow to fall. I chose down and to the right.

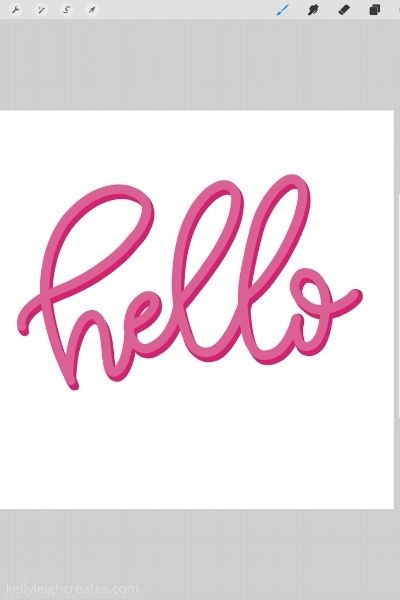
Tap on the dark pink layer in the layer panel and choose a monoline brush from the brush panel. Fill in the dark pink layer so that it is connected to the light pink layer. You can see what I mean by looking at the end of the “o” below and comparing that to the image above.
METHOD 2
The second type of shadow we’re going to create is the shadow where the script letters overlap. To make this shadow, you first have to determine where the letters overlap and which part of the stroke goes “on top”
Create a new layer above your lettering layer and set the new layer to clipping mask. Choose a soft airbrush and use the color black. Lightly color on all the areas where the strokes overlap. The harder you press with the Apple pencil, the darker your shadow is going to be. Make sure you are drawing on the clipping mask layer. This will “clip” the shadows to your lettering layer.

Next, change your brush color to the color of your lettering and choose a monoline brush. While on the clipping mask layer, draw over the areas of your lettering that are the top strokes. This results in the look of a shadow and dimension where the strokes overlap.

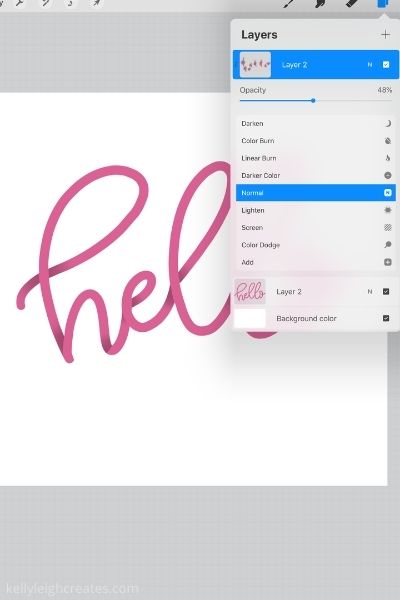
Lower the opacity of the clipping mask layer by tapping on the layer and moving the opacity slider.
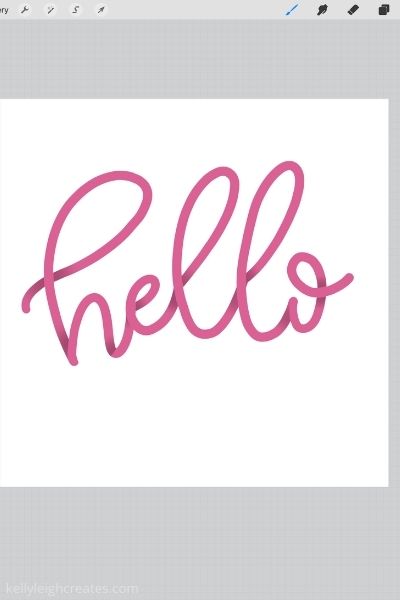
This is the final result of Method 2.
METHOD 3
In this method, we are going to create a shadow by shading areas of the lettering. First, determine where your light source is coming from. This is totally up to you but most of the time I choose my light source to be shining from the top left down to the bottom right of my lettering.
Once you have determined where the light source is, shade the areas of the letters that are not receiving this light. For example, if my light source is coming from top left, then the bottom right of my letters will be shaded. The areas in the loops will also be shaded.
Choose a shading or texture brush and a color that is darker than darker than your lettering.

Create a new layer above your lettering and set that layer to clipping mask. While on the clipping mask layer, use the texture brush to shade the areas of your lettering.

Here is the final result of method 3.

I hope this tutorial was helpful for you and if you create anything using this tutorial, I’d love it if you would tag me on instagram @kellylcreates so I can see your work!
MORE PROCREATE TUTORIALS
- 3 Fun Hand Lettering Styles to Try in Procreate
- How to Install Brushes into Procreate
- How to Use Masks in Procreate
- How to Create Color Palettes in Procreate
LOVE IT? PIN IT!
