
The Easiest Way to Layer Vinyl Perfectly Each Time
Learn how to layer vinyl so that it lines up perfectly every time. Read on for the easy tutorial!
Layering vinyl is an important step in creating multiple-color designs. But if you have ever worked with adhesive vinyl, you know the frustration that can happen when your design doesn’t Iine up properly. WOMP WOMP. I’m here to tell you that I’ve been there and also…this doesn’t have to happen. Today I’m going to show you the easiest way to layer vinyl perfectly each time.
BASIC SVG & SILHOUETTE STUDIO POSTS
- How to Use Silhouette Cameo 4: A Guide to Getting Started
- How to Use SVG files: Tips, Tricks & Ideas
- How to Import Files Into Silhouette Studio
- How to Weed Vinyl
- A Beginner’s Guide to Heat Transfer Vinyl
- How to Cut By Color in Silhouette Studio
- How to Separate SVG files into Layers
WHEN TO LAYER VINYL?
Before we get into the actual method of how to layer vinyl, let’s talk about WHEN you would need to layer vinyl. Layering vinyl is needed when you have a design that has multiple colors stacked on top of each other. The most popular project using this method is when people layer vinyl decals but you can also use this method to make projects like wooden signs. This tutorial covers layering adhesive vinyl. If you have a project using other types of vinyl such as heat transfer vinyl (HTV), you’ll want to check out these posts on the best way to layer heat transfer vinyl and how to layer glitter heat transfer vinyl.
SUPPLIES FOR LAYERING VINYL
- Silhouette or Cricut – Any Silhouette machine (Portrait or Silhouette Cameo) or any Cricut machine (Cricut Explore, Cricut Explore Air, Cricut Maker, Cricut Joy)
- Vinyl – my favorite vinyl is Oracal 651 from Expressions Vinyl
- Transfer tape (Cricut brand | Silhouette brand | Oracal brand)
- Weeding tools
- SVG file – you can find lots of free SVG files on my blog or in my shop

EASIEST WAY TO LAYER VINYL
Layering vinyl begins in Silhouette Studio or Cricut Design Space. Since I use Silhouette, that’s what I will be covering but you can also do this same process in Cricut Design Space.
SET UP YOUR DESIGN IN SILHOUETTE STUDIO
Once you have your SVG file uploaded into Silhouette Studio, you’ll need to separate it into layers. If the designer created the file with the layers already separated, you’re good to go. If not, this post will step you through how to separate an SVG into layers.
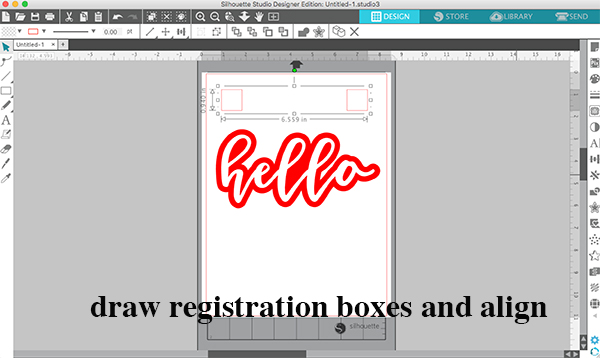
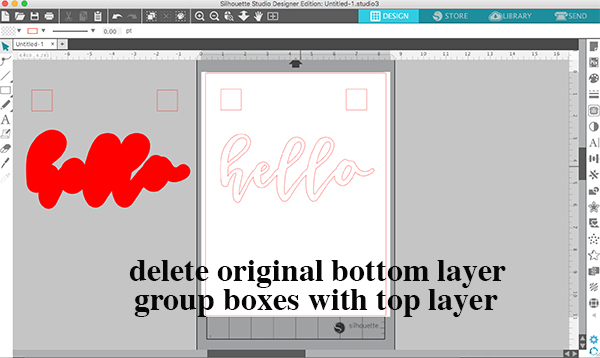
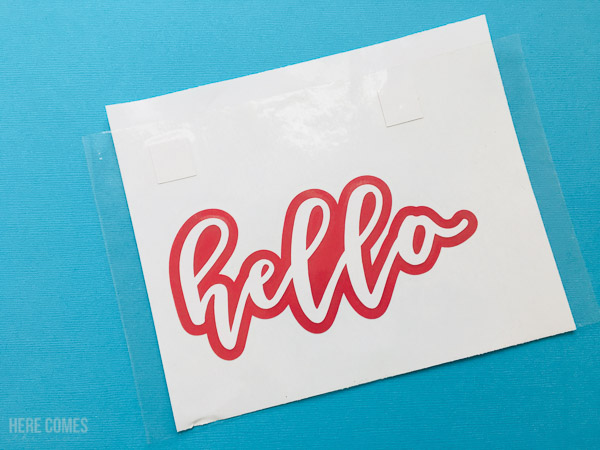
Once your layers are separate, you’ll need to add registration marks to your design. Draw two boxes and place them at the top of your design. Align the boxes using the transform panel in the right side menu, and group the boxes together (CMD or CTR – G).
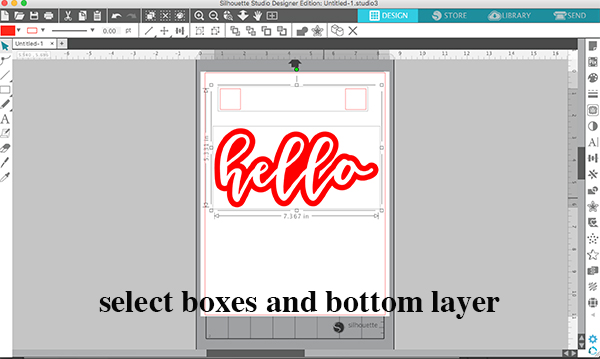
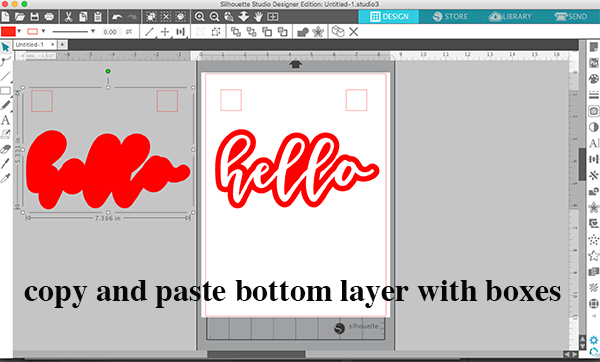
Select the boxes and the bottom layer (red layer in the picture above), then copy and paste. Move that layer aside and delete the original layer. Continue to do this until all layers have registration marks attached to them.
CUT YOUR DESIGN USING A SILHOUETTE PORTRAIT OR CAMEO
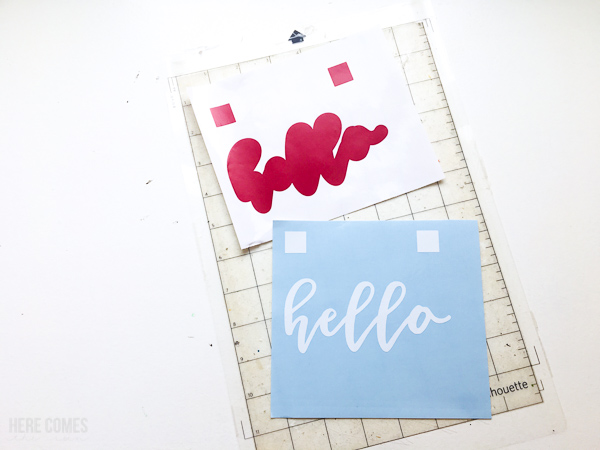
Cut out each layer of vinyl separately along with the registration marks for each layer. To cut out your design, you can either drag your layers onto the mat one at a time or you can cut by color. Once your design is finished cutting, weed your design.
LAYER YOUR DESIGN
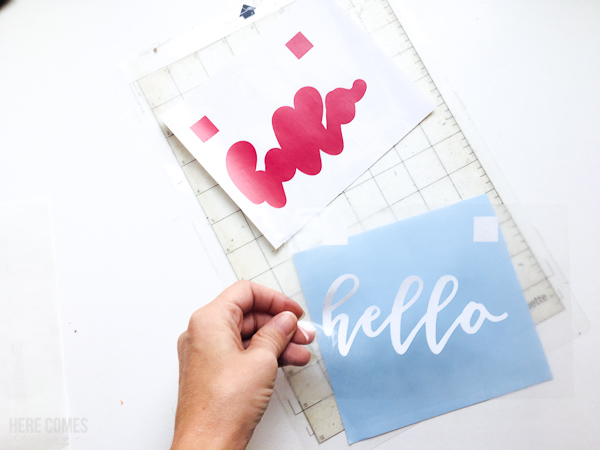
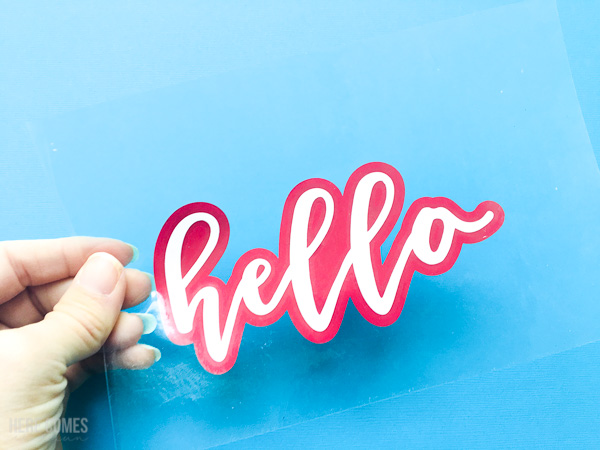
To layer the vinyl, place a piece of transfer tape over the top layer and adhere the top layer to the transfer tape. by burnishing with a scraper tool. Make sure that you use a piece of transfer tape that will cover the entire design and not just the top layer. This is because every layer is going to adhere to this piece of transfer tape. Peel the backing paper away from the vinyl, starting at the top closest to the registration marks. Only peel back a portion of the liner until the registration marks are exposed.
Line up the registration marks from the top layer with the registration marks from the second layer.
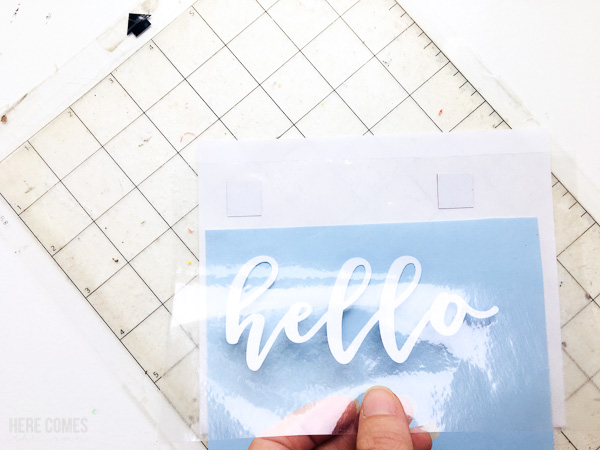
Slide the backing out and press the top layer down onto the second layer.

Repeat this process for each layer that you have. When you are done with the final layer, you can peel the registration marks off of the transfer tape. You should now have a design where the layers are perfectly aligned.
If this tutorial has helped you, please consider sharing it so others can see it!
MORE SILHOUETTE AND VINYL TUTORIALS
How to Layer Heat Transfer Vinyl
How to Weed Vinyl: 5 Must-Know Tips
The Beginner’s Guide To Heat Transfer Vinyl
How to Use SVG Files: Tips, Tricks & Ideas
SVG FILE FAQs
How do I open these files in my Silhouette software?
Save the file to your computer. If it is a zip file, unzip it. Open your Silhouette software and select FILE>OPEN and navigate to where you saved the file. You can also import the file(s) to your Silhouette library by clicking FILE>LIBRARY>IMPORT TO LIBRARY and navigating to where you saved the file.
Can I open SVG files in the Silhouette Basic Edition?
No. You must have Silhouette Designer Edition or higher to open SVG files. If you have Silhouette Basic Edition, you can use PNG files and convert the PNG to a cut file.
Can this file be used with a Cricut?
Yes. Any SVG file can be used in Cricut Design Space
LOVE IT? PIN IT!
Thank you
What a simply great tip thanks so much – common sense ultimately but never seen a post of such simple, sound advice ! #needed ??
Thanks for the useful tip!
What are registration marks? Thank you
Hi Debbie! Registration marks are the shapes that you draw at the top of your design that you use to line up each layer. They could also be called reference marks.
Registration marks are marks put above the design in design space, which are then cut out along with the design still on top of it. Then, you use the registration marks on all the designs and lights them up to make sure you designs are aligned and perfect. I hope this answers your question Debbie W. 😄
Hi! I’m hoping to attempt this technique tonight. Your tutorial seems straight forward, so thank you! I’m wondering if you could share what font your HELLO is.
Hi Shasta! The font I used is called Miss Magnolia. It is available on Creative Market here: https://crmrkt.com/6pXx5m