
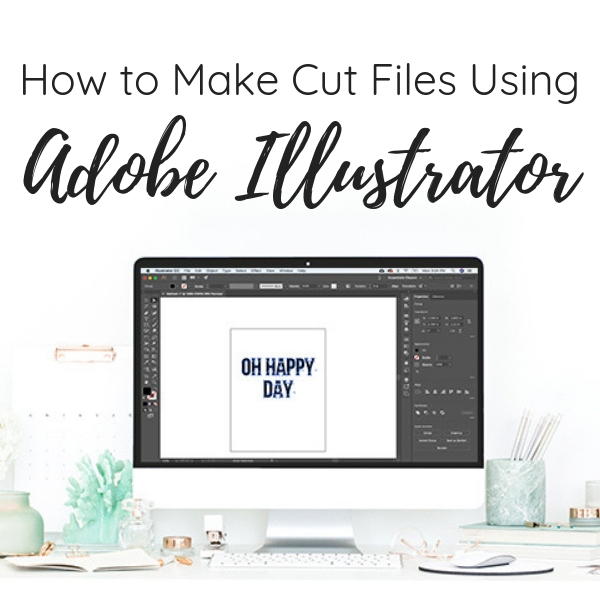
How to Make Cut Files using Illustrator
Learn how to make cut files using Illustrator for use with Silhouette or Cricut.
Cut files (also known as SVG files) are one of my favorite crafty items to create. But for the longest time, I didn’t know how to make them. I relied on using other people’s cut files and soon got frustrated when I couldn’t find exactly what I wanted. Now that I know how to create an SVG cut file, I want to share this knowledge with you so you can also create cut files using Illustrator.
WHAT IS A CUT FILE?
Before I get into how to create SVG files in Adobe Illustrator, let’s talk about what exactly an SVG is. Cut file and SVG are used interchangeably. SVG stands for scalable vector graphic. SVG files are in vector file format instead of raster. Vector graphics are comprised of points whereas raster image formats are comprised of pixels. Examples of raster graphics include JPEG and PNG files. The big difference between vector and raster is that vector files can be scaled up without losing resolution. Raster images lose resolution and become blurry if they are scaled up (enlarged) too much. Because vector graphics can be scaled up, they can be placed on something as small as a business card or as large as a billboard and the resolution will be the same. SVG files can be used in personal cutting machines like Cricut and Silhouette.
WHAT SOFTWARE IS USED TO CREATE CUT FILES?
When making SVG files (cut files), there are several programs that can be used. Here are the 3 most popular programs:
- Inkscape – Inkscape is a free program that allows you to convert PNG and JPEG images into SVG files. It also allows you to draw your own SVG files from scratch.
- Silhouette Studio – Silhouette Studio (Business Edition or higher) allows you to create and save SVG files.
- Adobe Illustrator – Adobe Illustrator is the most robust design software of these 3 options. It is the software that professional graphic designers use and (in my opinion), the best software for creating SVG files.
Adobe Illustrator comes with the Adobe Creative Cloud monthly subscription. If you are just starting out and don’t want to invest just yet, you can get a free trial.
Up until recently, I was very intimidated about using Adobe Illustrator. I thought that it was too complicated to learn and I stayed away from it for a very long time. But when I wanted to start to create my own cut files, I I took the plunge, bought Creative Cloud and started to teach myself Illustrator. And guess what… it’s not so scary and I learned that there is no reason to be intimidated. This program can do some pretty cool stuff.
I’m here to show you that this tech is not so scary and that it is not as hard as it may seem. Today I’ll be showing you how to make cut files (SVG file) in Adobe Illustrator using both text and graphics.
HOW TO MAKE CUT FILES USING ILLUSTRATOR

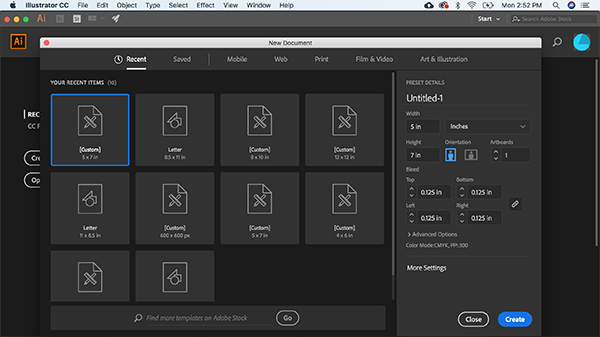
STEP 1 – CREATE AN ARTBOARD
Open up Illustrator and click “Create New” to start a new project. When designing SVG files, I usually create a 12×12 artboard. Illustrator gives you several default sizes to choose from or you can create a custom size in the right hand panel. I use 12 x 12 because that is the size of the Cricut and Silhouette cutting mats. 8.5 x11 is also a good option if you will be cutting the file out on a Silhouette Portrait.
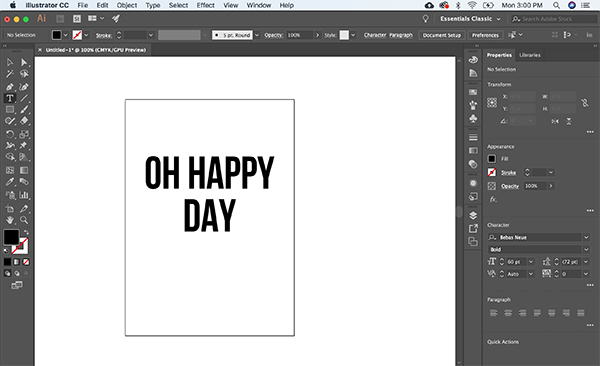
STEP 2 – ADD TEXT
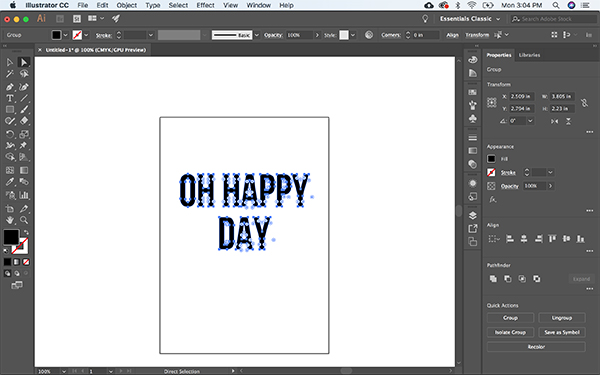
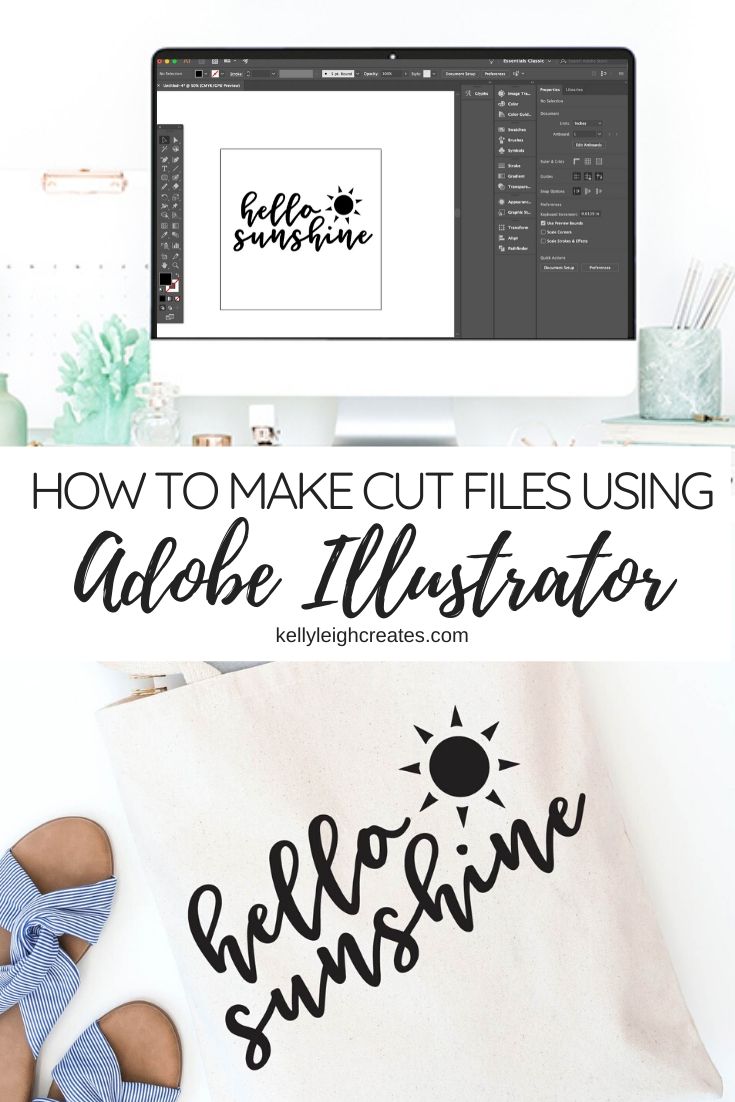
Click on the “TEXT” tool (T) in the panel on the left side and type out your text. If you have more than one line of text, I recommend typing each line separately so you can easily adjust each line. Click your text and choose a font from the dropdown menu on the right. When using text in cut files, you’ll want to use a font that is not too jagged around the edges. The more jagged the font, the harder it will be to cut. Some hand-drawn fonts are not really suitable for SVG files so you’ll have to be aware of the font that you are using. For this example (Oh Happy Day, below) I’m using Bebas Neue. If you like script fonts, one of my favorites is Miss Magnolia.
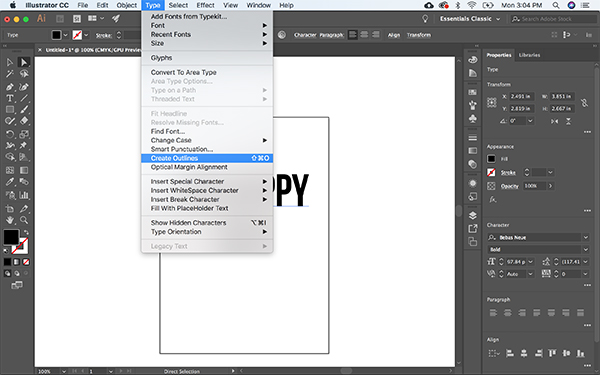
STEP 3 – OUTLINE THE TEXT
This is very important. Click TYPE>CREATE OUTLINES. When you outline your text, you are changing it from a font into a path. This is important because it allows the file to be opened on computers that don’t have the specific font installed. If you have ever purchased an SVG file and it doesn’t open correctly on your computer, the fonts mosts likely have not been converted to paths. After you outline your text, you can no longer edit it (change letters, etc.) so make sure to have it exactly the way you want it before you outline it.
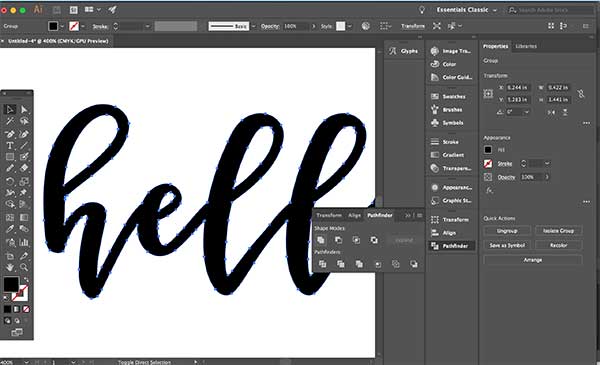
STEP 4 – UNITE THE TEXT
This step in only necessary for cursive fonts. If you are using a cursive font like the one shown below, select the text with the direct selection tool and click WINDOW>PATHFINDER >UNITE. The unite tool will unite all the text together. If you skip this step with a cursive font, the font will be cut out as separate letters and not as one continuous piece. In the image below, you can see that the script letters are connected. If the text was not united, the places where the letters overlap would be cut.
STEP 5 – CREATE A COMPOUND PATH
Creating a compound path is necessary to use the SVG file in Cricut Design Space. If you were to upload this file to Design Space without creating a compound path, the letters would be jumbled and not aligned in the proper order. To create a compound path, you can activate the Pathfinder Tool by clicking on OBJECT > COMPOUND PATH > MAKE from the top menu bar, or you can select your text and click CMD-8 (or CTRL-8) on a PC.
To make sure that your text is a compound path, access the Layers Panel on the right side of the screen. Each text layer should say “Compound Path”
If you are creating a text-only file, you’re done and you can save it by clicking File>Save>SVG. But if you want to add some graphics, then follow these next steps.
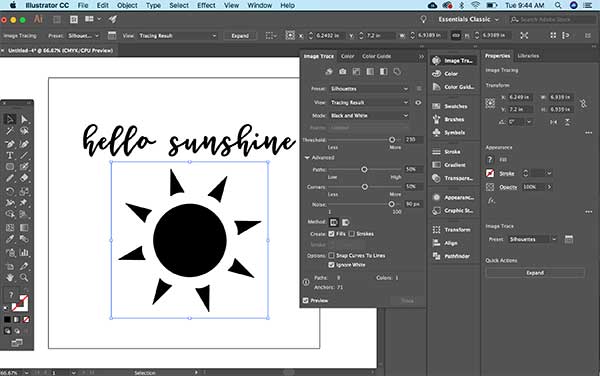
STEP 6 – ADD GRAPHICS
When adding a graphic to a design, you can either import a pre-made file or draw your own graphic. To import a file, click FILE>PLACE and navigate to where your graphic is saved on your computer.
STEP 7 – TRACE THE GRAPHIC
If the graphic is in JPEG or PNG format, you’ll need to trace it to change it to vector format. To trace, click OBJECT>IMAGE TRACE>MAKE AND EXPAND from the top menu. If you draw your own graphic using the shape tools within Illustrator, click OBJECT > EXPAND.
STEP 8 – MAKE COMPOUND PATH
Just like you made a compound path with the text, you’ll need to make the graphic a compound path too.
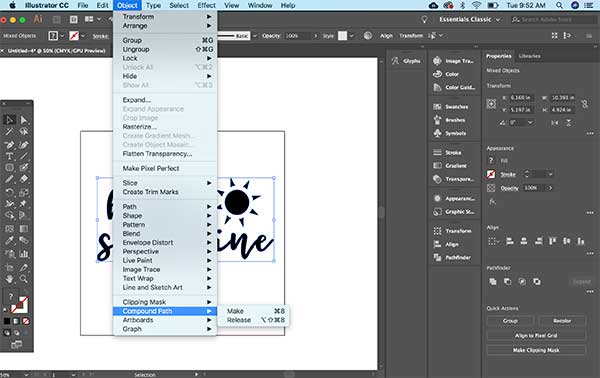
STEP 9 – GROUP
Group all of your compound paths together. Select everything and click CMD (or CTRL) – G. Now everything is nested neatly into a group and will move as one piece when imported into Silhouette Studio or Cricut Design Space.
STEP 10 – SAVE
After you have created everything, your file is still an Illustrator file. You’ll need to save it as an SVG file in order to use it in cutting machines. Save your newly created file as an SVG. Click FILE>SAVE AS and choose SVG when prompted. That’s it!
I hope you enjoyed this tutorial on how to create cut files using Illustrator. If you found it useful, please consider sharing it.
MORE SVG TUTORIALS:
- How to Use SVG Files: Tips and Tricks
- How to Convert a JPEG or PNG into a Cut File using Silhouette Studio
- How to Vectorize Hand Lettering in Illustrator
- How to Use Silhouette Studio: Everything You Need To Know

LOVE IT? PIN IT!
SVG FILE FAQs
How do I open these files in my Silhouette software?
Save the file to your computer. If it is a zip file, unzip it. Open your Silhouette software and select FILE>OPEN and navigate to where you saved the file. You can also import the file(s) to your Silhouette library by clicking FILE>LIBRARY>IMPORT TO LIBRARY and navigating to where you saved the file.
Can I open SVG files in the Silhouette Basic Edition?
No. You must have Silhouette Designer Edition or higher to open SVG files. If you have Silhouette Basic Edition, you can use PNG files and convert the PNG to a cut file.
Can this file be used with a Cricut?
Yes. Any SVG file can be used in Cricut Design Space
Wow nice and simple, what a well written article!
I have a question- once the svg is transferred to Scan n Cut and lets say I am cutting it on HTV as mirrored image, how do I then transfer it to the Fabric all as a single piece. Because the cut piece will be individual letters, it will be a nightmare to get it all together individually aligned on the fabric to iron. I struggle with that part while using a non-script font. Can you please help. Is there a clever way to ‘connect’ non script font so it peels away from Mat as a single item? Thanks in advance Adi
Hi Adi! Heat Transfer Vinyl comes with a carrier sheet. After your file is cut, weed away the excess vinyl and you will be left with your design attached to the carrier sheet. Then just flip the sheet over and you can place your design onto your fabric in one piece. Hope this helps.
Hi Kelly, you wont believe I have been lookingfor this tutorial for almost4-5 months now. I have gone through tons of youtube videos but none has explained it so beautifully and so easily as you did. However, after image trace when I use direct selection tool to select both the text and image and do “compound path-make” the image gets a big black square box with it. I used a black heart png. I dont know why this is happening. Can you please help me out. Looking forward.
Hi Shadaan! I’m glad you found my tutorial useful. If you are getting a black box, try using the “group” command instead of “make compound path”. This step isn’t always necessary…it just makes it so the design is all grouped together and you can move it in one piece.
This post was very helpful! You explained everything in an easy to understand way. Thank you so much! XO
Thanks so much, Diana! I’m glad you found it helpful.
Hello! Thank you very much for information! I try to make some svg design. If it will consist two colours or more, need to put them on different layers?
Yes, put each color on a different layer in Illustrator.
As an Illustrator newbie trying to expand into cut file development (to hopefully sell), you nailed it! I was able to easily follow your steps and create my own svg cut file without trouble. It uploaded into Cricut Design Space seamlessly. Thank you so much for your time and energy in putting this together.
I’m so glad you found the tutorial helpful.