
How to Create SVG Files Using Procreate
Learn how to design SVG files using Procreate app. This tutorial will teach you the first step in the process I use to create SVG files.
I absolutely love to create SVG files but for a long time, I did not know how to create SVG files. After I learned hand lettering, I started to create SVG files from my lettering using Procreate and Illustrator. When I create SVG from my lettering, I’m able to put my work onto things like shirts, bags and so much more. It really is so much fun to see your own work on an item of clothing. Today I’m going to show you how I design my SVG files using Procreate.
SUPPLIES NEEDED
- iPad – you don’t need an iPad Pro to use Procreate. Any iPad version 6 or newer will work.
- Procreate app – this is pretty obvious, right? This app is available from the Apple store. When I purchased it, it cost around 10 dollars. I’m not sure if the price has gone up but it is super cheap for everything that this app allows you to do.
- Apple Pencil – you can use almost any stylus created to draw on an iPad, but if you are looking to create hand-lettered SVG files with differing stroke weights, you’ll need an Apple Pencil. The Apple Pencil is pressure-sensitive meaning the harder you press down, the thicker the weight of the stroke will be.
HOW TO DESIGN SVG FILES USING PROCREATE
If you need a refresher to Procreate, or you are new to Procreate, make sure to check out my Intro to Procreate post. First, I need to point out that you cannot export to SVG format directly from Procreate. You will need another program to turn your Procreate file into an SVG. I use Adobe Illustrator but you can also convert to SVGs using Inkscape which is free. If you are a Silhouette user, you can also save a file as an SVG from the Silhouette software. But I am getting ahead of myself…
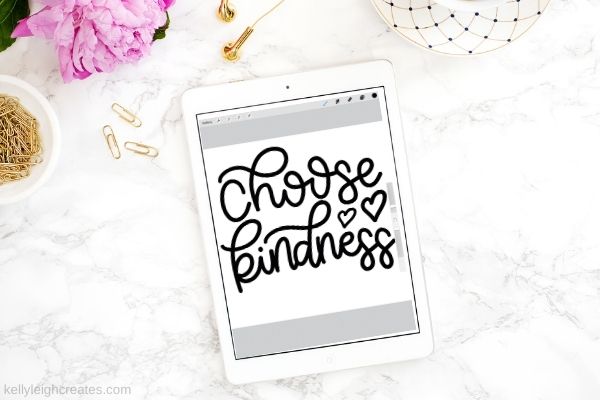
- Open up Procreate and select a document size. I’d recommend using 12″x12″ because that is the size of the Silhouette and Cricut cutting mats. If you size your design to 12″x12″, it will upload perfectly to the cutting machine software and you will not have to resize it.
- Create your design. If you’re looking for tips on how to letter in Procreate, check out this post. If aren’t comfortable lettering, you can also use procreate to draw pretty much anything. I recommend using one of the default sketching brushes to sketch your design first and then use the monoline brush to go over your sketched design for the final product.
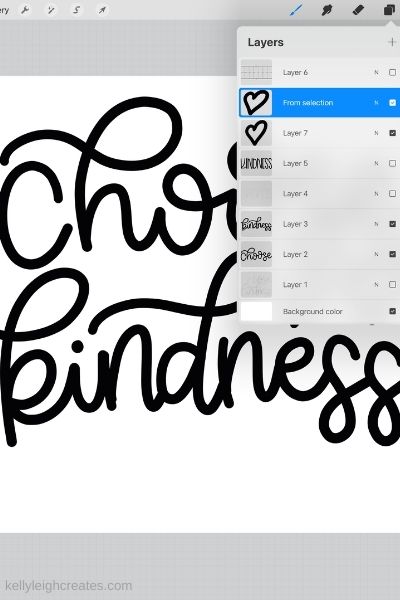
- Place each layer of your design onto a different layer in Procreate. This makes it easy to manipulate one layer without disturbing/destroying the other layers.

- When you are done designing, uncheck the background layer and export it as a PNG. Since I use a Mac, I usually AirDrop the file to my computer but you can also email it to yourself or send it to Google Drive or DropBox to access on a computer.
- Once your file is saved to your computer, you can either create the SVG in Illustrator or you can open it in Silhouette Studio to create an SVG.

I hope you enjoyed this tutorial. If it helped you, please consider sharing it!
MORE PROCREATE TUTORIALS
- How to Install Brushes in Procreate
- How to Create Color Palettes in Procreate
- How to Hand Letter in Procreate
- 3 Fun Lettering Styles to Try in Procreate
LOVE IT? PIN IT!
I tried this method for turing my png creation into svg and it did not work well, are there other methods or methods that i dont need to pay for another app or program just to do this. My design came out blurry and or cut in half. thnks
To avoid a blurry design, make sure your resolution is set at 300 dpi. If you don’t want to pay for Illustrator to vectorize your design, you can use the free program Inkscape.
How to I set my resolution to 300 dpi or change it?
Hi Chrissy. You can set the resolution under the Actions Menu (wrench icon). From there tap Canvas > Canvas Information > Dimensions.