How to Use the Silhouette Print and Cut Feature
Learn how to use the Silhouette Print and Cut feature to create gorgeous designs easily.
Have you ever wondered how to use the print and cut feature on a Silhouette machine? This feature is amazing and you can create so many fun crafts with it. You also use it to make cards, cake toppers, gift tags, and so much more.

WHAT IS SILHOUETTE PRINT AND CUT?
Silhouette Print and Cut is a feature that allows you to create designs in Silhouette Studio, send them from Silhouette Studio to your printer, and then use a Silhouette machine cut around those designs. You can use print and cut to make things like stickers, cake toppers, pop-up gift cards, photo booth props, gift tags, gift boxes, and more! Read on to learn how to make these fun happy birthday gift tags using Silhouette Print and Cut.
WHAT MACHINES CAN PRINT AND CUT?
For this tutorial, I’ll be using a Silhouette Cameo 4 but all the Silhouette models (Cameo, Portrait, and Curio) can print and cut.
HOW TO SET UP YOUR PRINT AND CUT FILE
To use the Silhouette Print and Cut feature, you will either need a file that is specifically designed for print and cut or you can create your own design. You can find many pre-made print and cut files in the Silhouette store and some also come free with your Silhouette machine. I’m using a happy birthday gift tag file.
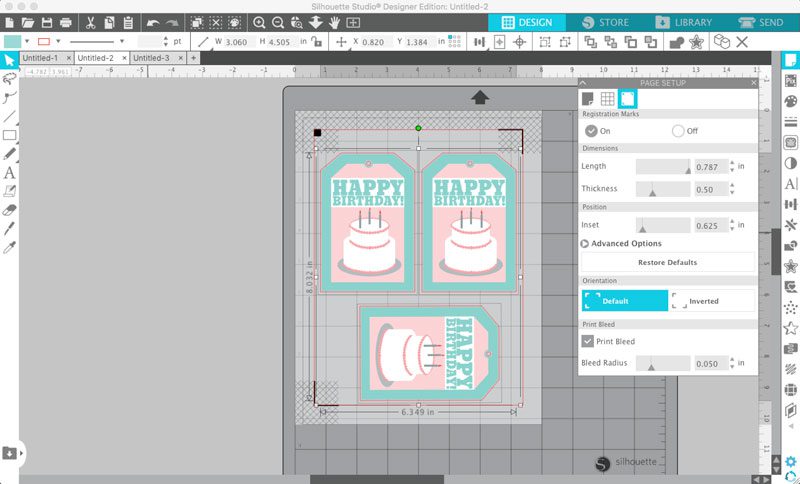
Open the file and place it on your canvas. If you open from the Silhouette library, registration marks will be automatically added to your canvas. Registration marks show up as black boxes and corners. They are reference marks and tell the Silhouette where to cut your printed design. If the registration marks don’t appear, you can add them under the Page setup panel. Select the registration mark box in the top row to turn on the registration marks.
To make sure that there is no white border when your design is cut, check the box next to “Print Bleed”. This function works similar to a bleed that you set up in Adobe Illustrator. The color will extend just beyond the cut lines so when the design is cut, there will be no white border. You will not be able to see this on the preview screen.
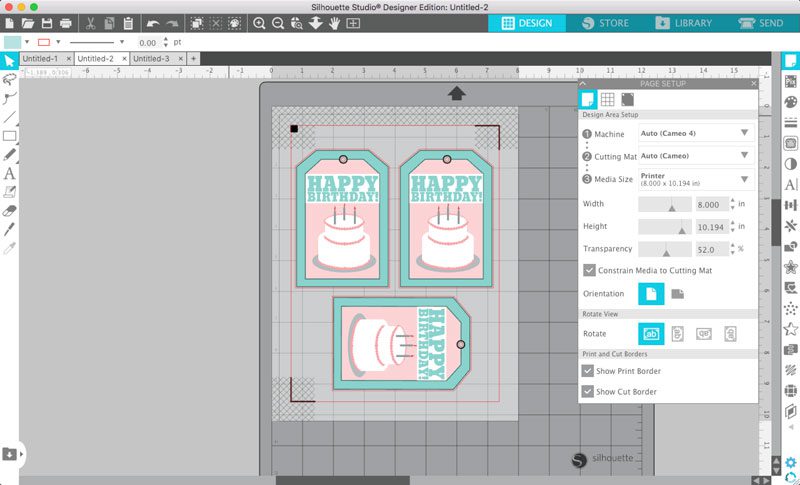
Set the media size to “printer” and check the boxes next to “show print border” and “show cut border” Resize your design to your desired size, making sure that it stays within the print and cut borders and does not touch the registration marks.
Hit the “Send” button and make sure that the only line set to cut is the outline of the design.

HOW TO PRINT FROM SILHOUETTE TO PRINTER
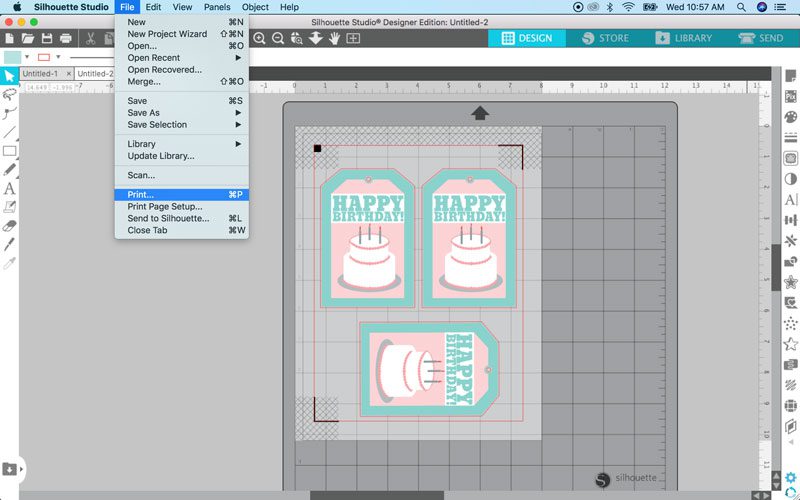
To print your design, hit FILE>PRINT and send it to your printer. The design and registration marks will print. Make sure that once you hit “print”, you do not adjust the design in any way. If you move it on your canvas, it will not cut correctly in the next step.
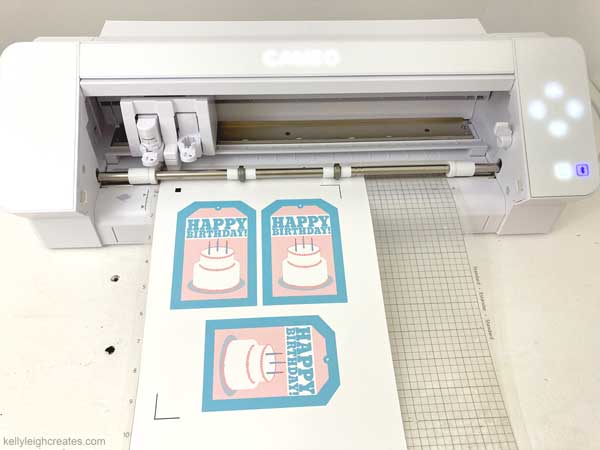
HOW TO PRINT AND CUT ON SILHOUETTE CAMEO 4
Once the design is printed, place your material onto a cutting mat and load it into your Silhouette. Go back to the SEND panel and double-check that only the outside of the design is set to cut. Choose your material from the drop-down menu. Most likely, you will be using cardstock or sticker paper but you can also use other materials.
If using a Silhouette Cameo 4, make sure the auto blade is loaded correctly and hit “SEND”. If you are using a Silhouette model without an autoblade, you will have to adjust the blade depth manually. Once you hit SEND, the Silhouette will read the registration marks and cut around the design.
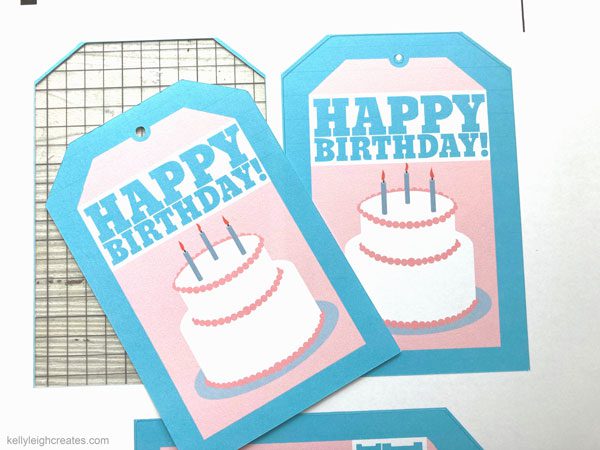
This is a close-up of the project. You can see that the color extends just outside the cut lines so you get a crisp edge and no white border.
I hope this tutorial has helped you learn the basics of the Silhouette print and cut feature. Check out more links to Silhouette tutorials below.
MORE SILHOUETTE TUTORIALS:
How to Import SVG files into Silhouette Studio
Silhouette Print and Cut Stickers
How to Make Labels with Silhouette
How to Use Silhouette Sketch Pens
LOVE IT? PIN IT!