
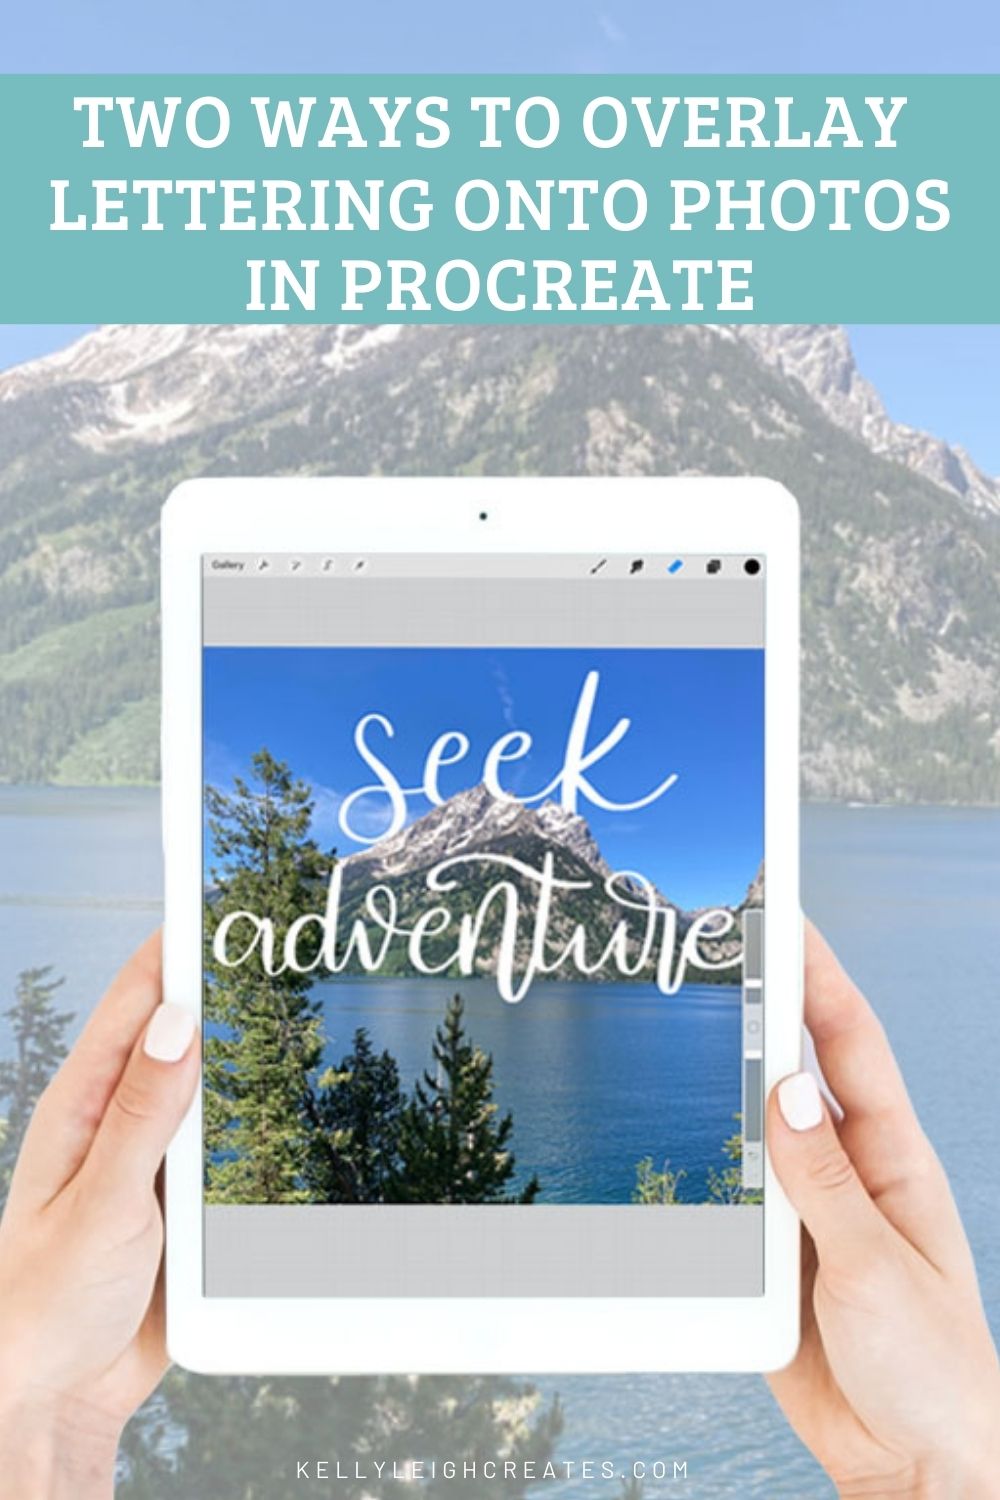
Two Ways to Overlay Lettering onto Photos in Procreate
Learn two easy ways to overlay lettering onto photos in Procreate to create unique effects.
I love lettering in Procreate. When I discovered the amazing effects that you can create with lettering and photos in Procreate, I knew that it was something I needed to share with you. Today I’m going to show you two easy ways to create beautiful effects when you overlay lettering onto photos in Procreate.
Before we begin, you’ll want to make sure you understand the basics of Procreate and iPad lettering.
TWO WAYS TO OVERLAY LETTERING ONTO PHOTOS
To overlay lettering onto photos in Procreate, you’ll first need to choose a photo. In this example, I’m using a photo from our recent family vacation to Grand Teton National Park. Make sure your photo has a focal point like the mountain in this photo.
Save the photo to your iPad ( I usually Airdrop it from my phone) and import it on a new layer in Procreate. To do this, open a new document, tap the wrench icon, then tap ADD>INSERT A PHOTO. The photo will be placed on a new layer.
After you have your photo imported, create a new layer and add your lettering. You can either hand-letter a phrase or use the text tool. To use the text tool, tap the wrench icon and tap ADD>TEXT.
Now comes the fun part. Decide how you want your lettering to overlay the photo. Usually, I want some of my lettering to be hidden behind the subject of the photo.
OVERLAY LETTERING ONTO PHOTOS: METHOD ONE
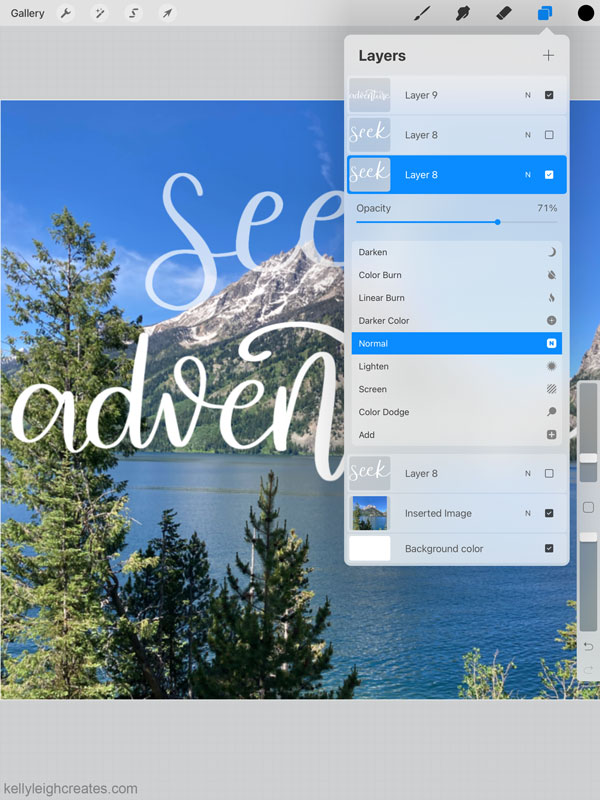
The first way to overlay lettering involves using the eraser tool. This tool can be found in the upper right of the screen. First, duplicate your lettering layer by swiping left on the layer and tapping “DUPLICATE”. Then, turn off the bottom lettering layer. Having a copy of your work is always good in case you mess up and can’t undo things.
Reduce the opacity of the lettering layer so the mountains show through. Select the layer, tap “N” and move the slider to the left.
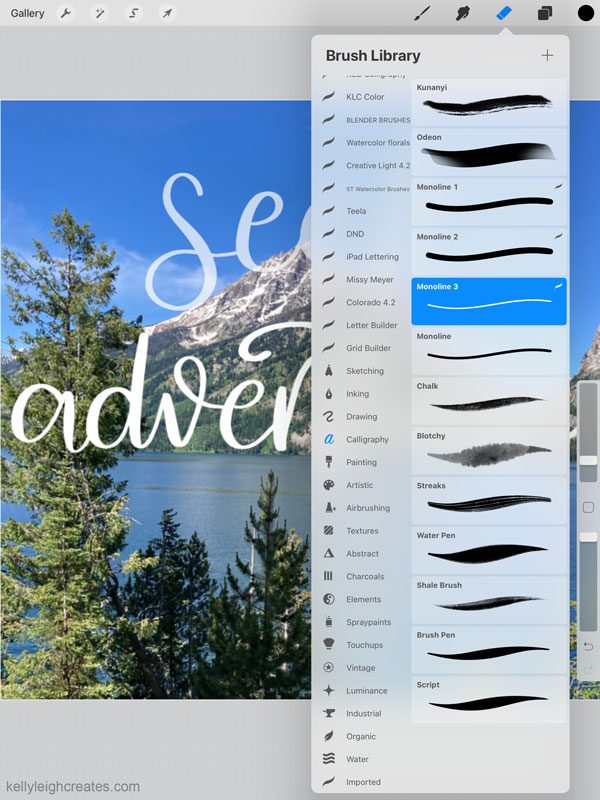
Erase the portion of the lettering that you want hidden. I use a monoline brush to erase and zoom in really close.
When finished, increase the opacity of the lettering layer to reveal the finished image.
OVERLAY LETTERING ONTO PHOTOS: METHOD TWO
The second way to overlay lettering onto photos is by using a layer mask. A layer mask is a form of non-destructive editing. To use a layer mask, tap on your lettering layer and tap LAYER MASK. You’ll see a white box appear next to your lettering layer in the layers panel. Whatever you do on the layer mask will show up on your lettering layer without actually disturbing your lettering layer.
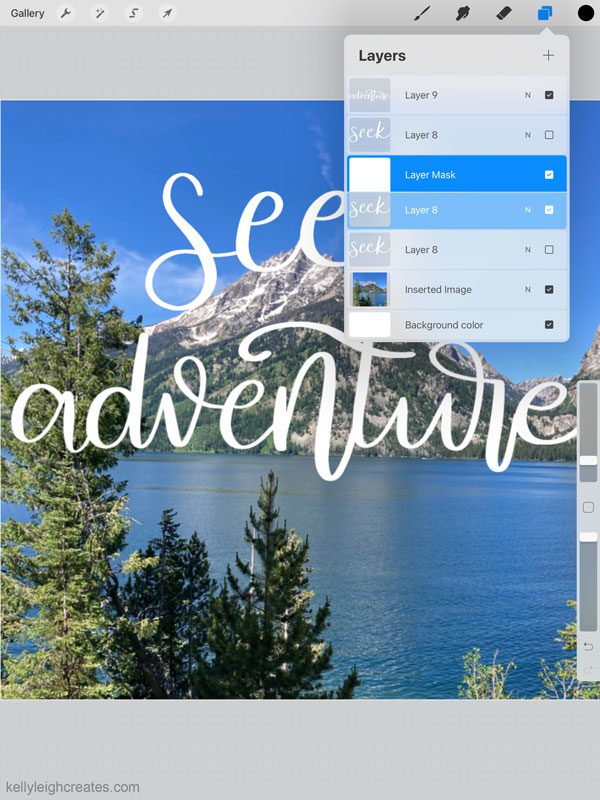
To erase, choose black from the color palette and a monoline brush. Draw over the areas that you want to erase (with the brush tool, not the eraser tool). If you make a mistake, simply change the brush color to white and draw over your mistakes to “undo”. To remember this method: “black conceals, white reveals”. Drawing over your lettering in black conceals it; drawing over it in white reveals it. There is no actual erasing being done on the lettering layer. It all happens on the layer mask. If you turn off the layer mask, your original lettering layer is still intact.
When you’re done, you’ll have a completely customized photo. If you use this technique, please be sure to tag me on Instagram at @kellylcreates. I’d love to see your work!
MORE PROCREATE LETTERING TUTORIALS
Galaxy Brush Lettering Tutorial
70s Style Lettering Tutorial
Rainbow Lettering Tutorial
3D Lettering Tutorial
LOVE IT? PIN IT!
Thanks for sharing this.