
How to Reverse Weed Adhesive Vinyl
Getting frustrated when you try to weed vinyl? This tutorial will teach you how to reverse weed adhesive vinyl for small letters and intricate designs.
I don’t know about you, but weeding vinyl is probably my least favorite step of any vinyl project. I have to admit that I used to shy away from intricate designs because weeding small letters and intricate designs can get very tedious and the frustration level gets out of control. That is until I discovered how to reverse weed adhesive vinyl. This is a game-changer, friends! If you are ready to get rid of the frustration of weeding small designs, then this tutorial is for you!
Let’s dive in!

BASIC SVG & SILHOUETTE STUDIO POSTS
- How to Use Silhouette Cameo 4: A Guide to Getting Started
- How to Use SVG files: Tips, Tricks & Ideas
- How to Import Files Into Silhouette Studio
- How to Weed Vinyl
- How to Cut By Color in Silhouette Studio
- How to Separate SVG files into Layers

What You’ll Need to Reverse Weed
- Any SVG file (sign up for my emails to access all my free SVGs) or get the Boho Vibes SVG here.
- Silhouette Cameo or Cricut
- Cutting mat – Silhouette / Cricut
- Adhesive vinyl
- Transfer tape
- Scraper tool
- Weeding hook

What is Reverse Weeding?
Reverse weeding is the process of applying transfer tape to your vinyl design BEFORE you weed the excess vinyl off of the vinyl backing.
Reverse Weeding Versus Regular Weeding
With regular (traditional) weeding, the transfer tape is placed onto the vinyl AFTER the excess has been removed from the vinyl backing. With reverse weeding, it is the exact opposite (hence the name, reverse). The transfer tape is placed onto the vinyl BEFORE any weeding takes place.
When Should You Reverse Weed?
Reverse weeding is useful when your design has small text and/or intricate designs. With reverse weeding, you are less likely to pull the design off of the vinyl backing by mistake when the excess vinyl is removed. Since the design is already stuck to the transfer tape, there is less chance ripping, damaging, or losing portions of the design.
How to Reverse Weed
- Cut your design using a Silhouette or Cricut machine
- Cut a piece of transfer tape and place it over the vinyl (do NOT weed the excess vinyl before placing the transfer tape on).
- Using a scraper tool, burnish the transfer tape to the vinyl
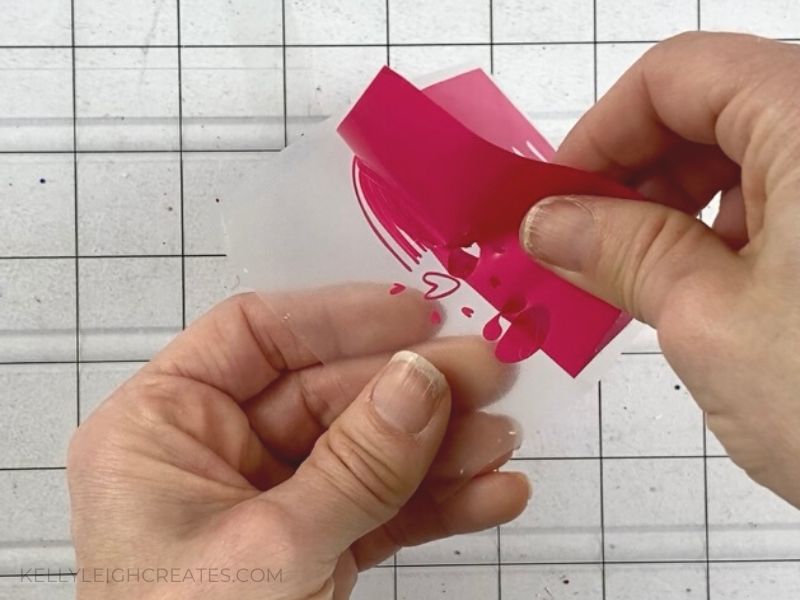
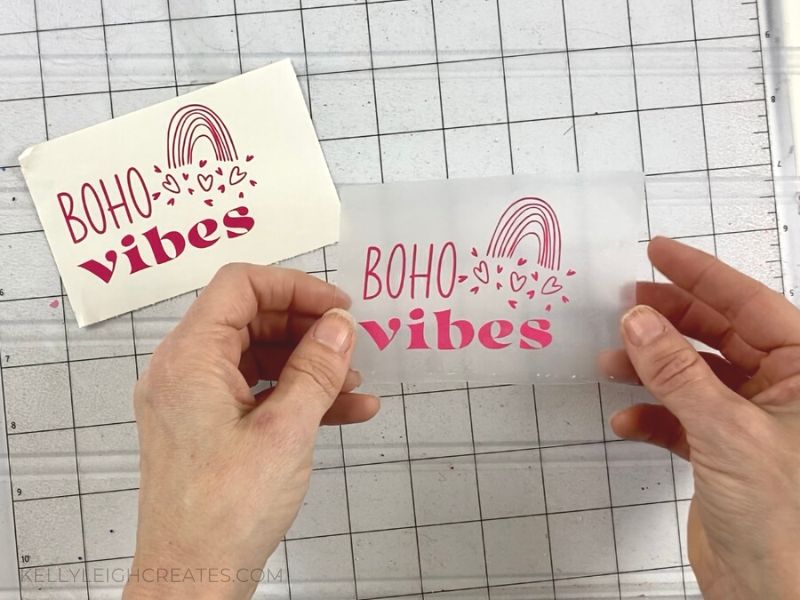
- Flip the vinyl over and peel off the vinyl backing
- Using a weeding hook to get started, peel the excess vinyl away from the transfer tape to reveal your weeded design.


MORE VINYL TUTORIALS
- HOW TO LAYER GLITTER HEAT TRANSFER VINYL
- THE BEST WAY TO LAYER HEAT TRANSFER VINYL
- HOW TO 5 VINYL: 5 MUST-KNOW TIPS
- THE EASIEST WAY TO LAYER VINYL
SVG FILE FAQs
How do I open these files in my Silhouette software?
Save the file to your computer. If it is a zip file, unzip it. Open your Silhouette software and select FILE>OPEN and navigate to where you saved the file. You can also import the file(s) to your Silhouette library by clicking FILE>LIBRARY>IMPORT TO LIBRARY and navigating to where you saved the file.
Can I open SVG files in the Silhouette Basic Edition?
No. You must have Silhouette Designer Edition or higher to open SVG files. If you have Silhouette Basic Edition, you can use PNG files and convert the PNG to a cut file.
Can this file be used with a Cricut?
Yes. Any SVG file can be used in Cricut Design Space