
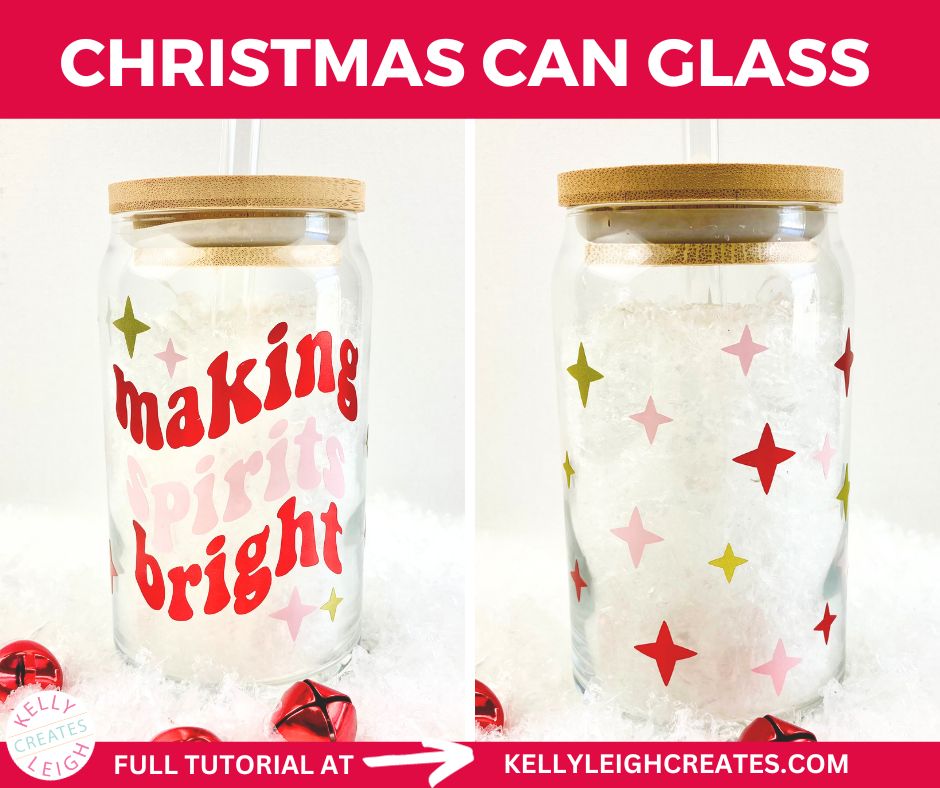
How to Make a Christmas Can Glass with a Vinyl Wrap
Learn how to make this fun Christmas can glass using a vinyl wrap. From designing the wrap in your software to applying it to the can glass, this tutorial will step you through the process.
Glass can wraps are super popular right now. I’m absolutely in love with them. You can customize them for any season, holiday, or event so this project can be used year-round which is always a win in my book. I couldn’t wait to make my own vinyl wrap and if you haven’t tried making one yet, you’re gonna love this tutorial. Today, I’m showing you how to make a Christmas can glass using a vinyl wrap.
Let’s dive in!
SVG & Silhouette Studio Posts
- How to Use Silhouette Cameo 4: A Guide to Getting Started
- How to Use Silhouette Studio: Everything You Need to Know
- How to Use SVG files: Tips, Tricks & Ideas
- How to Import Files Into Silhouette Studio
- How to Weed Vinyl
- How to Cut By Color in Silhouette Studio
- How to Separate SVG files into Layers
Christmas Can Glass Supplies
- 16 oz. Libbey Beer Can Glass
- Making Spirits Bright SVG file (get it below)
- Silhouette Cameo or Cricut
- Cutting mat – Silhouette / Cricut
- Permanent adhesive vinyl (red, pink, and gold)
- Transfer tape
- Scraper tool
- Weeding hook
SHOP THE HOLIDAY SVG COLLECTION


How to Design and Cut a Can Glass Wrap
- Download the SVG file.
- Open up Silhouette Studio (or Cricut Design Space) and create a box that is 10″ long and 4″ high. This is your template. This wrap will fit 16 oz. Libbey beer can glass.
- Upload the SVG file into your cutting software and size the file so it fits the template. Make sure that the words are in the middle of the template.
- Copy and paste the sparkes to fill the template. You may have to ungroup or release the compound path of the design to copy and paste. Follow this tutorial for how to work with layers in Silhouette Studio.
- Fill each element with color and cut the SVG file by color. You can follow this tutorial on how to cut by color using a Silhouette machine.
- After your files are finished cutting, weed the excess vinyl using a weeding hook.
How to Put a Vinyl Wrap onto a Can Glass
- Apply transfer tape to your weeded design. This post will show you how to use transfer tape with vinyl. This post will show you how to assemble each color onto one piece of transfer tape.
- Prepare your glass for vinyl – wipe the glass down with rubbing alcohol and let dry. This removes all dirt and debris.
- Apply your vinyl wrap – place the middle of the design down first and then smooth the sides around the glass.
Tips for Using Adhesive Vinyl
I’ve made many many projects using adhesive vinyl over the years, including lots of projects where I have placed vinyl on mugs, glasses, and items that will be washed. Here are some things I’ve learned when working with adhesive vinyl:
- If your design has very thin lines, it will not stick well or hold up if your item is being washed. The thicker lines that your design has, the better. Thicker lines mean more surface area on the back of the vinyl and it will stick better to the glass.
- Always let your item “cure” for 24-48 hours after you place the vinyl on. Letting it set for this amount of time allows a strong bond to form between the vinyl and your mug/glass.
- Never place items with vinyl in the dishwasher. Always hand wash them.


MORE SILHOUETTE AND CRICUT CHRISTMAS PROJECTS
- Easy Silhouette and Cricut Christmas Projects
- How to Sublimate a Wooden Ornament
- DIY Christmas Banner
- Christmas Countdown
- DIY Christmas Gift Box
- Wooden Round Christmas Sign
- How to Make a Santa Sack
- DIY Personalized Socks with Funny Sayings
- DIY Matching Family Christmas Pajamas
- Snow Globe Shaker Card
- DIY Makeup Bag Teen Gift Idea
- Christmas Gift Tags with Silhouette Sketch Pens
- DIY Christmas Wrapping Paper
- Buffalo Check Christmas Ornaments
- Christmas Tea Towels
- DIY Holiday Serving Tray
- Jingle All the Way Shadow Box
SVG FILE FAQs
How do I open these files in my Silhouette software?
Save the file to your computer. If it is a zip file, unzip it. Open your Silhouette software and select FILE>OPEN and navigate to where you saved the file. You can also import the file(s) to your Silhouette library by clicking FILE>LIBRARY>IMPORT TO LIBRARY and navigating to where you saved the file.
Can I open SVG files in the Silhouette Basic Edition?
No. You must have Silhouette Designer Edition or higher to open SVG files. If you have Silhouette Basic Edition, you can use PNG files and convert the PNG to a cut file.
Can this file be used with a Cricut?
Yes. Any SVG file can be used in Cricut Design Space