
DIY Winter Wonderland Wooden Christmas Ornament
Make a fun and glittery winter wonderland wooden Christmas ornament with this easy tutorial.
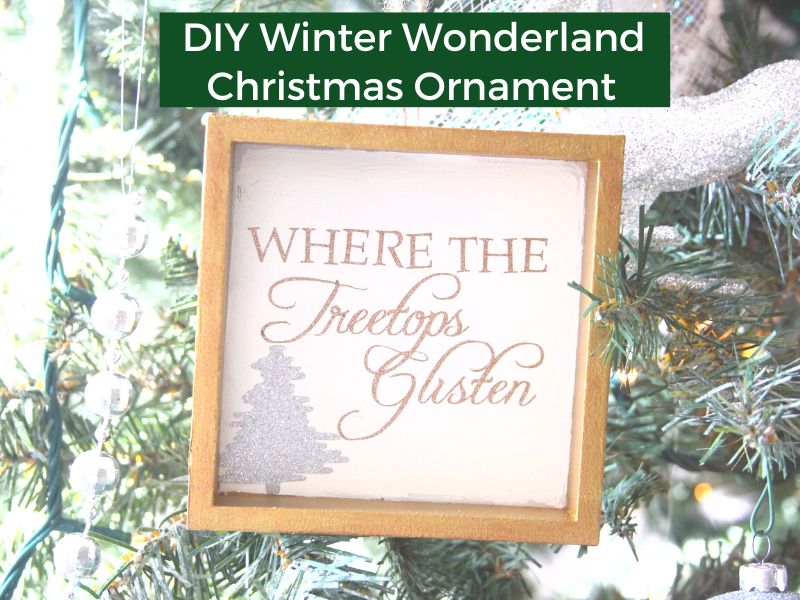
Themed Christmas trees are kinda my jam. In the past, I’ve decorated a rustic tree, red and white themed tree and even a coastal tree but this year I decided to go with a winter wonderland-themed tree. Sparkly, glittery and gorgeous. And since every winter wonderland tree needs a sparkly ornament, today I’m sharing an easy tutorial for a winter wonderland themed wooden Christmas ornament.
BASIC SVG & SILHOUETTE STUDIO POSTS
- How to Use Silhouette Cameo 4: A Guide to Getting Started
- How to Use SVG files: Tips, Tricks & Ideas
- How to Import Files Into Silhouette Studio
- How to Weed Vinyl
- How to Cut By Color in Silhouette Studio
- How to Separate SVG files into Layers
WOODEN CHRISTMAS ORNAMENT SUPPLIES
- Square wooden sign
- Acrylic paint (white and gold)
- Washi tape (gold)
- Adhesive vinyl (glitter gold and silver)
- Bakers twine
- Hot glue gun & glue sticks
- Paintbrush
- SVG file
- Silhouette or Cricut
- Cutting mat – Silhouette / Cricut
- Weeding hook
- Scraper tool
- Transfer tape

HOW TO MAKE A DIY WOODEN CHRISTMAS ORNAMENT
- Download the SVG file – It is available in my resource library, free for email subscribers
- Cut out your SVG file – I recommend using Oracal 651 vinyl. If you want to cut the SVG file in a few different colors as I have, you can follow this tutorial on how to cut by color. Make sure to measure your sign and size your file(s) to fit before you cut your file(s)
- Weed the SVG files – Once your design is finished cutting, weed the excess vinyl using a weeding hook.
- Apply transfer tape – Once your file is weeded, line up all your pieces on one piece of transfer tape by layering vinyl using this method.
- Paint your sign – Paint the inside of your sign white and the edges gold. After painting, let your sign fully dry. Don’t jump the gun on this one. I know it’s tempting to apply the vinyl but if your sign isn’t fully dry, the transfer tape will pull up the paint.
- Apply washi tape to the edges of your sign (optional)
- Apply the SVG file with the transfer tape – Once your sign is fully dry, (seriously…you need to wait until it is FULLY dry or you will have a mess), apply the file to your ornament. See this post if you need a tutorial on how to use transfer tape with vinyl.
- Attach a hanger – Make a loop with some bakers twine and adhere it to the back of the ornament with hot glue.

Add this ornament to your winter wonderland-themed Christmas tree for a sparkly touch.
MORE SILHOUETTE AND CRICUT CHRISTMAS PROJECTS
- Easy Silhouette and Cricut Christmas Projects
- Mini Banner Christmas Ornament
- Coffee Themed Gift Basket Idea
- Christmas Coasters with Infusible Ink
- Christmas Tote Bag with Infusible Ink
- DIY Christmas Banner
- Christmas Countdown
- DIY Christmas Gift Box
- Wooden Round Christmas Sign
- How to Make a Santa Sack
- DIY Personalized Socks with Funny Sayings
- DIY Matching Family Christmas Pajamas
- Snow Globe Shaker Card
- DIY Makeup Bag Teen Gift Idea
- Christmas Gift Tags with Silhouette Sketch Pens
- DIY Christmas Wrapping Paper
- Buffalo Check Christmas Ornaments
- Christmas Tea Towels
- DIY Holiday Serving Tray
- Jingle all the Way Shadow Box
SVG FILE FAQs
How do I open these files in my Silhouette software?
Save the file to your computer. If it is a zip file, unzip it. Open your Silhouette software and select FILE>OPEN and navigate to where you saved the file. You can also import the file(s) to your Silhouette library by clicking FILE>LIBRARY>IMPORT TO LIBRARY and navigating to where you saved the file.
Can I open SVG files in the Silhouette Basic Edition?
No. You must have Silhouette Designer Edition or higher to open SVG files. If you have Silhouette Basic Edition, you can use PNG files and convert the PNG to a cut file.
Can this file be used with a Cricut?
Yes. Any SVG file can be used in Cricut Design Space