
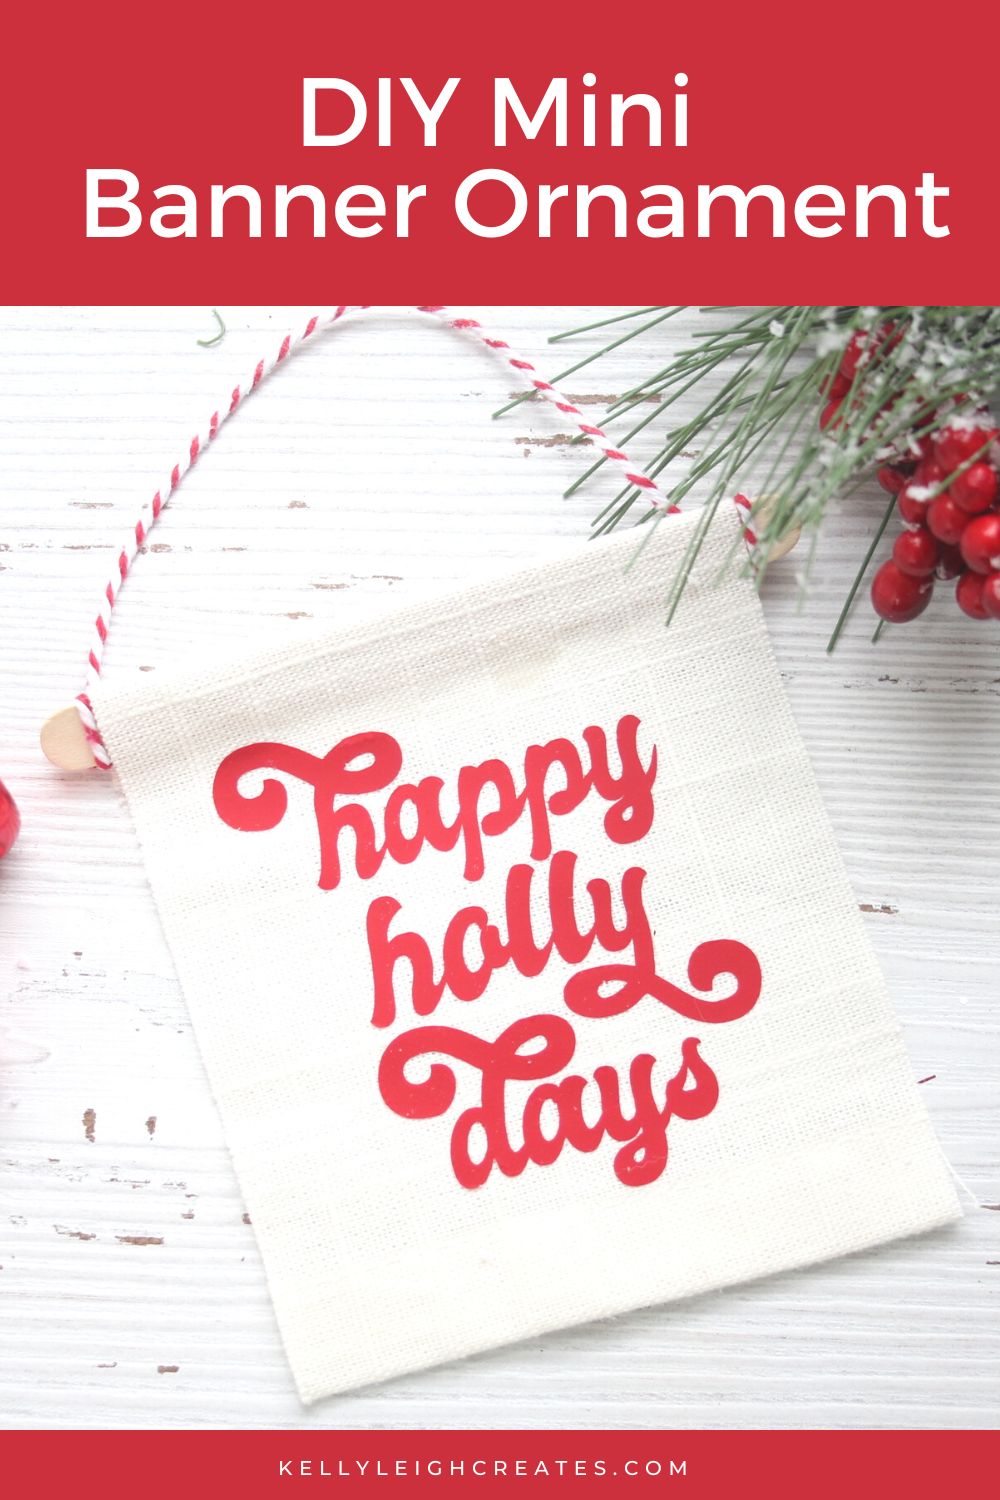
DIY Mini Banner Christmas Ornament
Learn how to make this fun mini banner Christmas ornament with this easy tutorial.
I love making homemade Christmas ornaments and have quite a collection that I have made over the years. Some of my favorites are my felt sachet snowflake ornament, peppermint bath bomb ornament, buffalo check ornament, felt candy ornament and wood slice ornaments. I’ve added another homemade ornament to my collection this year…a mini banner ornament. Ready to learn how to make it? It’s super easy with my SVG files and a few basic supplies.

BASIC SVG & SILHOUETTE STUDIO POSTS
- How to Use Silhouette Cameo 4: A Guide to Getting Started
- How to Use SVG files: Tips, Tricks & Ideas
- How to Import Files Into Silhouette Studio
- How to Weed Vinyl
- A Beginner’s Guide to Heat Transfer Vinyl
- How to Cut By Color in Silhouette Studio
- How to Separate SVG files into Layers
MINI BANNER CHRISTMAS ORNAMENT SUPPLIES
- Cream colored fabric
- Popsicle stick or small wooden dowel
- Scissors or a rotary cutter and mat
- Hot glue gun & glue sticks
- Red & white baker’s twine
- Mini pom pom garland
- SVG file (see below for access instructions)
- Red Heat transfer vinyl
- Weeding hook
- Silhouette or Cricut
- Cricut EasyPress 2
- Cricut EasyPress Mat
HOW TO MAKE A MINI BANNER CHRISTMAS ORNAMENT
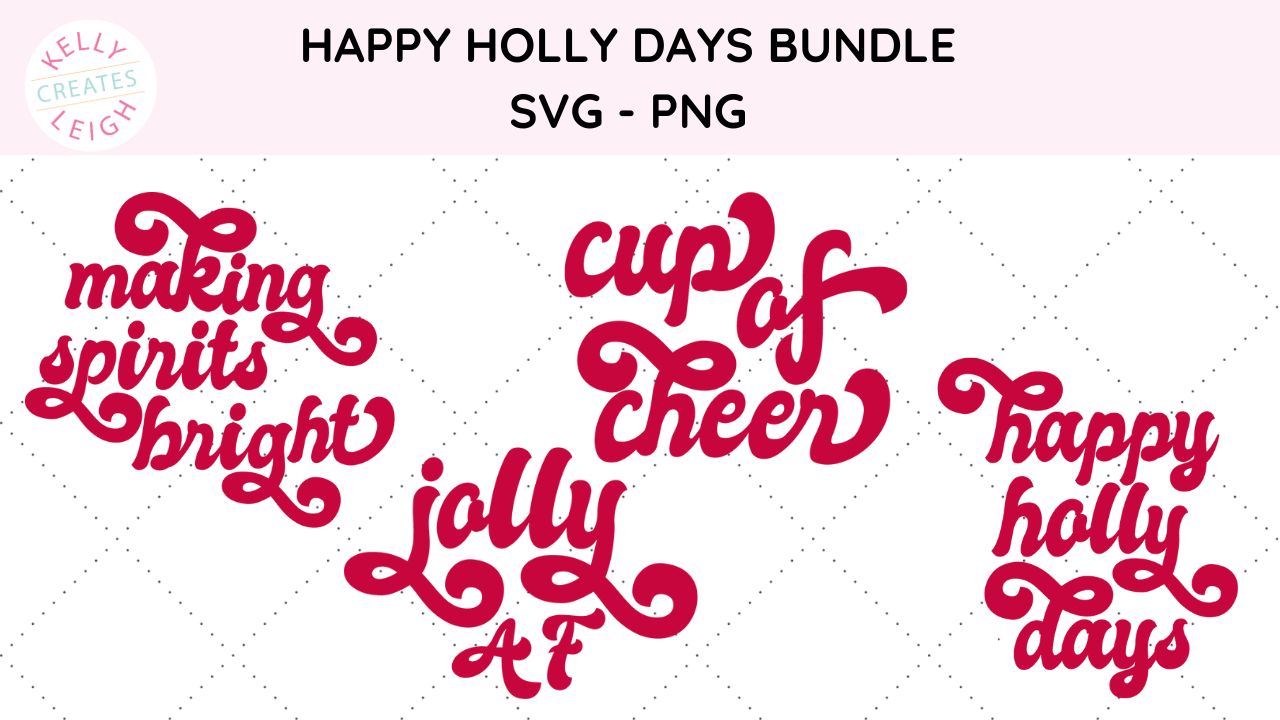
- Grab the Happy Holly Days SVG file in my shop.
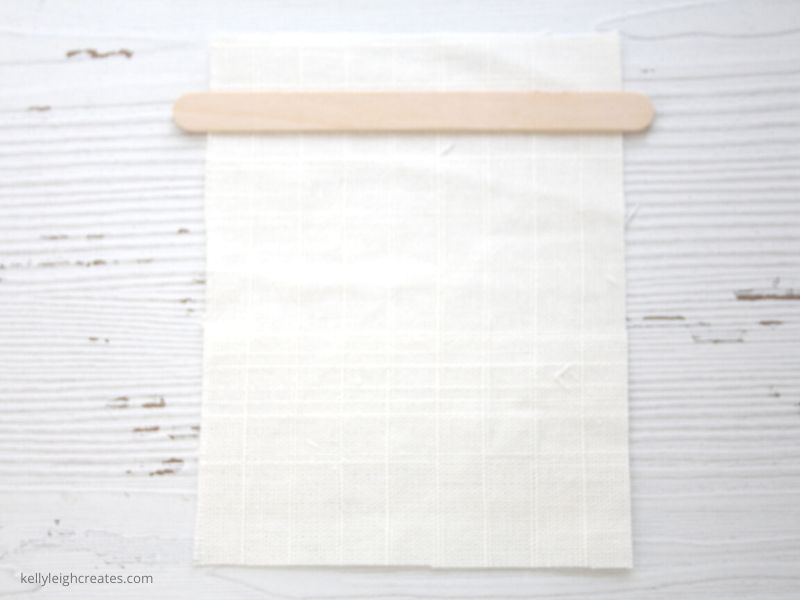
- Cut your fabric to your desired size. Remember to leave a little extra at the top because it will be folded over the dowel/popsicle stick.

- Place your popsicle stick or dowel at the top and fold the fabric over. Secure the fabric with hot glue.
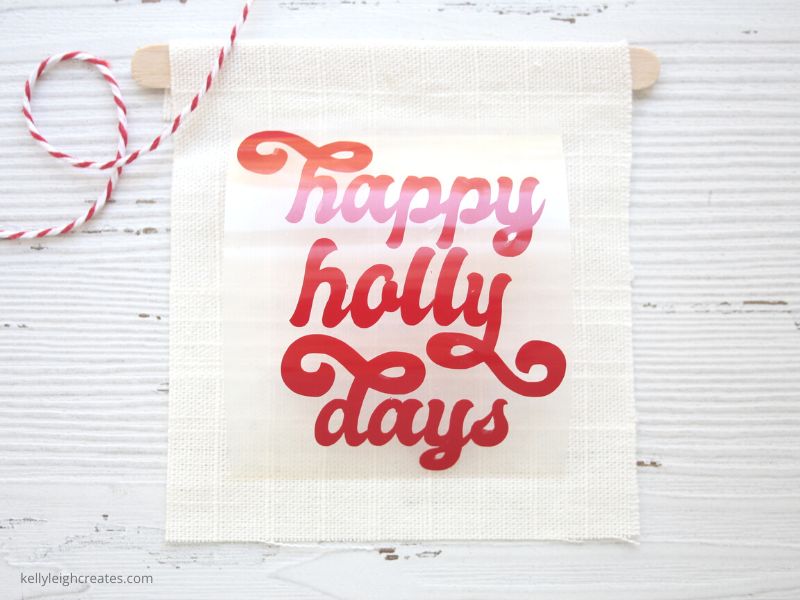
- Cut out the SVG file onto heat transfer vinyl (HTV) using a Silhouette or Cricut. I like to use Siser Easyweed HTV because it is easy to work with and holds up well. Here is a detailed tutorial on how to cut heat transfer vinyl with a Silhouette. If you want to use multiple colors of vinyl, this tutorial will show you how to cut out multiple colors of vinyl.
- Weed away the excess vinyl.
- Place an EasyPress Mat under the banner. Use the EasyPress 2 to adhere the vinyl to the banner at 325 degrees for 15 seconds. I recommend an EasyPress 2 instead of an iron because you can set the exact temperature and the plate provides more even heat. Here is a detailed tutorial on how to use a Cricut EasyPress 2.
- Wait until the carrier sheet has cooled and then remove the carrier sheet
- Tie the baker’s twine around each end of the popsicle stick and embellish with a pom pom banner (optional)
My Happy Holly Days SVG Bundle comes with 4 different holiday sayings so you can make several versions of mini Christmas banner ornaments. Mix and match to make a set!


SVG FILE FAQs
How do I open these files in my Silhouette software?
Save the file to your computer. If it is a zip file, unzip it. Open your Silhouette software and select FILE>OPEN and navigate to where you saved the file. You can also import the file(s) to your Silhouette library by clicking FILE>LIBRARY>IMPORT TO LIBRARY and navigating to where you saved the file.
Can I open SVG files in the Silhouette Basic Edition?
No. You must have Silhouette Designer Edition or higher to open SVG files. If you have Silhouette Basic Edition, you can use PNG files and convert the PNG to a cut file.
Can this file be used with a Cricut?
Yes. Any SVG file can be used in Cricut Design Space
MORE SILHOUETTE AND CRICUT CHRISTMAS PROJECTS
- Easy Silhouette and Cricut Christmas Projects
- DIY Christmas Banner
- Christmas Countdown
- DIY Christmas Gift Box
- Wooden Round Christmas Sign
- How to Make a Santa Sack
- DIY Personalized Socks with Funny Sayings
- DIY Matching Family Christmas Pajamas
- Snow Globe Shaker Card
- DIY Makeup Bag Teen Gift Idea
- Christmas Gift Tags with Silhouette Sketch Pens
- DIY Christmas Wrapping Paper
- Buffalo Check Christmas Ornaments
- Christmas Tea Towels
- DIY Holiday Serving Tray
- Jingle All the Way Shadow Box